Hiii everyone.It’s Marcos again!
I’m so happy to share in this community and I’m excited to see your comment here lol.It’s just fun I feel that we bond together!
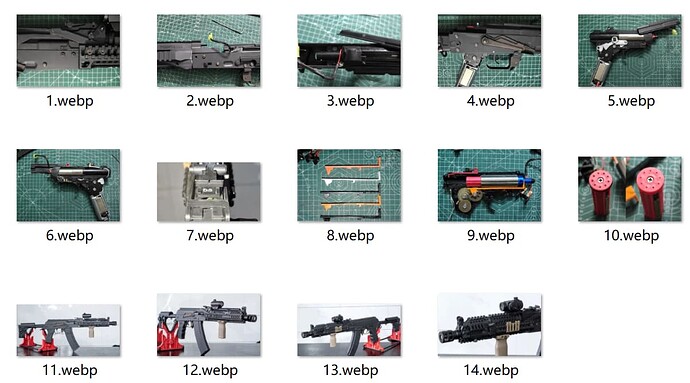
It only allow new users to attach one picture so I had to make a screenshot…If you find the content helpful,here is the original blog:DS105 Unboxing,Review and Disassembly – TriggerToy
This time I wanna share a little bit about DS105.It’s in my collection and actually it’s a second one cause I was poor back days when I was first in love with gel blaster stuffs lol.Not sure if you already had this one but in my impression, DS is a particularly diligent manufacturer with a wide range of products, basically covering the entire AK series. Not only are there many products, but there are also many IDs, including STS, DS, AK, etc., according to incomplete statistics.
With a wide range of products, broad sales, and deep market penetration, I wonder if DS is now the leading player in the AK track. This time, I got a second-hand DS105 with a Zening special shape, let’s take it apart and see.
Step 1
Loosen the four round head screws of the barrel sleeve to remove the entire front section.
The sleeve is metallic, the outer tube is inserted into the sleeve and fixed with a pin, similar to the AKA structure, but the sleeve is connected to the receiver with round head screws, I think it would be better to rivet the sleeve to the receiver like AKA, at least it would be more authentic.
The hole position of the sleeve is higher than Jinming’s and 2mm forward, you can’t use Jinming’s sleeve.
It’s not compatible with Jinming (obviously)
Step 2
Remove the three-way fixed seat screw at the magazine well of the receiver, and remove the three-way and three-way fixed seat screw.
The three-way and three-way fixed seat is metallic, the fixed seat does not hold up the gearbox, easy to disassemble. There’s a spring between the three-way and the front section, but the three-way is thread fixed, I don’t know what the purpose of this spring is.
The magazine contact is not insulated, so the factory put a heat shrink tube on the head of the gearbox, remember to wrap it with tape at the same position for insulation when reinstalling.
Step 3
Remove the grip, speed mechanism, machine piece return spring, and pull out the entire gearbox.
Because the hole in the barrel sleeve is not deep enough, when reinstalling the machine piece spring, don’t install the sleeve and receiver in place first, install the return spring first, then tighten the sleeve.
I don’t know when this one-word round head screw can disappear
Step 4
After removing the recoil piece, you can remove the gearbox.
In terms of the process of disassembling the gearbox, it’s the simplest and quickest I’ve played with in AK.
The handguard could feasibly accommodate a battery or something like a 14500 cell
Step 5
Finally, we need to rescue the original factory’s initial velocity of only 50-55.
The first step is to replace the original factory’s super long nozzle, the cylinder head I have on hand was tested for a round, just right hole position adapted Jingji, and the bridge timing is the same as Jingji/Jinming 2nd wave style, just right to use. Compare the original factory nozzle with Jingji nozzle, the locking point is 7mm forward, including the different sealing methods, redesign the three-way and three-way seat, the locking point is moved back 9mm.
For changing different system cylinder head nozzles, I generally first see if the nozzle can be directly installed, if it can’t be directly installed, I see if the cylinder head positioning hole is adaptable, as long as it can be stuffed in. Note that the cylinder head needs to just hold up the gearbox shell, if it’s not enough, you need to pad. The gearbox positioning hole is not a stress point, direct spring impact will mostly explode.
Then install the bridge nozzle, simulate the movement, observe whether the nozzle has any bad phenomena such as jamming or head lifting, if there is a bad indication that the bridge is not adapted, you need to change the same timing bridge. Finally, install the three-way rotation gear, observe the unlocking and locking position, whether it can ensure the unlocking distance and reliable locking.
From top to bottom are JQ/JM 3rd/WD PDX/JJ JM 2nd/DS original
JJ cylinder head nozzle + JJ/JM 2nd bridge
The sealing of the cylinder head nozzle is probably divided into three schools, one is no oil no sealing, two is grease sealing, three is O-ring silicone oil sealing. This DS105 belongs to grease sealing, the nozzle has no O-ring, there is a lot of high viscosity grease between the cylinder head guide column and the nozzle, the actual test effect is okay.
I belong to the O-ring party, I think the gas may blow the grease away, causing unstable sealing, its durability is questionable. Changing the nozzle system is not a serious matter, as long as the cylinder head can be stuffed in, basically it can be changed, opening and closing lock through changing three-way matching, only need some simple modeling.
The original factory zinc alloy wave, the gearbox shell axle hole is too large and not round, all 6 bearings are running, it feels like there is more than 5mm gap, I don’t think this is a usable gearbox. It feels like the 3rd gearbox is modified for performance, it’s just JM/RX/CYMA.
The head hole is small, the oil is also thick, can’t be cleaned, simply enlarge the hole.
The zinc alloy motor frame will shake when installed, tighten it with great force. Although there is a grip to hold it, but it’s still better to tighten it, CYMA is also like this, need to exert great effort.
Enlarge the head hole
The original factory motor is powerful enough, M70 spring, running 73@18Hz. Changed to a metal pull handle, metal hitting metal is very ear-piercing, using 7.4v to slow down is appropriate.
See the three-way below, note that the locking point is moved back 9mm, the inner tube also needs to be replaced, otherwise there is not enough length to install the spin.
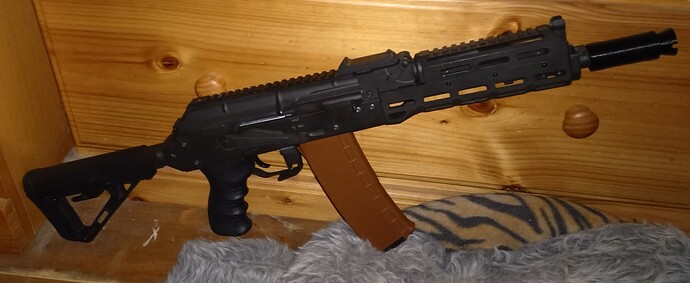
And some nice picture I took for my old DS105.Feel free to talk in the comment.I should learn from you guys!!


