BF P90 V4 Gel Blaster Review and Dsassembly
Hi everyone.It’s Marcos here.I’m happy to be a member here!I wanna share my experience in BF P90 V4 Gel Blaster.It’s all about my personal though so you can feel free to share your ideas!(It’s sad that it only allow me to upload 1 photo…)

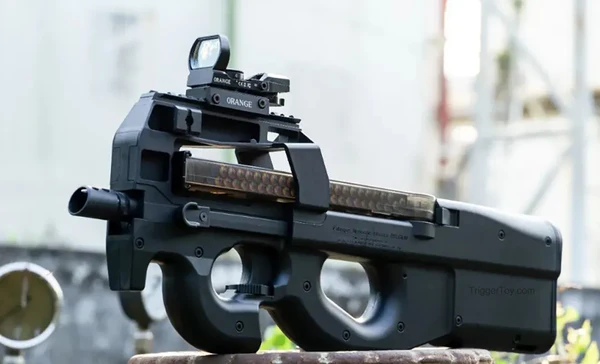
After a bit of a break, BF dropped the fourth generation P90, the BF P90 V4, and I couldn’t wait to dive back into the action with this new toy. In this blog, we’re zooming in on the BF P90 V4 gel blaster review, dissecting its features, improvements over the BF P90 V3, and taking a close look at its disassembly process. I’ll walk you through the stark contrasts between the BF P90 V4 and its predecessor, dive into the disassembly process, and showcase the main components in detail.
1.COMPARING BF P90 V4 TO BF P90 V3 GEL BLASTER
Right off the bat, the BF P90 V4 addresses all those pesky issues with cracks and rough edges that plagued the BF P90 V3. The craftsmanship and materials have seriously leveled up, hitting a mainstream quality that’s hard to beat. Details like the engraving, magazine, and mag release are finer, effectively eliminating jamming issues. Additions like the linked charging handle, simplified fire control, reverse-threaded muzzle, quick-detach butt plate, updated side rails, and redesigned battery compartment at the tail have all been revamped or added, fixing the gripes from the third generation without hiking the price. Talk about staying true to their roots.
2.DISASSEMBLING THE BF P90 V4 GEL BLASTER
The disassembly process shares a lot of similarities with the BF P90 V3:
-
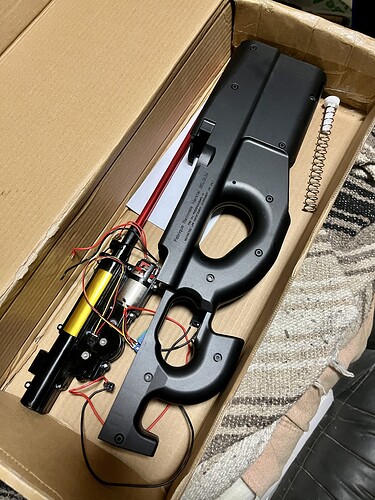
First up, pressing the front disassembly button and pushing forward removes the front part. Here, you’ll notice the integrated charging handle and a minor addition to stabilize the inner barrel, which still poses a bit of a headache due to restrictions that prevent wrapping it with tape for stability.
-
Next, unscrew the ten self-tapping screws, paying special attention to the two shorter ones marked in yellow.
-
Then, gently pry apart the two halves of the casing, being extra careful around the mag release to avoid any damage.
-
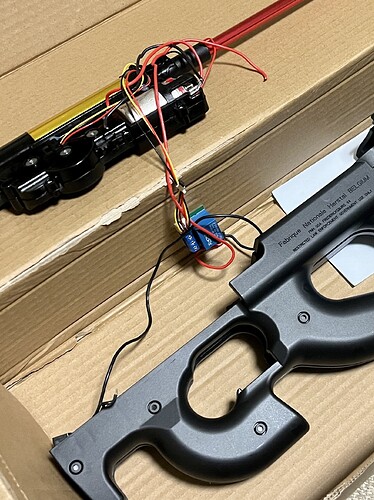
Finally, opening up the casing reveals a gearbox very similar to the third generation, maintaining the same size but with slight differences in bearing sizes and sensor holes, distinct from the 95/97 models. The hefty micro switch mount on top remains, paying homage to its robust lineage.
3.DETAILS OF THE MAIN COMPONENTS
-
The gearbox’s color shifted from white to black, with the material feeling pretty similar but a tad softer. The bearing holes have been upgraded to 8mm, accommodating any bearing with ease. Hall sensors and magnets in the gearbox follow the same setup as the newer 95/97 models, ensuring stability across firing modes.
-
In terms of accessories, traditional elements like the red-tailed 460 motor, J8 bridge piece, small aperture poppet head, aluminum cylinder, and 180° anti-reverse gears are all there, making for an impressive out-of-the-box experience at 65-70@18Hz. Despite this, it’s better suited for minor modifications to maintain stable performance around 25 shots per second.
-
On AOE (Angle Of Engagement): Due to a shallower cylinder head depth compared to JinMing or third-party products, improvements with a JinMing cylinder head are minimal.
-
The nozzle has been raised compared to JinMing’s by 1.2mm, causing issues with proper lock-up and potentially affecting initial velocity. Using a JinMing O-ring nozzle with RenXiang rubber brings it to the same height as the original, solving any leakage issues.
-
original nozzle(above)BF P90 V4 Gel Blaster Review
-
JingMing nozzle(above)BF P90 V4 Gel Blaster Review
-
Moving from left to right, we have JinMing’s third-party cylinder head/BingFeng’s stock cylinder head/JinMing’s stock cylinder head, BingFeng’s stock nozzle/JinMing O-ring + RenXiang rubber/JinMing stock/JinMing O-ring/JingJi.The factory setup includes a basic gear tuning, where the bevel gear and the sector gear might rub against each other. Placing a 0.2mm spacer under the sector gear’s contact surface eliminates this friction. The meshing of the bevel gear is pretty solid, so it’s kept in its stock condition. The total space for gear tuning is about 0.5mm, which is easier to adjust compared to the 95/97 models. Just a heads-up when swapping gears: thin-backed bevel gears are preferred, though thick-backed metal gears are now rare.For the slow nylon gears, I usually don’t adjust them. Simply using spacers to reduce friction between the gears and between the gears and the bushings, maintaining about a 0.2mm gap, does the trick. As long as the stock gear doesn’t have any major issues and is properly lubricated, it will have a long lifespan.
-
Gear tuning remains relatively straightforward with the factory setup. Reducing friction between gears and bearings with spacers while maintaining about 0.2mm of gap ensures a long lifespan. After swapping the nozzle and applying some basic lubrication, the BF P90 V4 really shows its strength, with the stock spring hitting 80-85 without fail.
All in all, with a custom magazine added to the mix, the BF P90 V4 gel blaster review shows both its looks and performance have been significantly boosted. Whether you’re new to the scene or a seasoned player, the BF P90 V4 has something for everyone.
I recently found a new spot with particularly beautiful scenery.BF P90 V3 gel blaster seems to be a product from 2018, and the BF P90 V4 gel blaster from 2023. It took five years to sharpen this sword, a period of quietly accumulating strength. The upgrades in the fourth generation are indeed praiseworthy.I will share some basic and entry topic some time later.

