You’re too kind DocBob, I’ll see what I can do. Very interesting that you pointed out that it’s the same place that the springs fail, kind of like how people will radius their gearboxes.
Ah ok got it. And that screw goes straight into the metal rod thing (edit: spring guide) holding the main spring in the gearbox, is that correct?
Yes. If you have any questions ask away, we are all here to help ![]()
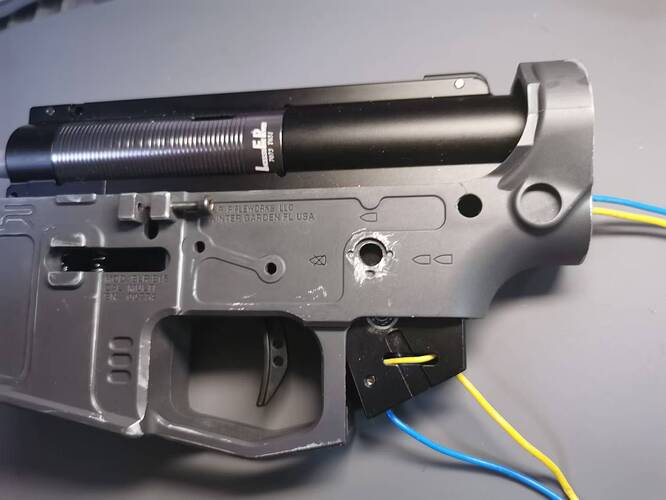
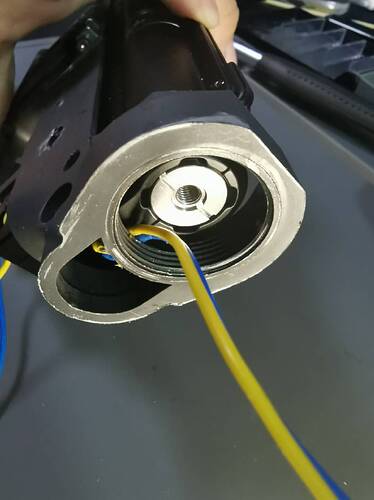
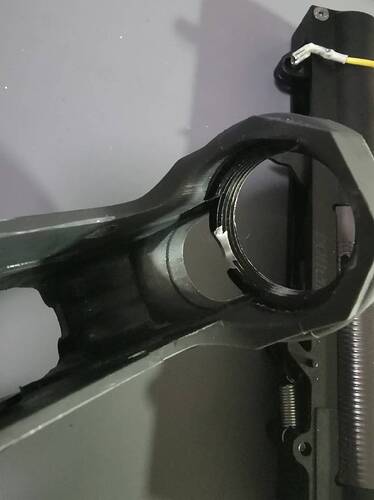
Ok so… if I put the battery cables through the bottom hole here, everything fits nicely no problem, but then I would have to… drill a hole in my buffer tube and put my cable through there?
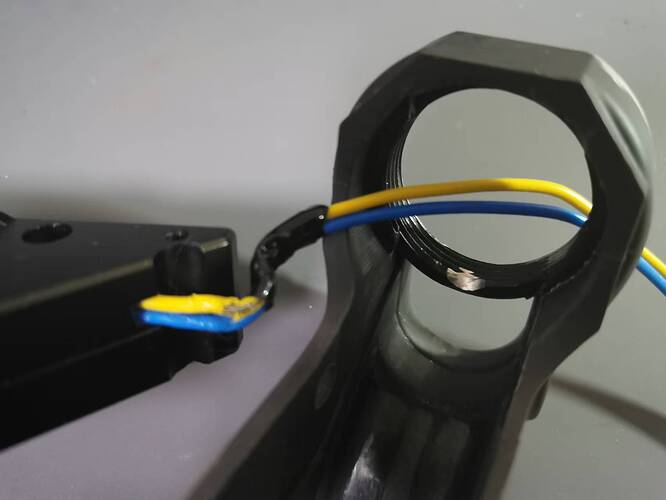
So I managed to grind out a bit of this back piece to let the cable through. As you might be able to tell, the cable has already been kinda compromised because this is how it was before. I put some electrical tape and seems to be ok for now.
Well I guess it fits but not very well…
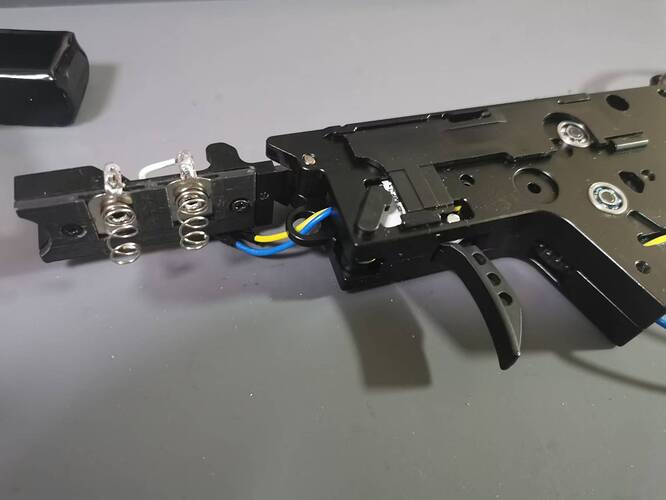
Just realized… I was trying to be clever and looped the cables through this hole… but now it looks like the mag release goes through here… am I cooked? Am I gonna have to re-solder the cables?
And I lost my mag release pin for some fucking reason… oh well…
Yes you are going to have to resolder those mag terminals.
Didn’t realise you had a metal SLR receiver, with the screw in buffer tube. Normally you would not need to run the buffer tube bolt and washer through to hold the buffer tube on, however with a split gearbox it might be worth doing? If the spring retainer doesn’t flop around - looks like a 4 lug and they usually don’t; I would not worry with the buffer tube bolt and washer. Just screw the buffer tube in and tighter with the castle nut.
The catch is, as I said earlier these split boxes use the rear receiver pin, and the buffer tube bolt to tighten the upper section in place. This is going to depend on tolerances of the gearbox and rear pin as to if you don’t need the buffer tube bolt to help hold it on.
If you put the receiver pins in and the upper has very little movement, I would try it without the buffer tube bolt. However if it does jiggle a bit, use the bolt. Over time that little bit of movement will increase with wear. I have seen a few of these split style casings develop an unacceptable amount of movement in the upper section, resulting in the sector gear not picking up the piston. You don’t want that. Worth considering.
Without the buffer tube bolt and washer, it will be far easier to assemble and disassemble. And will also have more space for battery and wires in the buffer tube.
I have not seen that exact gearbox, I do like the design where mag terminal block is captive part of the lower section. The LDX style we have seen just pop off the upper and free floats, it works but can result in a poor mag terminal soldering coming away. This design looks better than that.
HOLY SHIT GUYS IT WORKED AND IT’S FUCKING STRONG HOLY SHIIIITTTT
THANKS TO EVERYONE THAT HELPED ME!!! DOCBOB ROKSOLID FRIENDLY_FIRE WAYNE TOO OH MY GOD
I didn’t think it would work but it did holy shit. So in the end I had to resolder the mag contacts, I found my mag release pin, and the inner barrel spring was just pressing too hard on the T piece and after cutting it down 3 times I just had to remove it or I couldn’t get the receiver pin in. I also ground out the back and the wires go through seamlessly now.
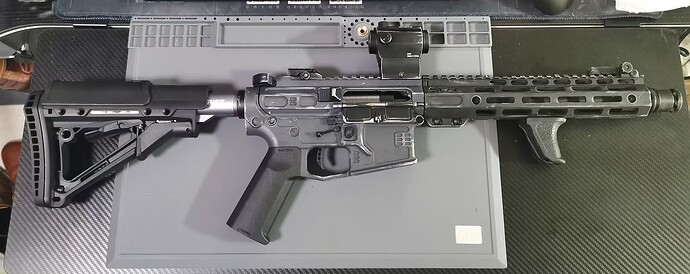
Got tired of all the brand spanking new blasters and decided to do some BaTtLe WoRn styling.
Thanks again to all you guys!
Yes I had to resolder the mag terminals (thanks for correct terminology) and found out I fried the tip of my soldering iron and had to switch it out.
No the SLR receiver and handguard is all nylon, but looks like that screw on part is metal or some kind of shiny nylon? I’m not sure… but when I ground it out it looked metal. Took a while too.
Yeah the tolerance on this gearbox is very tight, apparently some kind of new gearbox by an up and coming brand called IFP. Came highly recommended by the designated tech of another team. I’m definitely screwing in the buffer tube bolt once my long screwdriver arrives since I just can’t reach it right now, and am only relying on the castle nut. I hear what you’re saying, and would hate for the upper gearbox to jiggle around and get worn out. This IFP gearbox definitely has a lot of creative designs to it, the tech even saying it’s not that LDX or ROCK is bad, it’s just that they haven’t been innovating and these new lean and hungry companies have caught up to them, with good quality, new designs and great bang for your buck.
For now, after the ecstatic rush of OH MY GOD IT SPINS, I think I fried one of my batteries. I put it in and I could smell something burn and immediately disconnected the battery. Tried connecting another battery and it seemed to run fine, but that battery now won’t charge correctly, only two green lights instead of three, not sure what happened there.
Another issue is on single shot I’m getting two gels consistently instead of one, is that the sector delay chip problem? On full auto it seems fine but I haven’t chrono measured it yet. Also I had to remove the inner barrel spring completely, as it just would not close otherwise. Is that going to be a problem?
Oh and another thing, I put the little AOE rubber/silicon disc inside the cylinder up against the head but didn’t glue it down. Now I’m seeing people glue this in. Is that going to be a problem?
Thanks again for all the help guys! I couldn’t believe it last night when it fired.
Yes, you will have to glue down the AOE pad, otherwise it can move around and cause issues interfering with the piston.
Battery wise, you have to be extremely careful with all the wiring and electronic components when running full metal gearboxes or receivers.
As I could see in your pics, you’ve already had trouble with damaged insulation on the wiring, and you must make sure to repair or replace any of this type of damage, along with taking care to ensure that everything is secured down and protected from short circuits.
Double feeding could most likely be the sector delay leaving the nozzle open too long and allowing time for the Gels to double feed into the t-piece.
Best thing would be to remove the delay chip and test again!
If it’s still an issue, then other areas can be looked at to solve the problem.
Good luck and have fun! ![]()
![]()
I see, alright thanks. Seems like more soldering is on the horizon for me. Good thing I bought a decent soldering iron haha.
Thanks again for all the help!
Little niggley issues aside (which I’m sure you’ll sort out), very nice job on the build. ![]()
Nothing like taking the plunge, building something a little different to the off-the-shelf blasters and getting a good result.
That one being your first custom, should be something you always keep. ![]()
Nice work man! Always good to see a project make it through the turmoil and work!
If the tpiece is presser hard against the gearbox may not have to worry about the spring. I have had to cut the front tube of tpieces down to get them to fit on a few builds in the past. Long as there is enough to still glue a barrel in its no problem.
you can also use an o-ring to give the tpiece a bit of pressure.
As DocBob says, definitely glue the aoe pad.
Very close to completion though!
Thanks man, couldn’t have done it without your help!
For sure will keep this one forever. Several people told me to give up on the SLR but I guess I was stubborn.
Yeah the tpiece is all up in the gearbox nozzle, even without the spring there’s a bit of a gap between the upper and lower receiver. I cut bits off the spring but still would not close so I just removed it entirely.
The inner barrel isn’t glued down, but it had some glue or silicon left on it from the previous tpiece and I just hammered it in with my soft mallet. It’s tight as can be so I don’t think I need to remove it and glue it.
What kind of glue do you use for the AOE pad?
And what kind of cables for the mosfet? Been looking around taobao and cant find any.
You can use super glue, if you can find a shock proof version of it even better but super glue will work. Just be sure to clean and rough up the joining surfaces, and allow to cure before reassembly.
A “soft” type glue like Gorilla Grip, Silicone or Sikaflex works well, whereas “harder” setting glues such as Cyanoacrylate or Araldite aren’t any good for withstanding the constant impact loads.
I have mainly used Gorilla Glue Gel, and Tarzan’s grip shock proof.
I also recommend where possible, removing the stock cylinder head pad, and gluing your “aoe” pad to the head first, then glue the stock pad so it still contacts the piston.
Because the pad you use, may or may not stand up to direct impacts as well as the stock pad. I use a rubber pad that over time degrades if directly wearing impacts, but between the head and stock pad does not degrade.
I use rubber as it does not compress, but still offers some impact absorbing, which imo is the only reason I am using it, the “aoe correction” is a by product that is not needed but can benefit the operation of a high rps blaster.
Aoe correction is fine, if done properly. If you need to start removing half a tooth or a second tooth in front of the one that is normally removed, that is going to add focused stress to the piston rack. Too much correction is far worse than none.
I’m curious, at what ROF does AOE correction become beneficial? ![]()
I’m only asking because it’s something I’ve never bothered with… but then again, I’ve never built a high ROF brrrrt blaster either. I tend to aim for realistic ROF more inline with the real steel, and have been known to slow some down.
@BME that M4 you showed me recently, the one you got from HiroshimaScreamer, have you cracked that open to see what’s inside yet? I’m guessing DSG. ![]()
Man… that thing chooches. ![]()
I haven’t pulled it apart…
Who knows what goodness will be found inside…!!
Hiroshima Screamer built some wild stuff.
I tend to prefer about 25rps in my builds, but don’t complain and build them to be able to take about 30rps. After that nobody on a field wants to play and it is a bit of a lack of respect for other players to be lighting them up at this speed.
I would say below 30rps, there is benefits, but it is so marginal that most blasters will likely benefit from the extra volume more.
Above that I have always done it, but I only look for close to even flat tooth engagement, or slightly less. Saying it must be at 11 o’clock or 12 o’clock etc is just wrong. It might be, but it is more the first tooth meshing with the pickup tooth, than being at a certain degree.
Tbh, unless you are doing a DSG, it is something you could do or not. Cast boxes I do but it is more to resist impacts forces than for the aoe.
EDIT
I guess what I really mean is if you are going to do it, do it well. If you aren’t going to do it well and over correct it. That is far more detrimental than not doing it. If you need to remove more than the tooth that is normally missing from a 14 tooth piston, it is wrong and more likely to break teeth on piston racks.
Just for info, it does around 34 rds/ sec, at just under 300 fps…
I got it to use on my nephew…!!
If squiddy comes up, I’ll fill it with lead sinkers, and give him a touch up…!!!
![]()
![]()
