R.E. Wesker...(Or.. Bad boys,Bad boys.. watcha gonna Glue..?)

…Watch gonna glue, to make the suppressor work for you…!!

The challenge: Turn a DB beretta, into a (rare) Albert Wesker RE Clone…

As you can see, the hard part is going to be replicating the Nozzle /lower rail attachment, which slides on the front.

This securley mounts the suppressor, and the torch.
If i could buy one, i would, but they are a rare part, and i havent seen one for sale. It keeps everything “one piece, flowing and solid”.

Its going to be a bit tricky to securely mount the suppressor…

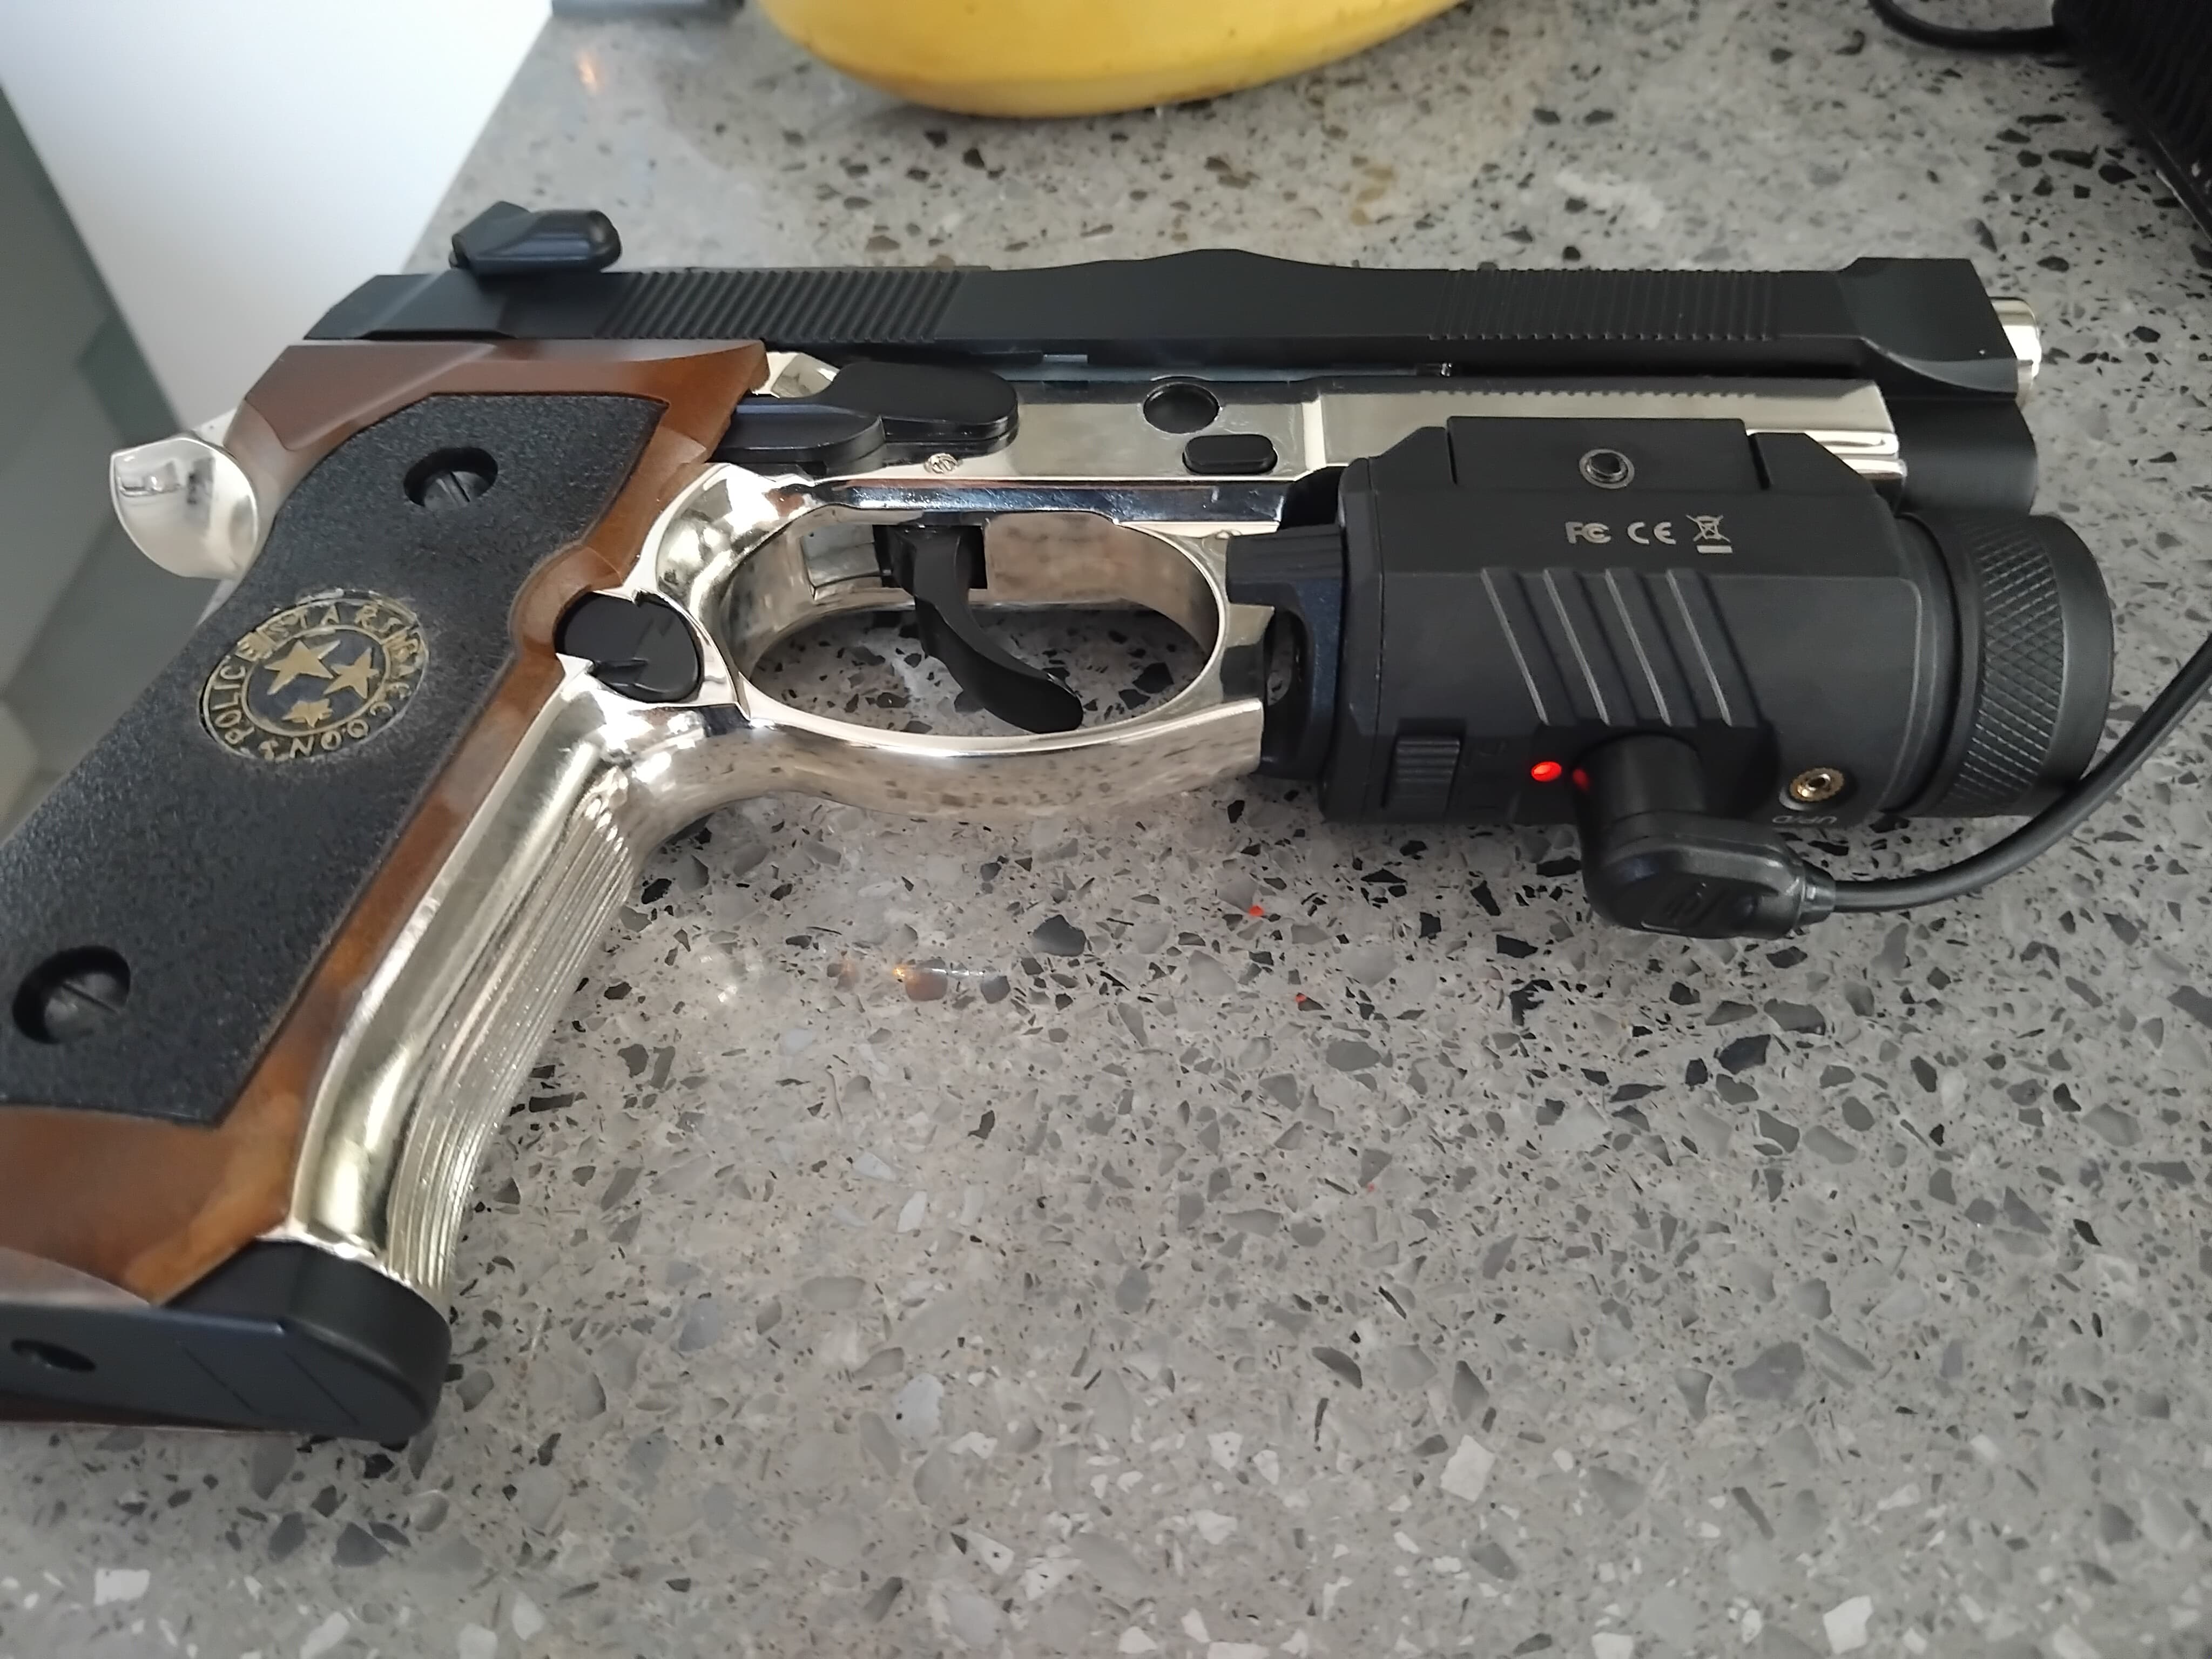
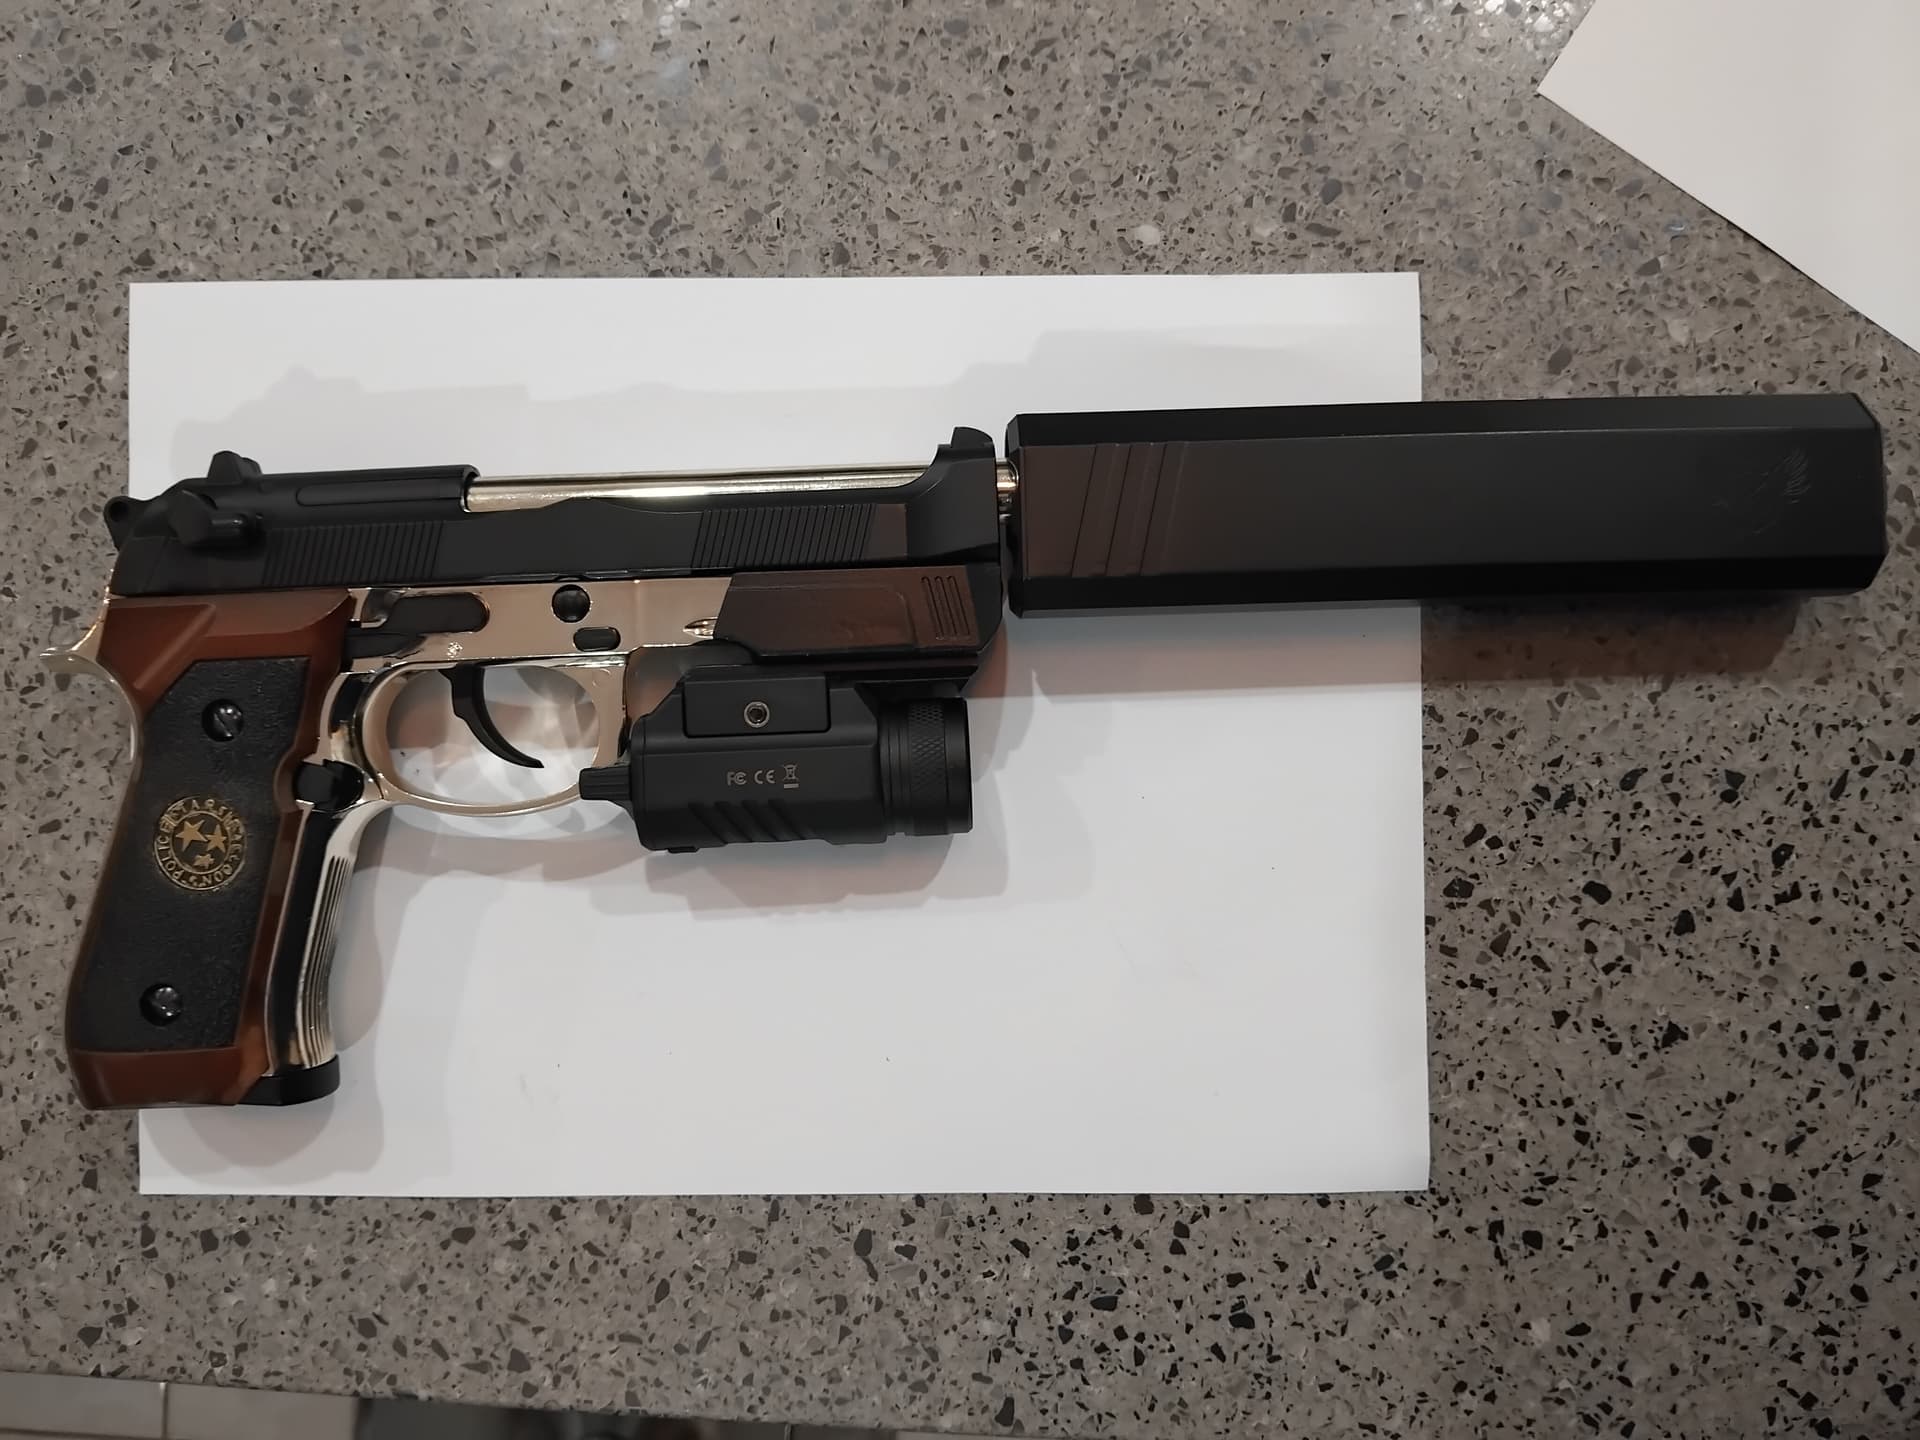
First off, the pistol.

You have seen this before, DB mix and match, slide and barrel change and RE standard grips. ( i have more of these coming) . My new torch arrived today, its aesthetically really good, correct length, and fits to the pistol perfectly…

1 Like

looks pretty schmick :call_me_hand:t2:

edit: removed noob comment because you weren’t finished

In an attempt to chunk up , the interface between pistol and suppressor, i have tried using one of the 3d printed hopups…

It fits onto the beretta end, but does not securely attach yet.
I would cut the front 1/3 off, and either attach the suppressor onto that somehow, or have it fit INTO the suppressor, and secure it permanently.

2 Likes

Solid suppressor retention is the name of the game.

I’m thinking this… 2 options…Attach via long lower rail ( 1 end into pistol, 1 end into Supp)…OR…run a hitman recoil guide forward.

The recoil guide is longer, runs forward, and into the suppressor.

The suppressor is hollow, and 2 parts glued together.
I could sit it in boiling water, pull it apart, and then i would need to fill the void with some adhesive material, able to be drilled into, for support for the screw / retention for the rod.

Any suggestion, for the material…??
It would have to stick to the internal Supp walls…

1 Like

Into the suppressor sounds like a plan, matey. :+1:

I’m not sure if boiling water is going to help you get that end cap off though I may have used epoxy on that.

If you look down the suppressor you’ll see a tube running down the guts of it too… held in there by the end plates.

What would i use, for filling / adhesion…something that adheres internally, and i can drill into.??

I’d use JB Weld or any two part epoxy putty.

You can buy it where the sausages sizzle in the adhesive section. :wink:

Stinks terribley, I’d wear gloves… but I repaired a motorcyle footpeg with that stuff and it held together for years.

1 Like

Also… i see xforce has the suppressors pretty cheap…and they come dissasembled. Grabbing another, might make life easier…easier to cut one end to shape, if its already off…

1 Like

Silly me.
I just realised…

The DB have internal thread on the barrel…
And,
The osprey suppresors are threaded on as well…

Could this be a simple fix.?.?
Surely, it’s not that easy…

Anyway, the torch is pretty dang good.
Its a 2 in 1, flashlight plus green laser light.

You can have either one or both on at once, steady or strobe.

On blaster charging, a charging port on the underside.
Switching on / off , is a rotate L/R backing onto the trigger guard.

Pretty cool…!!

1 Like

Was going to suggest the JB Weld also…as it was a very handy product that seen many different uses back in my days of bastardising these things :stuck_out_tongue_winking_eye:

Can be drilled, tapped, filed, painted over etc and a very solid filler to reinforce/hold things in place.

Only issue is that it won’t stick to nylon/plastics very well unless glued into place :+1:

The osprey suppressors come dissasembled, and you can assemble how you want, by the looks of the xforce pic.

It appears to give you the choice of threaded on , or grubscrew attachment.
As such, it appears to have a bit of length of thread.

Hopefully enough , to thread on the end of the barrel, and deep enough into the Supp.

2morrow shall tell… :smiley: :smiley:

Yeah, but you’ll need an adaptor to fit the internal thread of the DB barrel to 14mm CCW… I haven’t found one that fits yet, the ones at X-Force sure don’t. :man_shrugging:

I know that Osprey you’ve got is a grub screw attach, but a 14mm thread is a pretty good fit into it. If you can find an adaptor that fits your barrel you could always grub screw it onto the thread. It would be hidden.

What’s the different sizes for the adaptor…12-14mm CCW?

If so, I’m sure I’ve got a couple in a box here somewhere :thinking:

I’ve got the orange tip, that plugs into the DB barrel…who knows what size it is…medinchina…

Gonna hit the Northside stores 2morrow, to see what can be done…

Ps torch is bright…1250 lumens, and I’d believe it.
Lights up houses a couple of hundred metres away.

Same for the laser, too…

I’ll leave the link here, in case anyone else wants one…

1 Like

Mate… you gotta go back to work seriously :laughing: :rofl: :+1:

Otherwise my wood is going to fall off!

Nice work man and top pics. I’ll read more later when I get time :wink:

Neighbourhood Watch gonna have the TRG kicking your door down at 3:00 a.m. :stuck_out_tongue_winking_eye:

The torch does the job.

Better call it…

" The FAR-Soul" …!!

:rofl: :rofl: :rofl:

I did a SOUL FART this morning, it went quite away, can highly recommend :rofl: :+1:

And, the Wesker is complete ( for now).
Reminder shot, of the original…

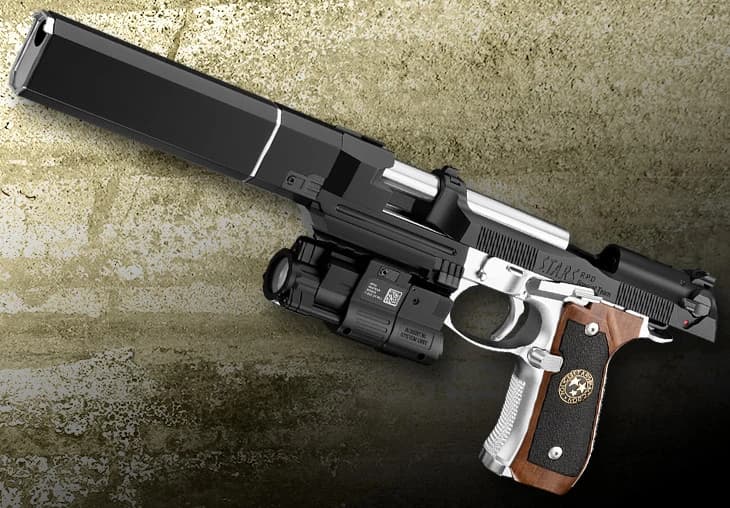
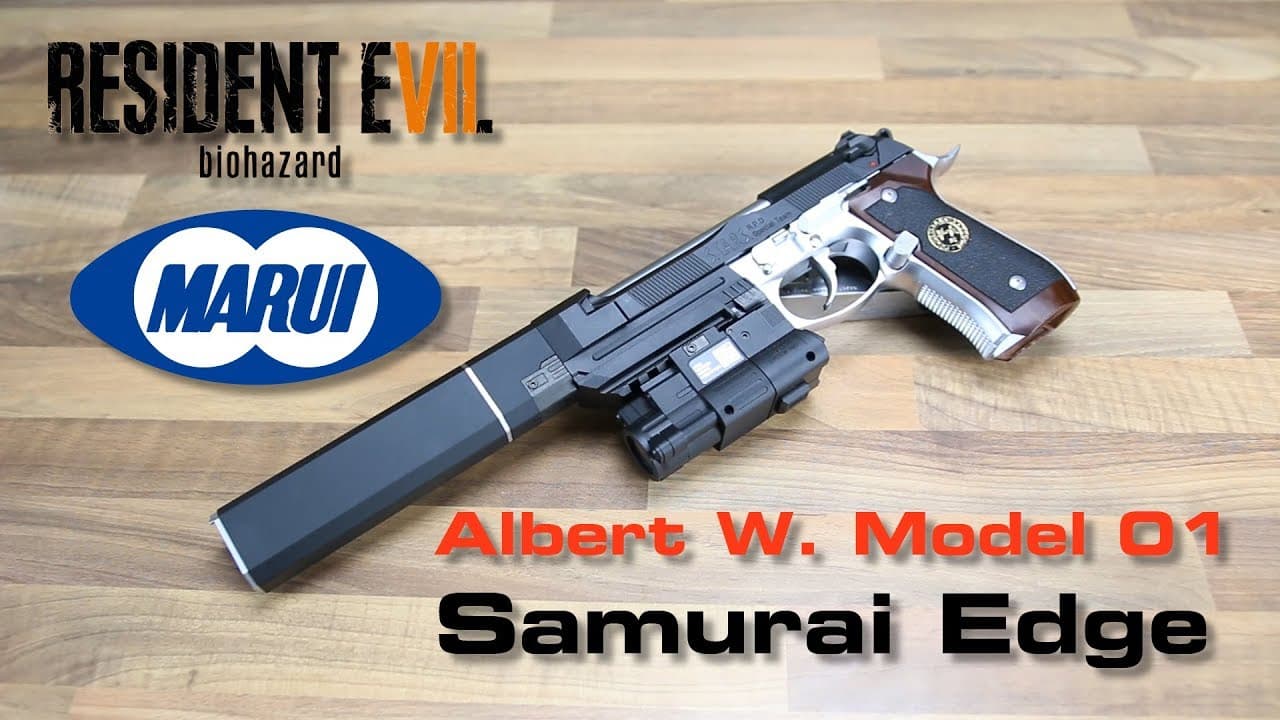
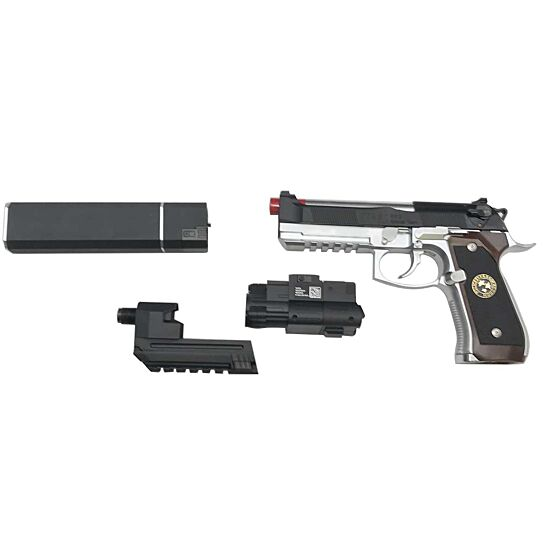
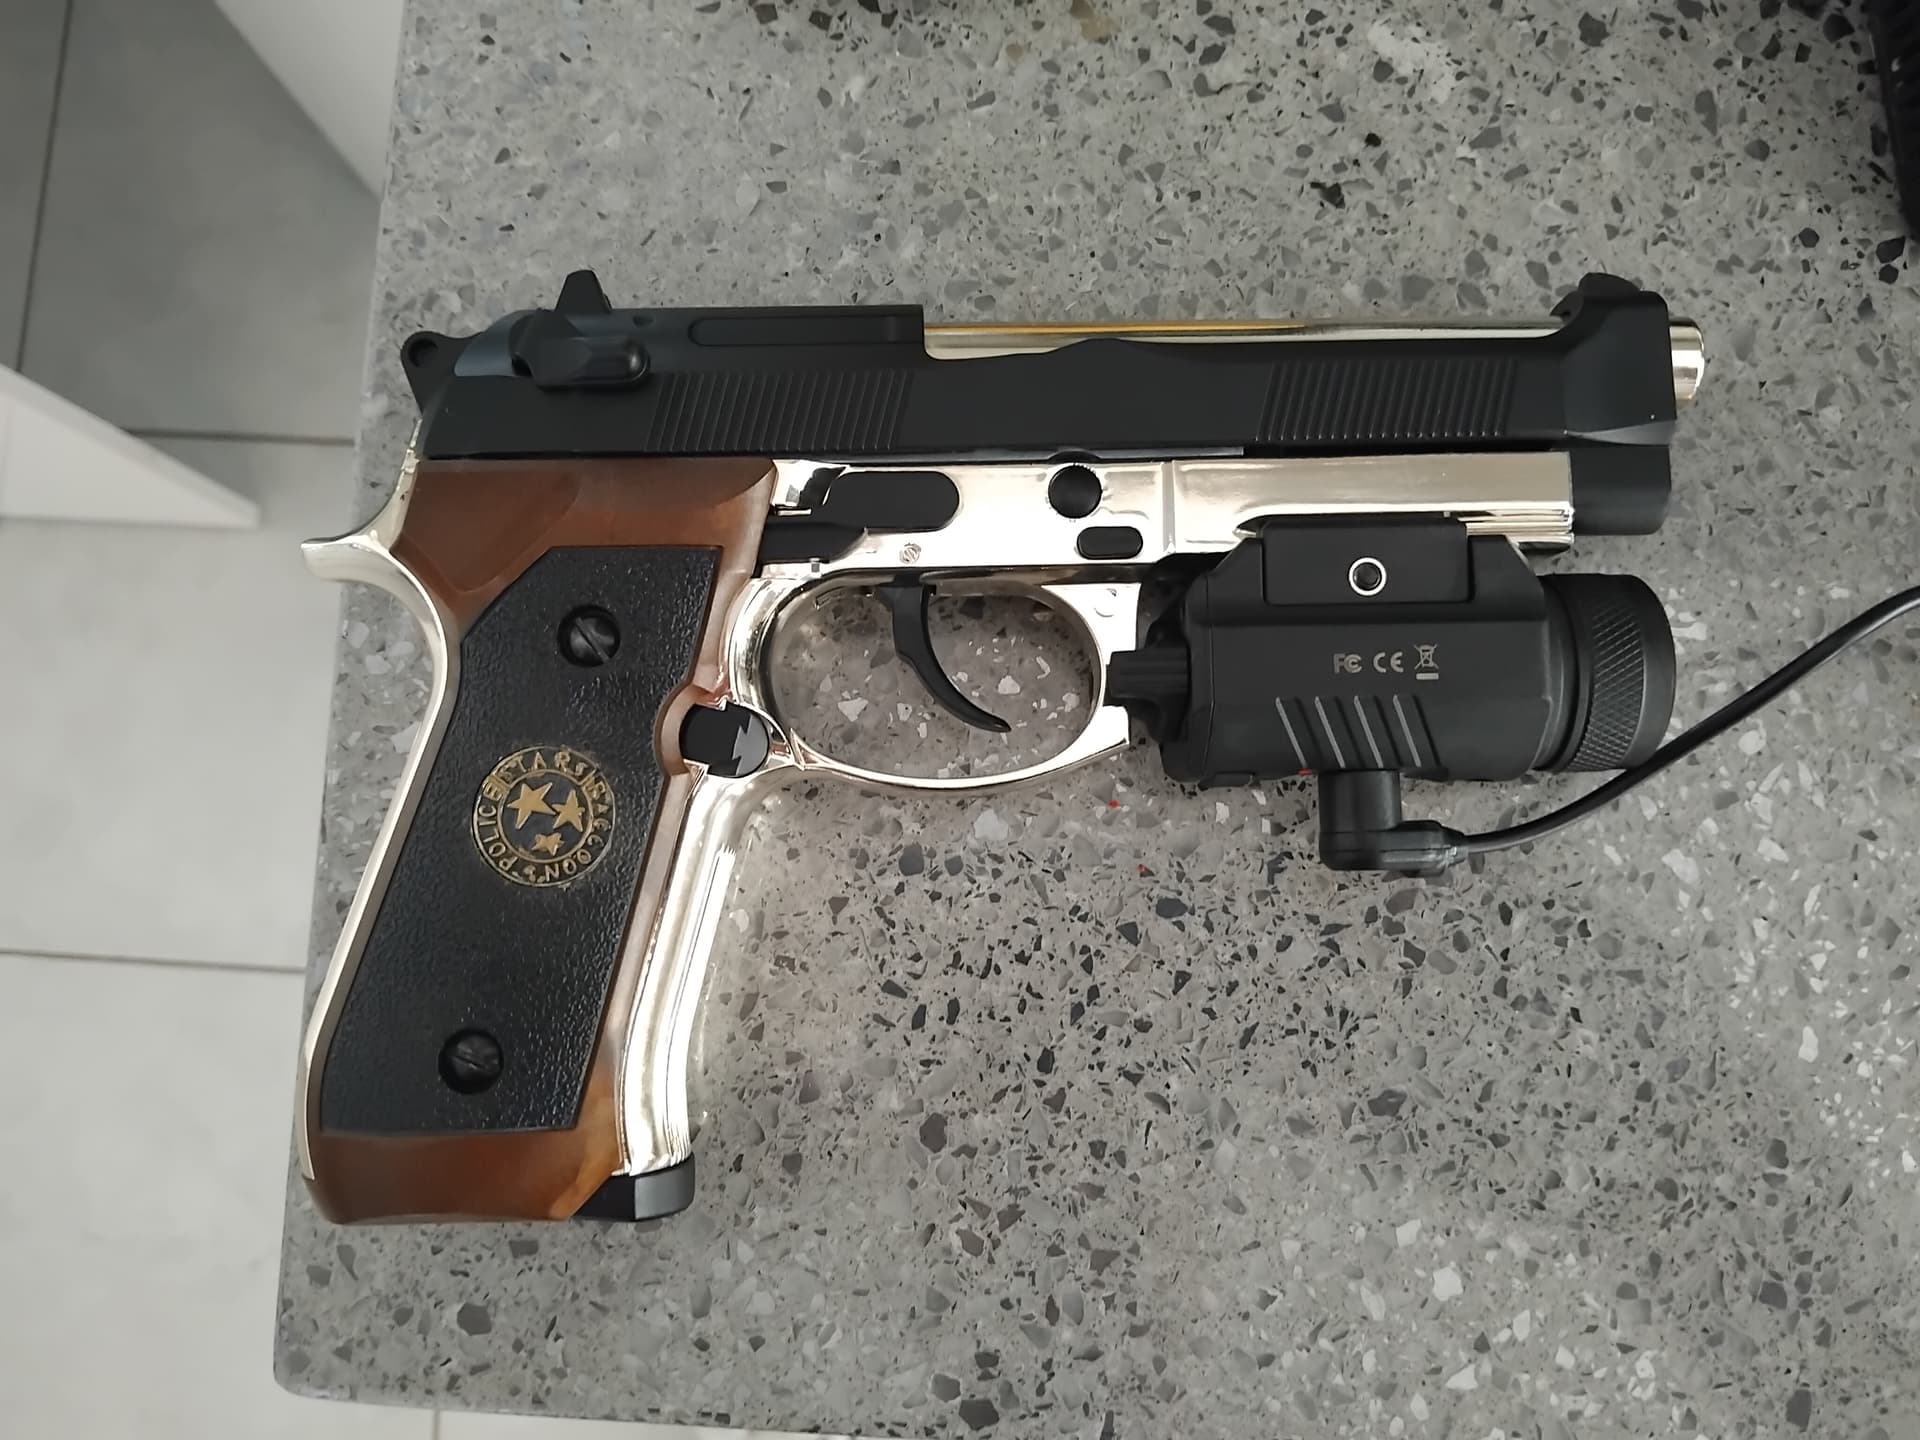
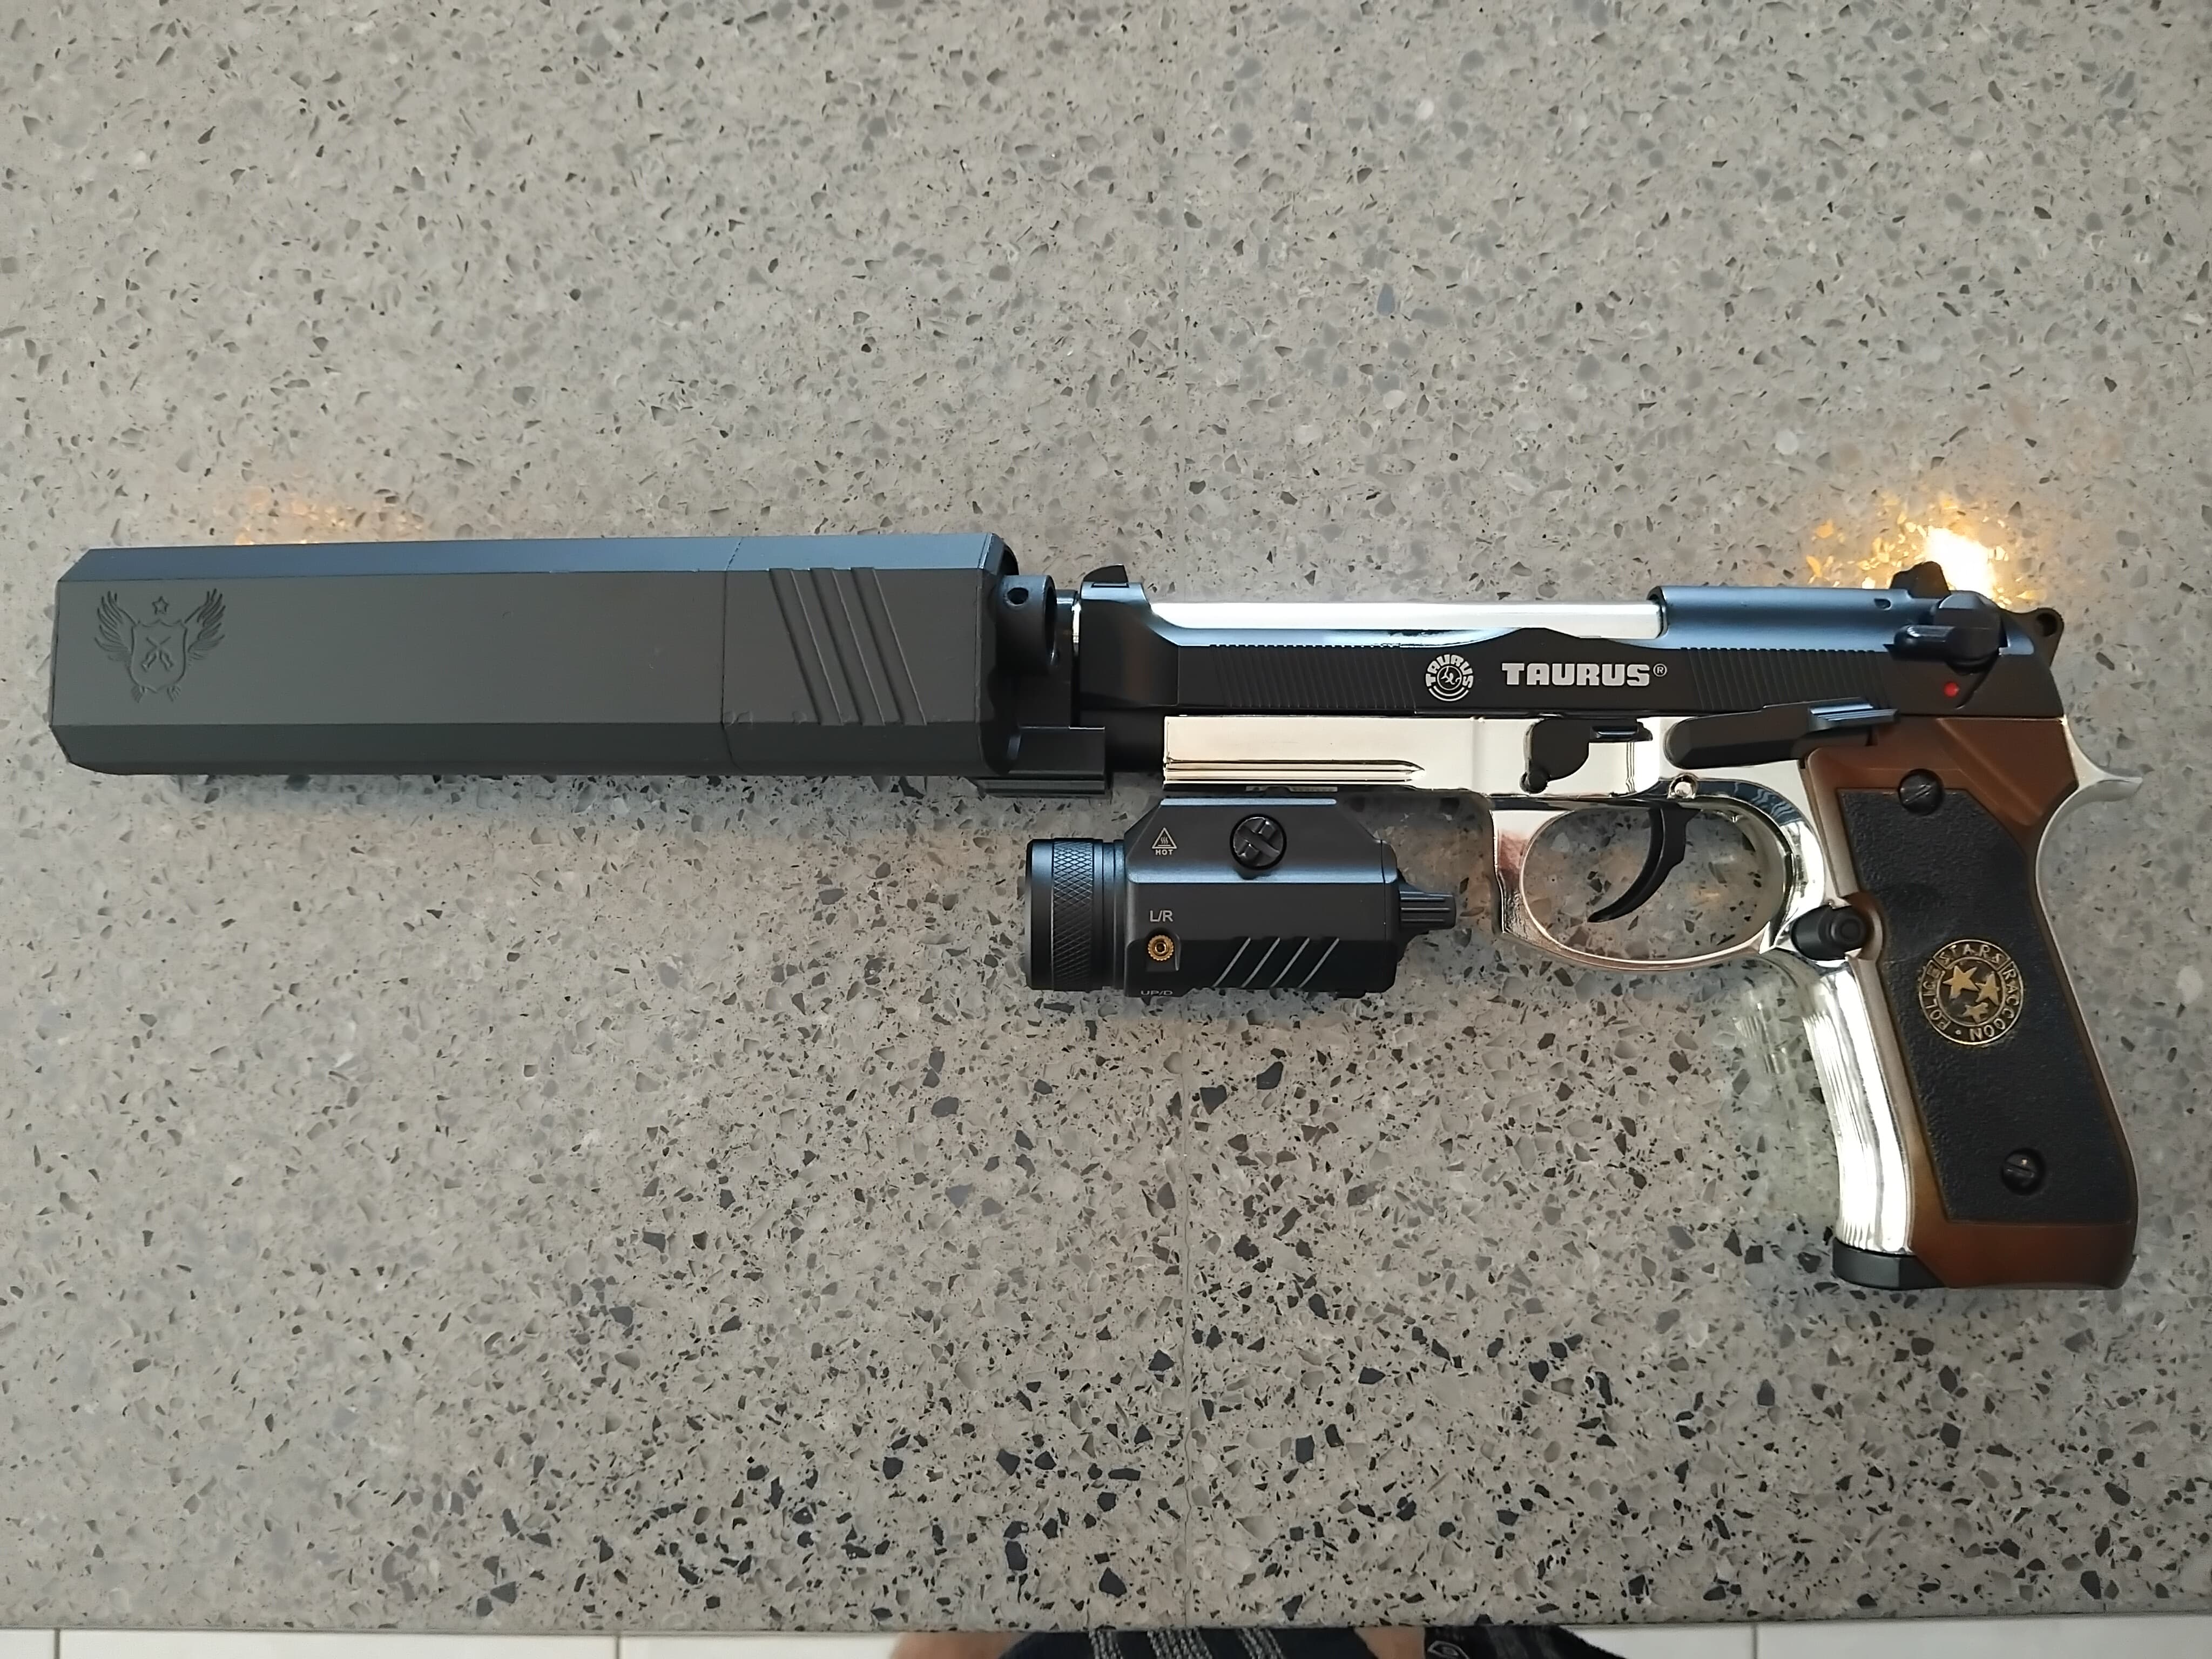
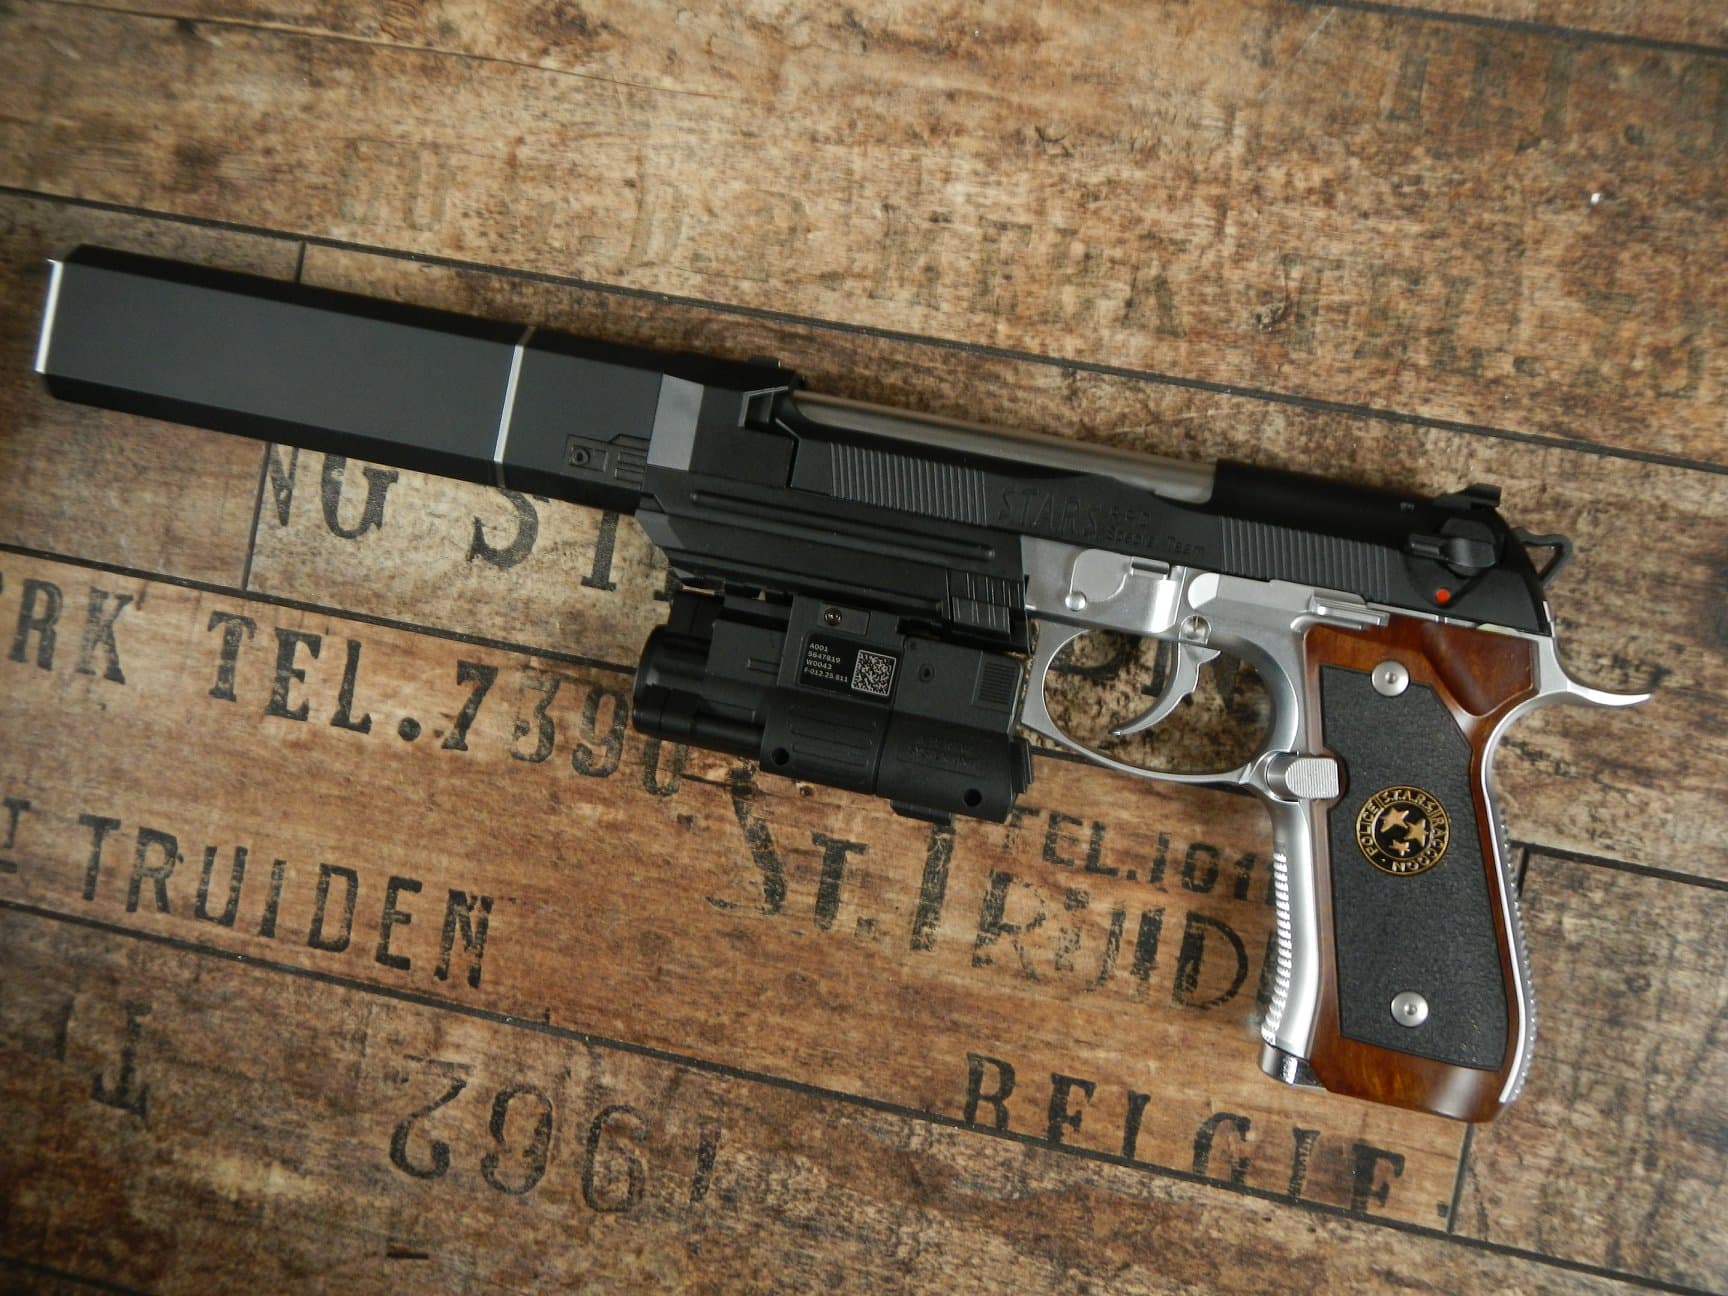
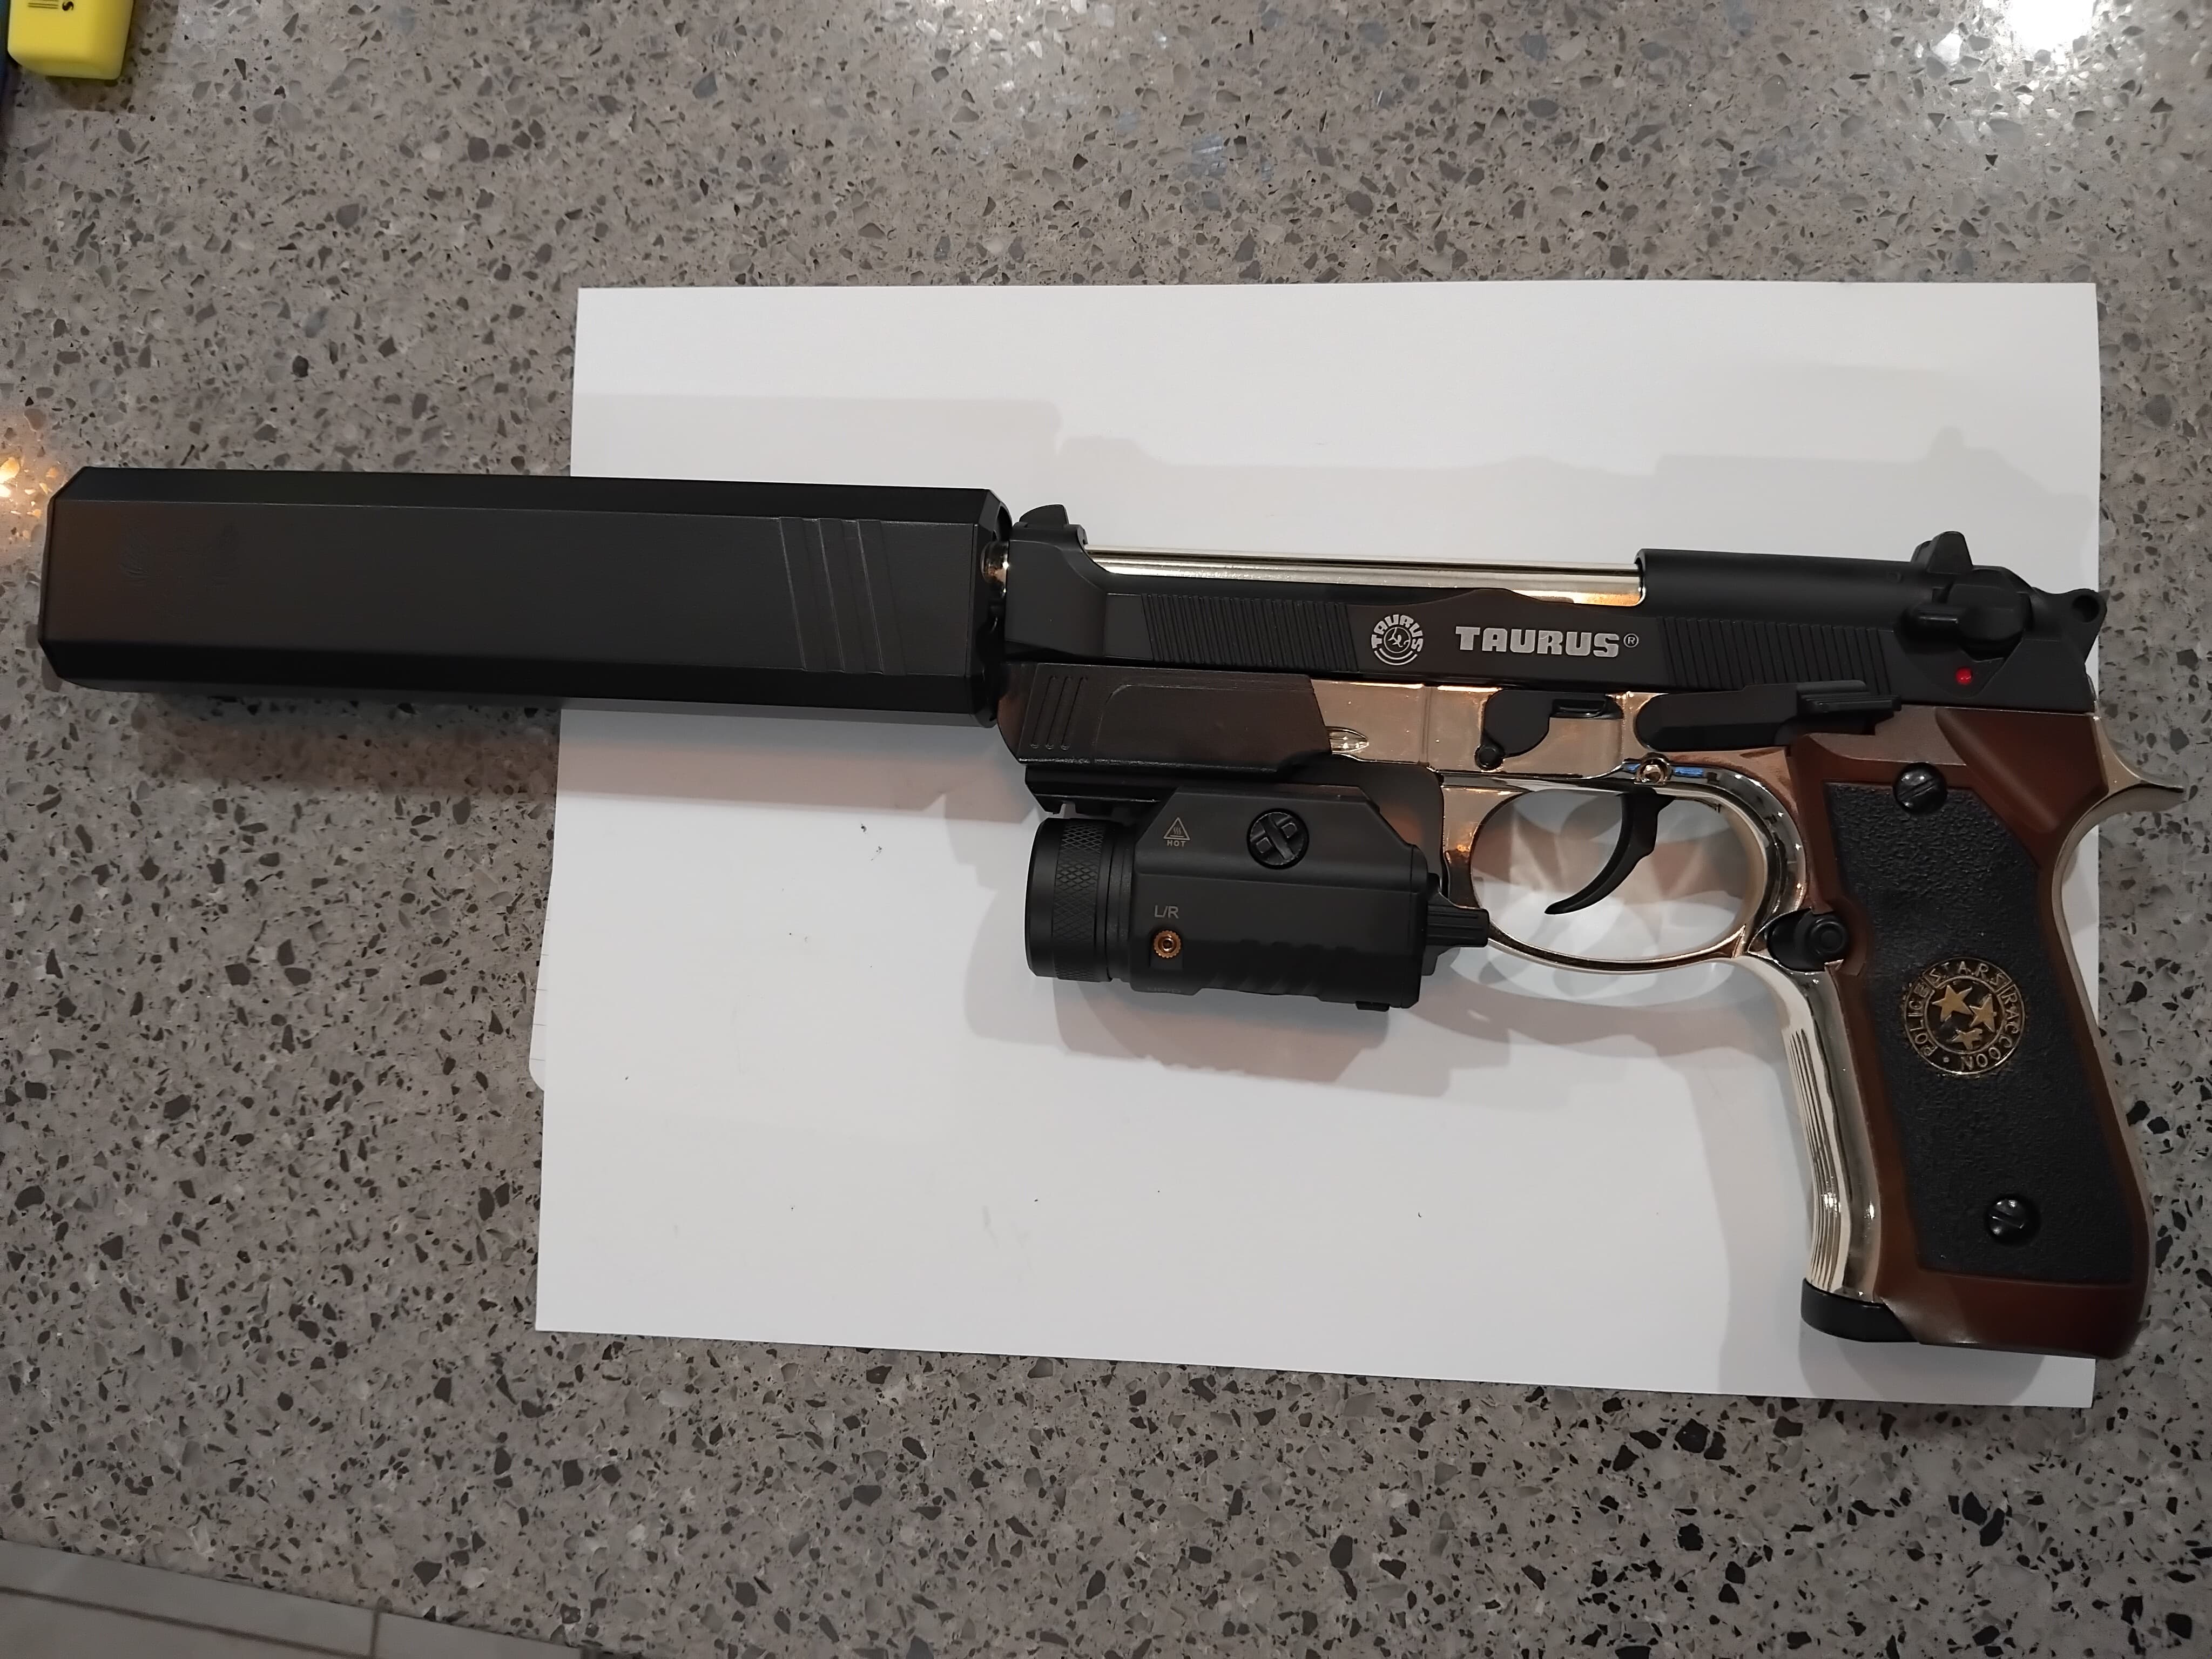
HUGE shoutout to @Friendly_Fire , for donating a suppressor, and his work finishing it off…

First things first…it was a straight on adaptor…WE tech 14mm to 11mm adaptor. We bought the last 2, at vipertac, so good luck…

The suppresor was a Osprey Vector, from xforce. Very close to the Wesker model, in terms of dimension and length. It does have enough retention via the adaptor, a little bit of barrel droop, but that happens with any suppressor.

You wouldn’t want to run around all day with it, but for a functional wall hanger, its great. I’m going to do a bit of painting on the Supp, to add on the silver stripes.

3 Likes