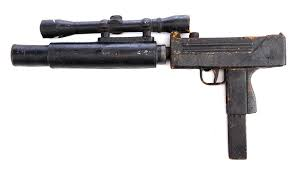
Thought you might like this as soon as I seen it, especially since this topic has been progressing ![]()
![]()
1 Like
working next 5 days straight…so no progress for awhile.!!
and, you cant have a Big Mac, without a can of coke…!! ![]()
![]()
Thats gotta be a really light, thin skinned drum…
No way its a 44 gallon, fuel rated drum…
1 Like
Yeah that’s just a standard duty 44, definitely not AVGAS/FUEL Grade!
1 Like
Quick update…
a day off today, so got into glueing the back end together.
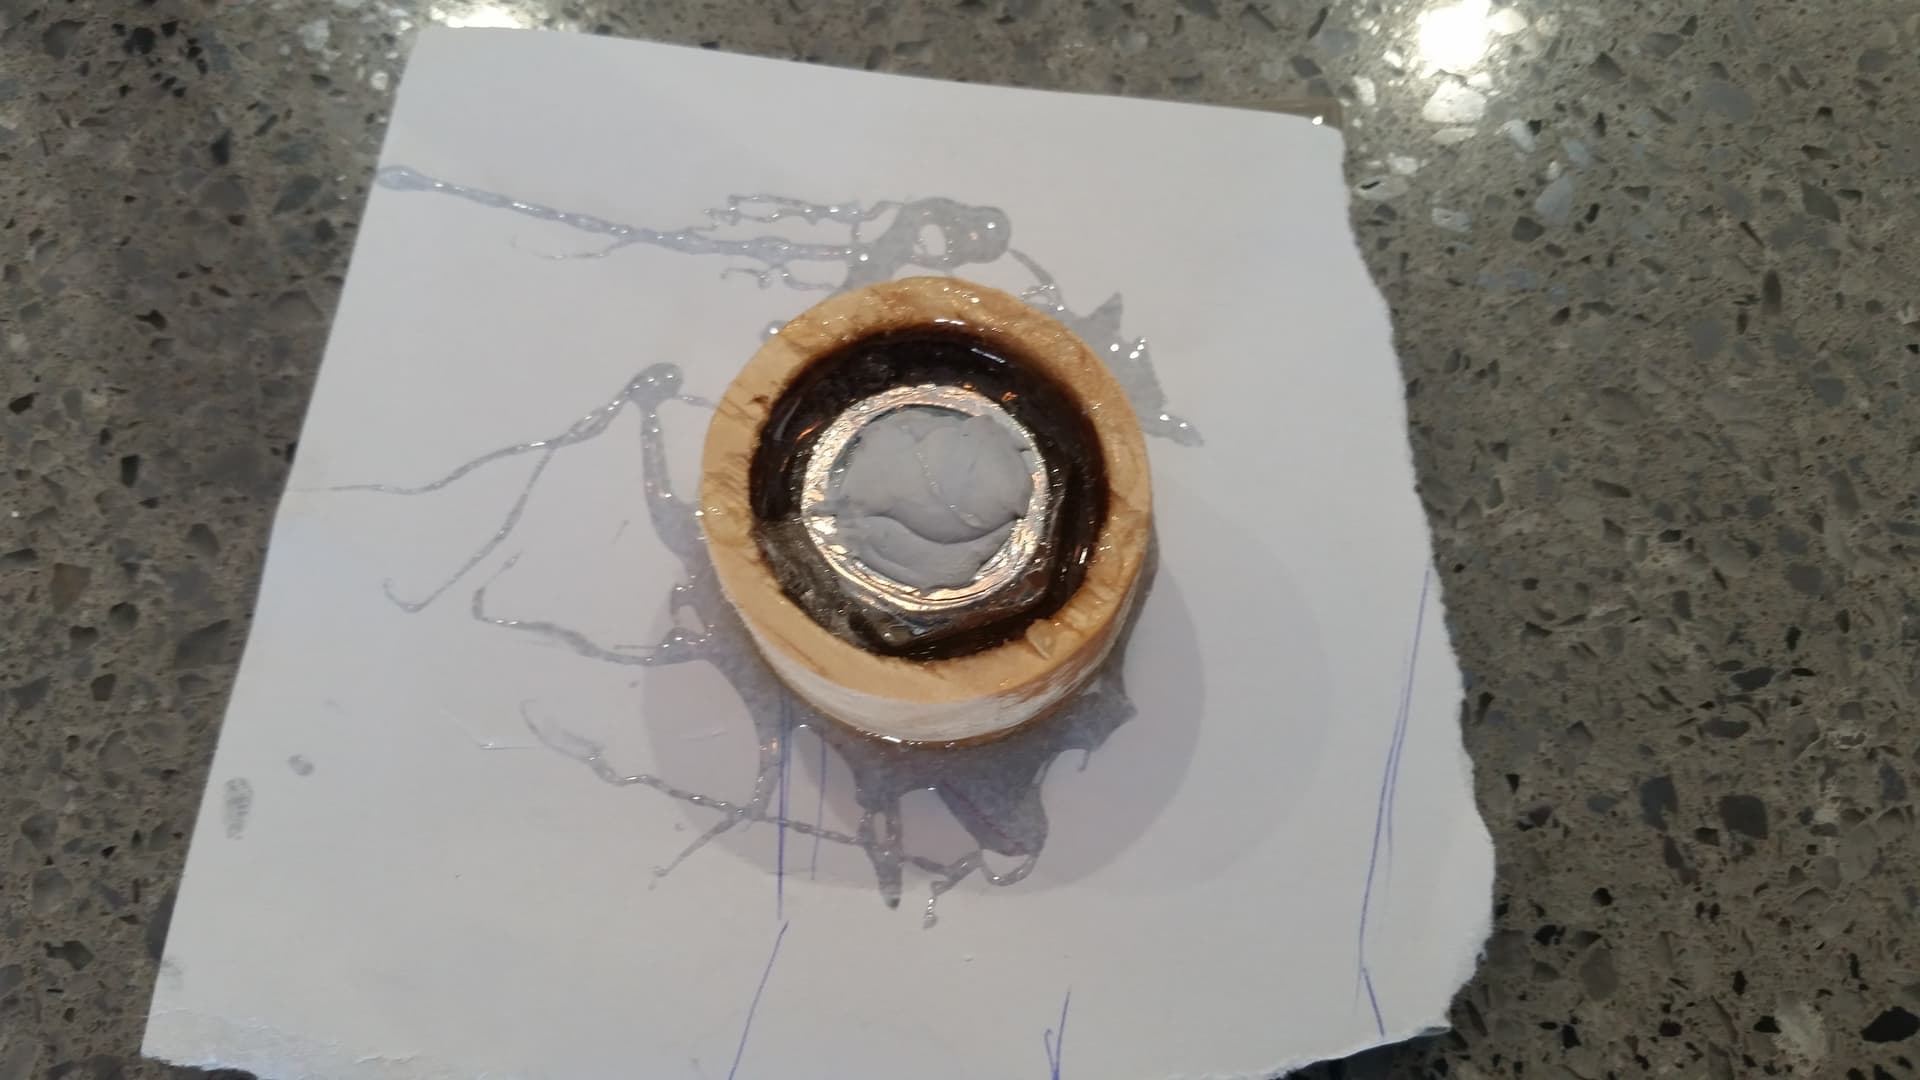
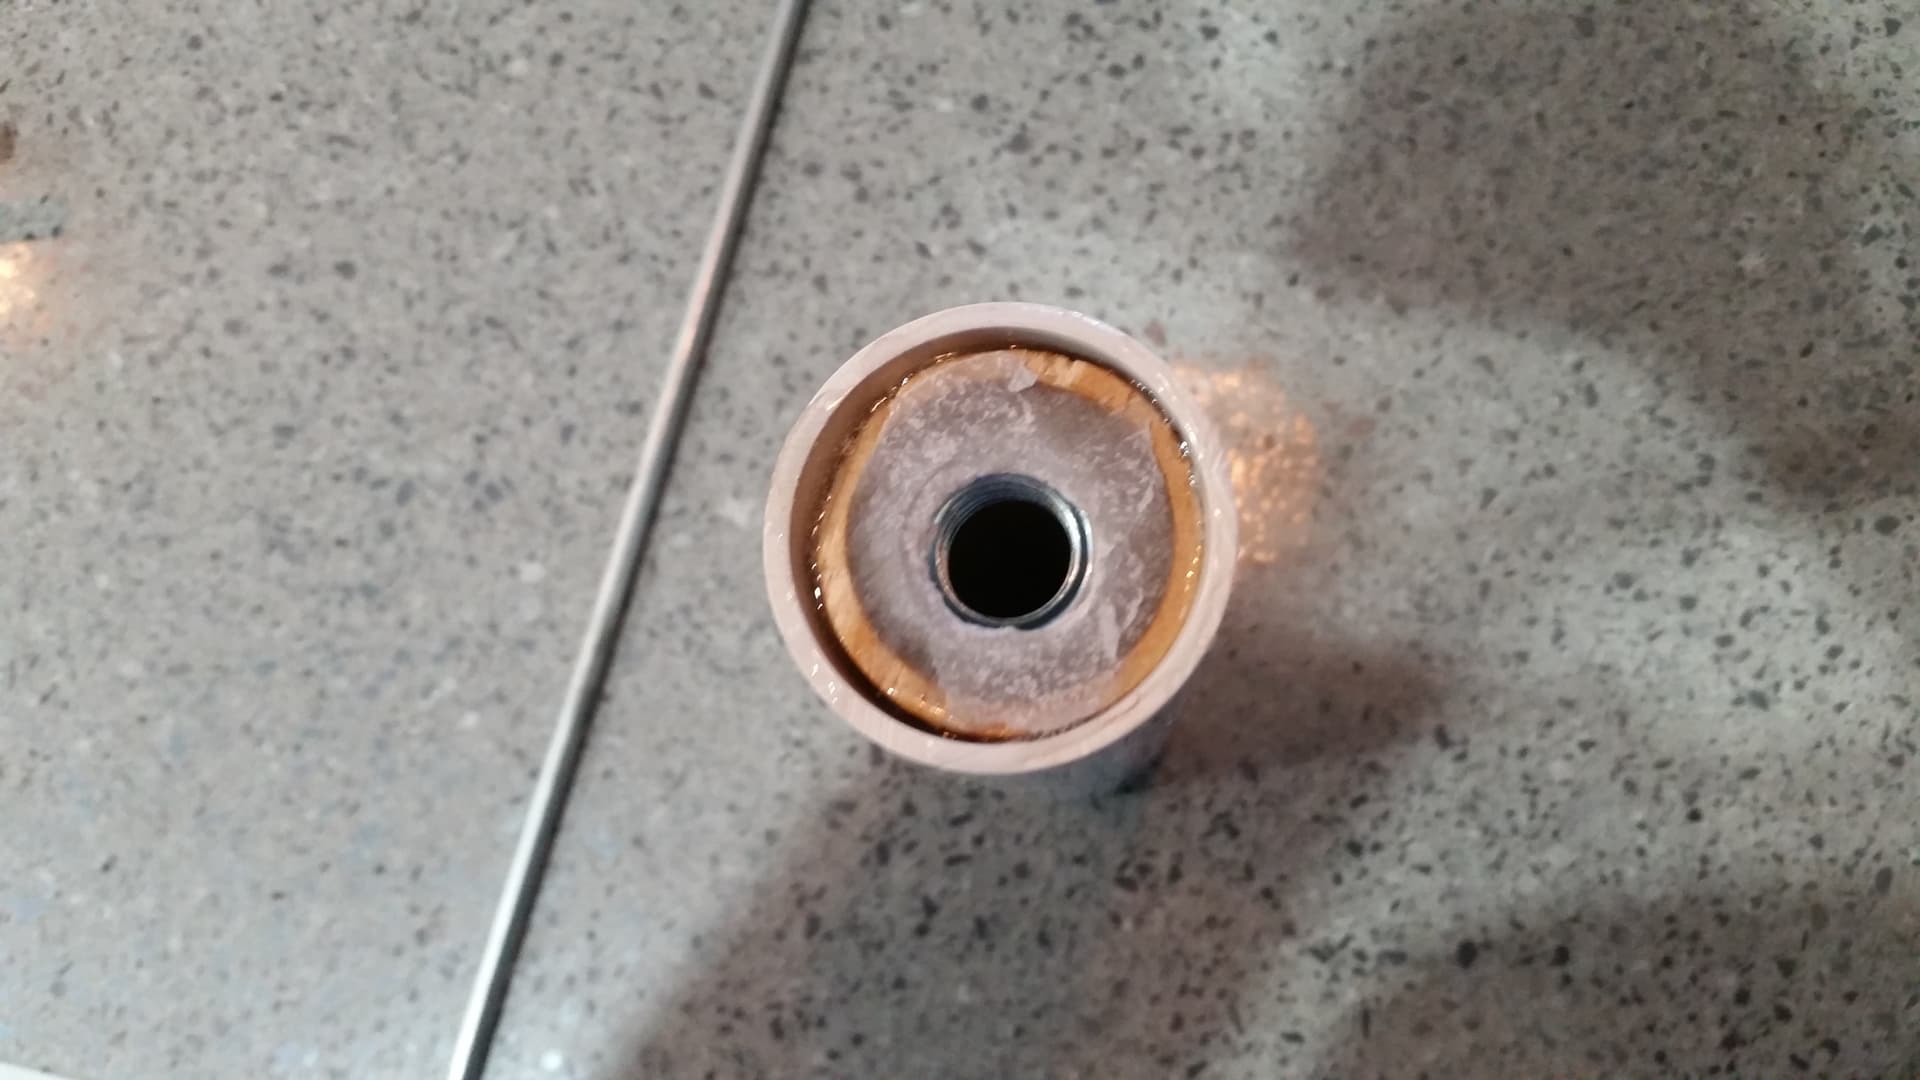
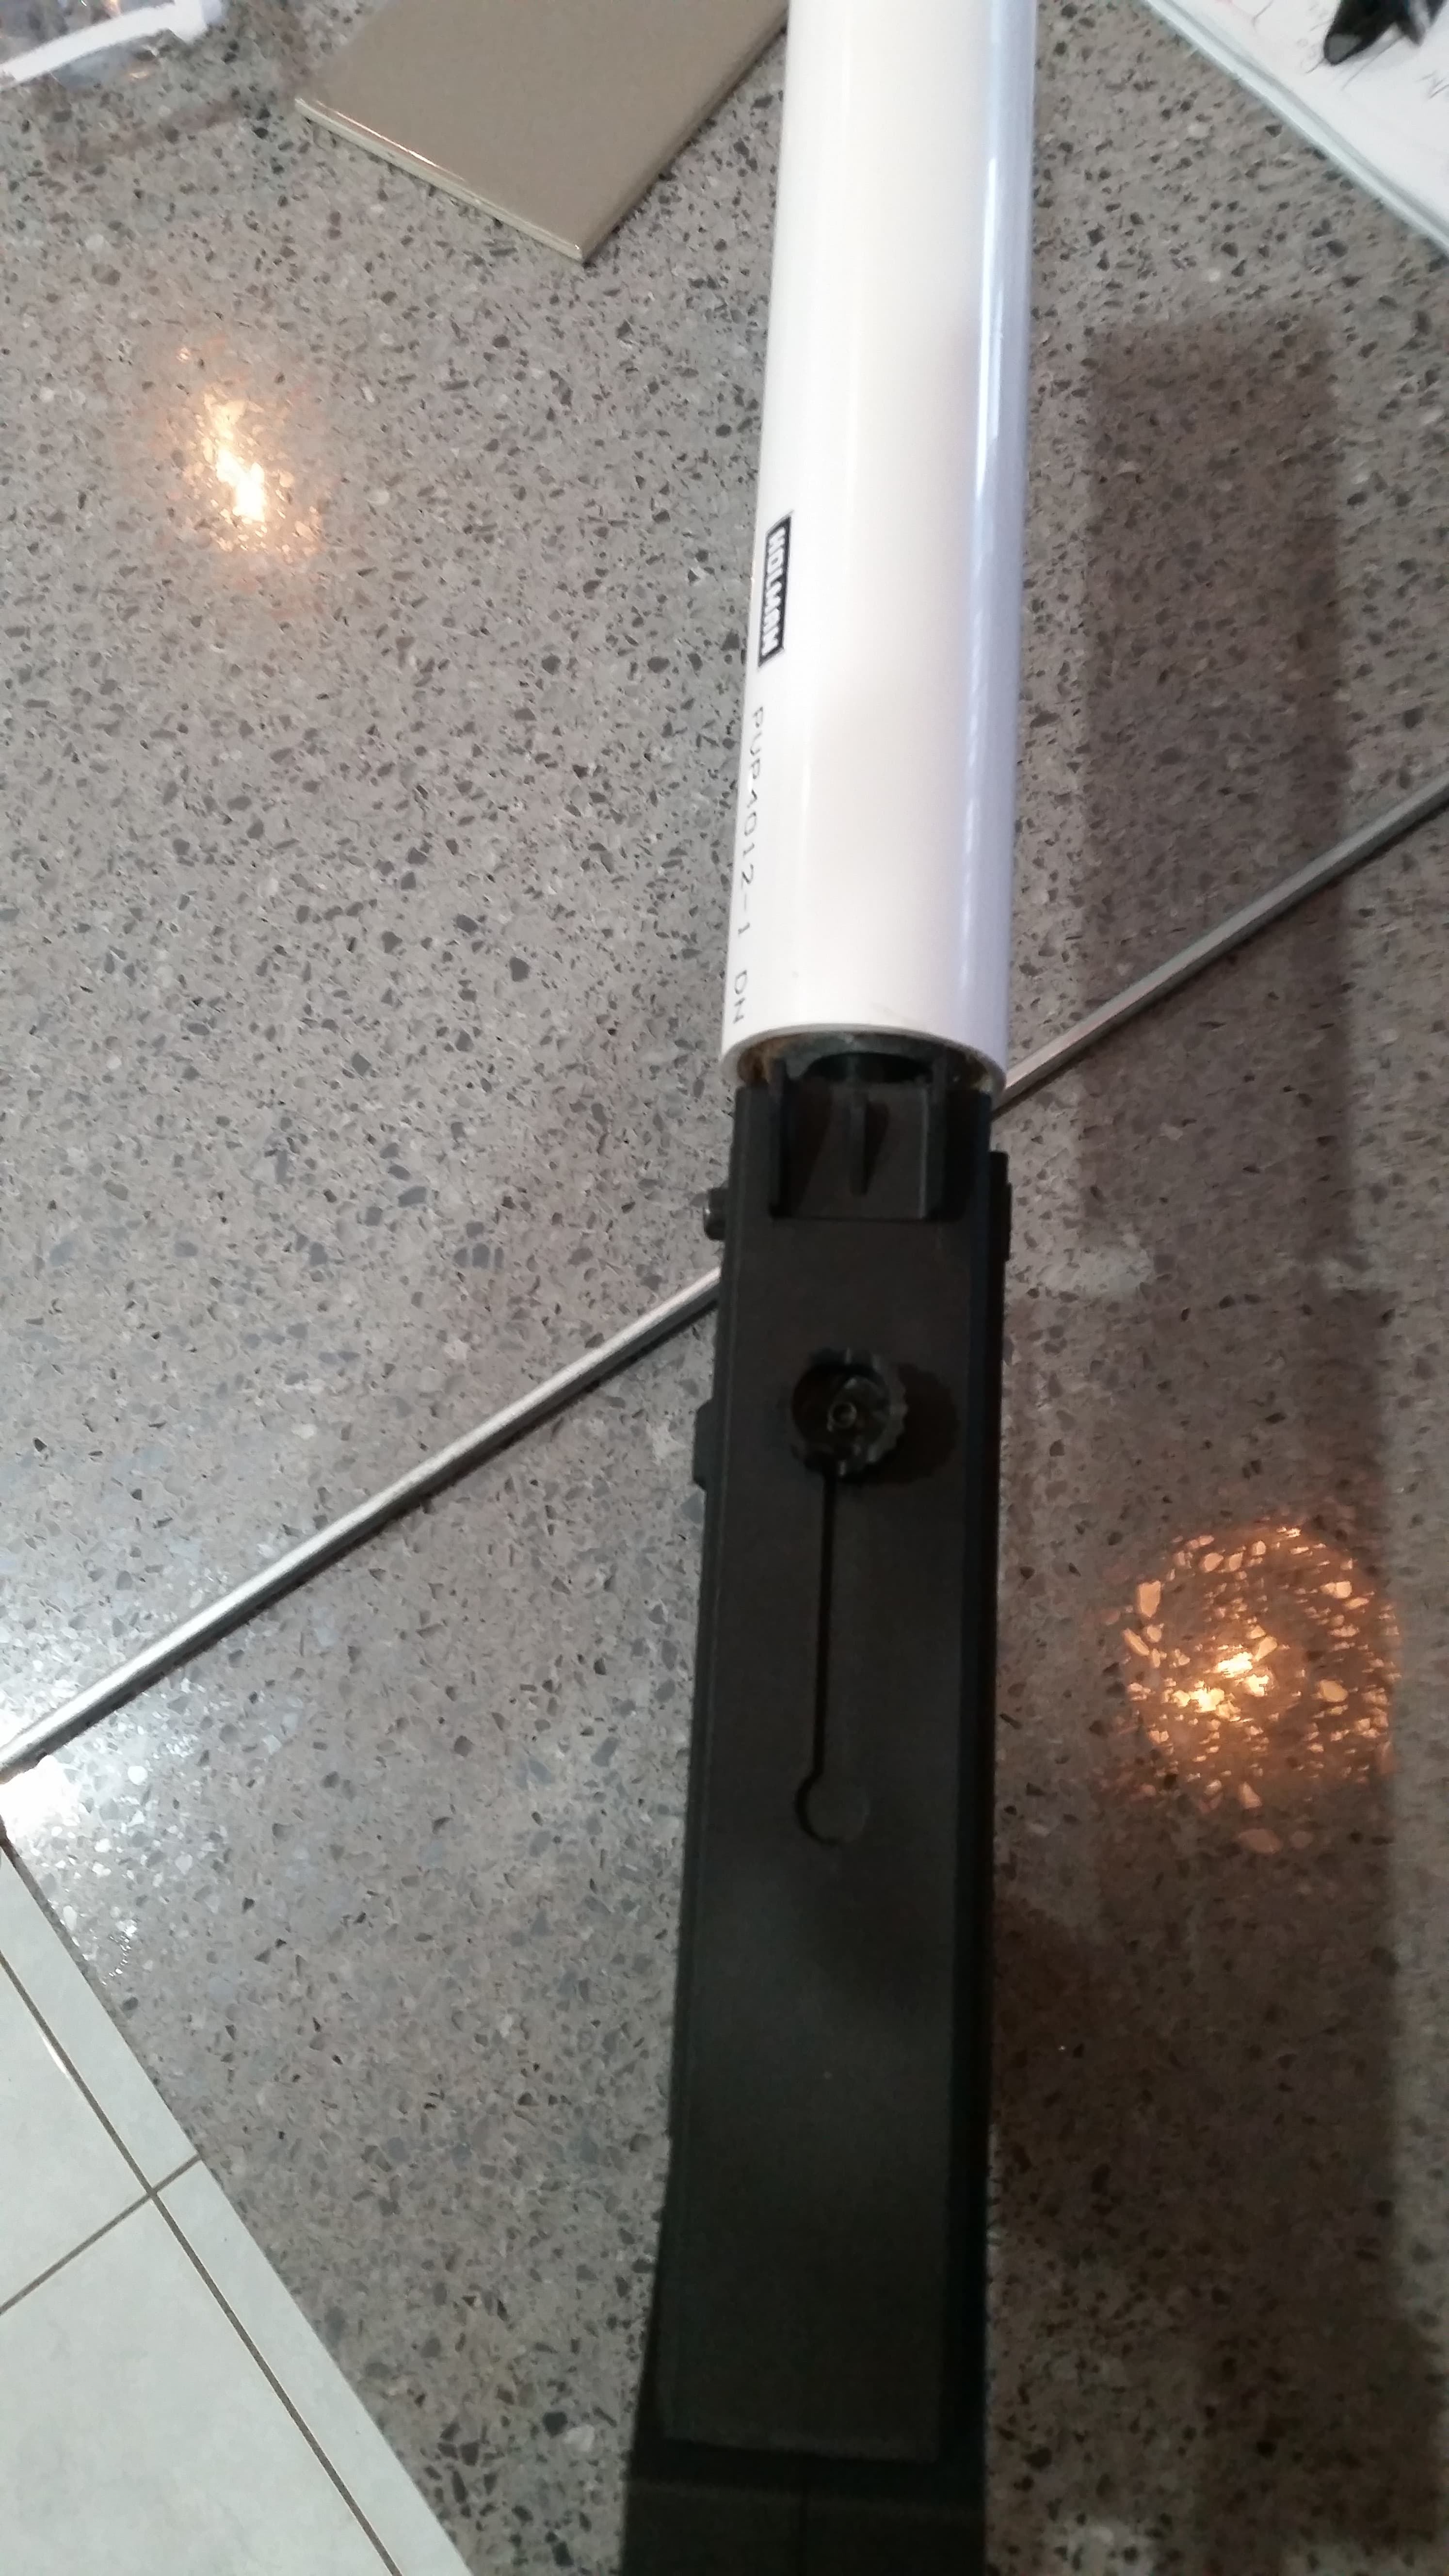
This is the rear plug , for the smaller can.
Everything will hang of it, so it needs to be as strong as possible, with as much glue as possible.
The nut is filled with blue tac, to stop resin getting in.
Problem…getting enough glue in.
Meant to coat both surfaces, I tried coating the outer surfaces of the nut, but it all rapidly slumped away.
Put the wooden ring on to try to retain it, very hard to get glue in , as very little space was remaining…
I’m having doubts, about this plugs strength, as it sets…
I don’t think it completely filled.
Solution: increase space on the inside of the wooden ring.
For the smaller can, that would make the ring too thin, with risk of fracture.
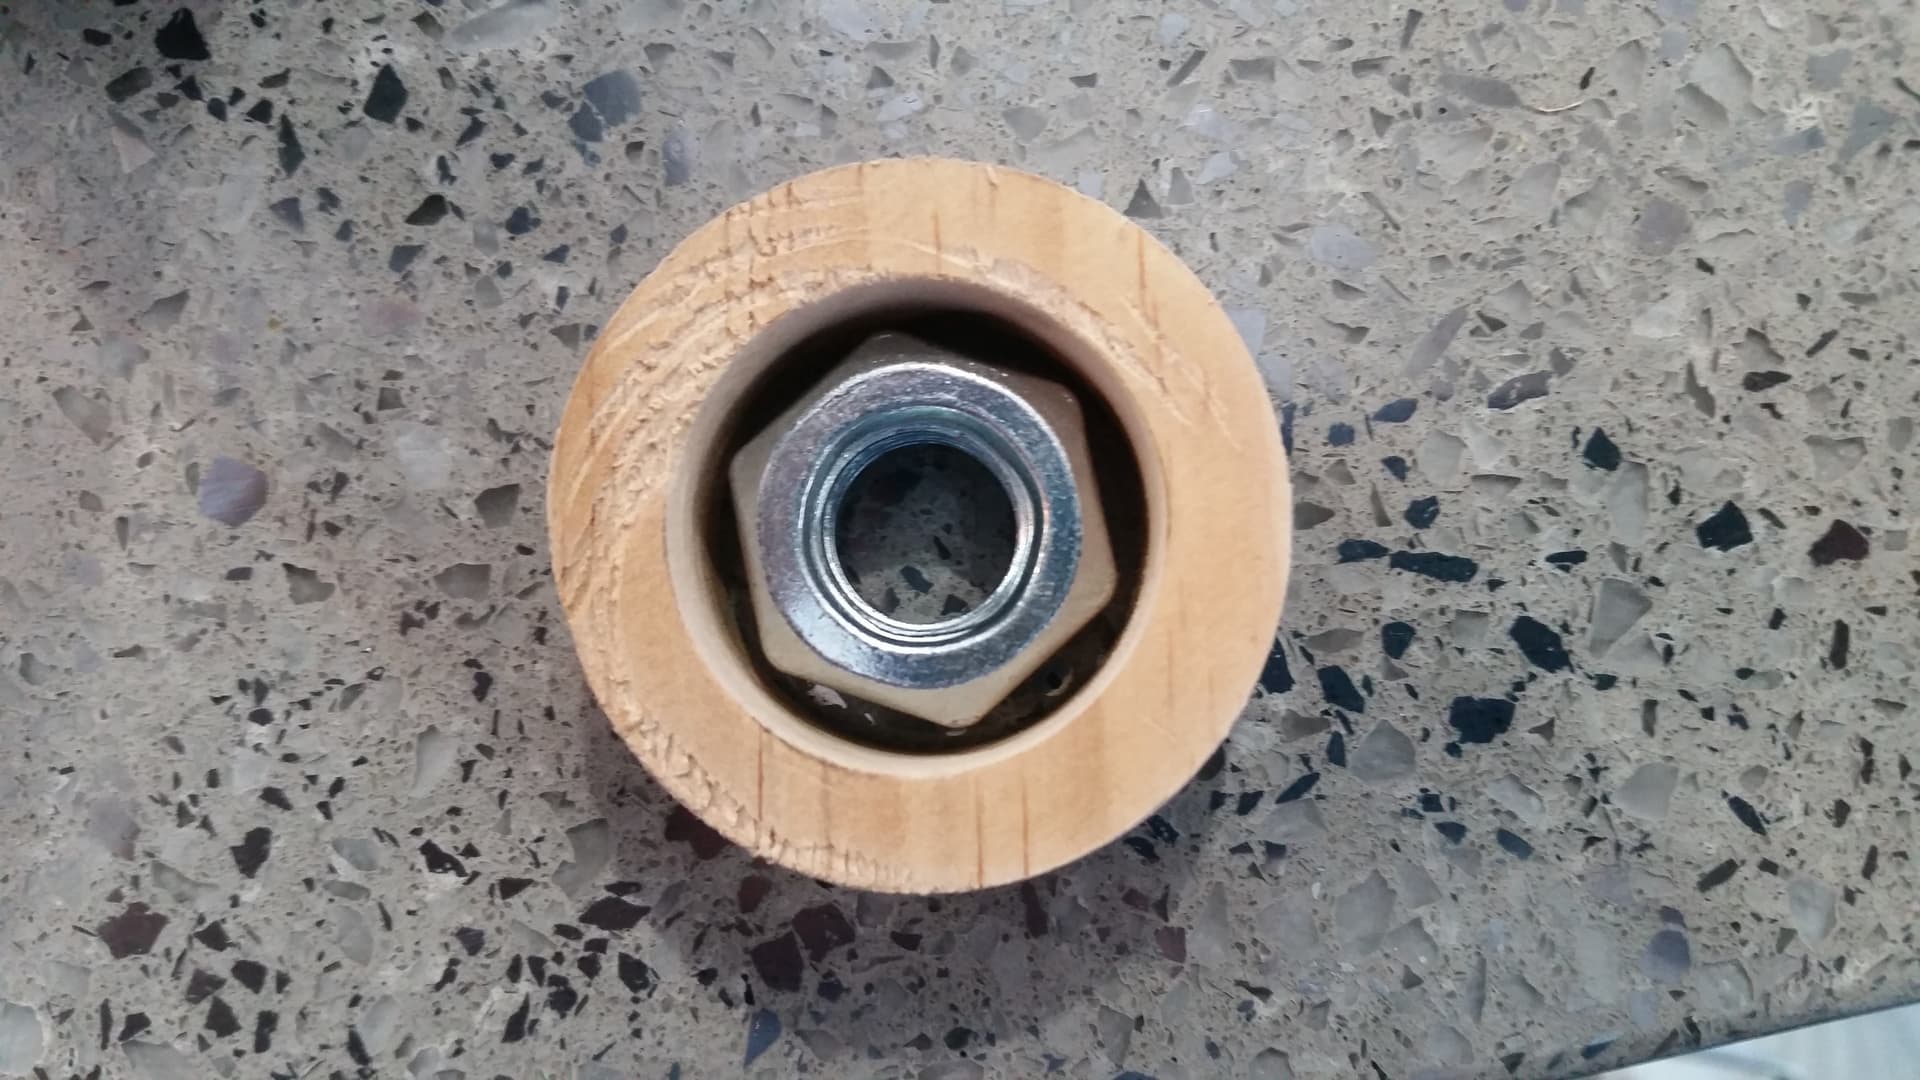
So, back to the larger can, larger plug, larger hole on the inside, more room space for the resin.
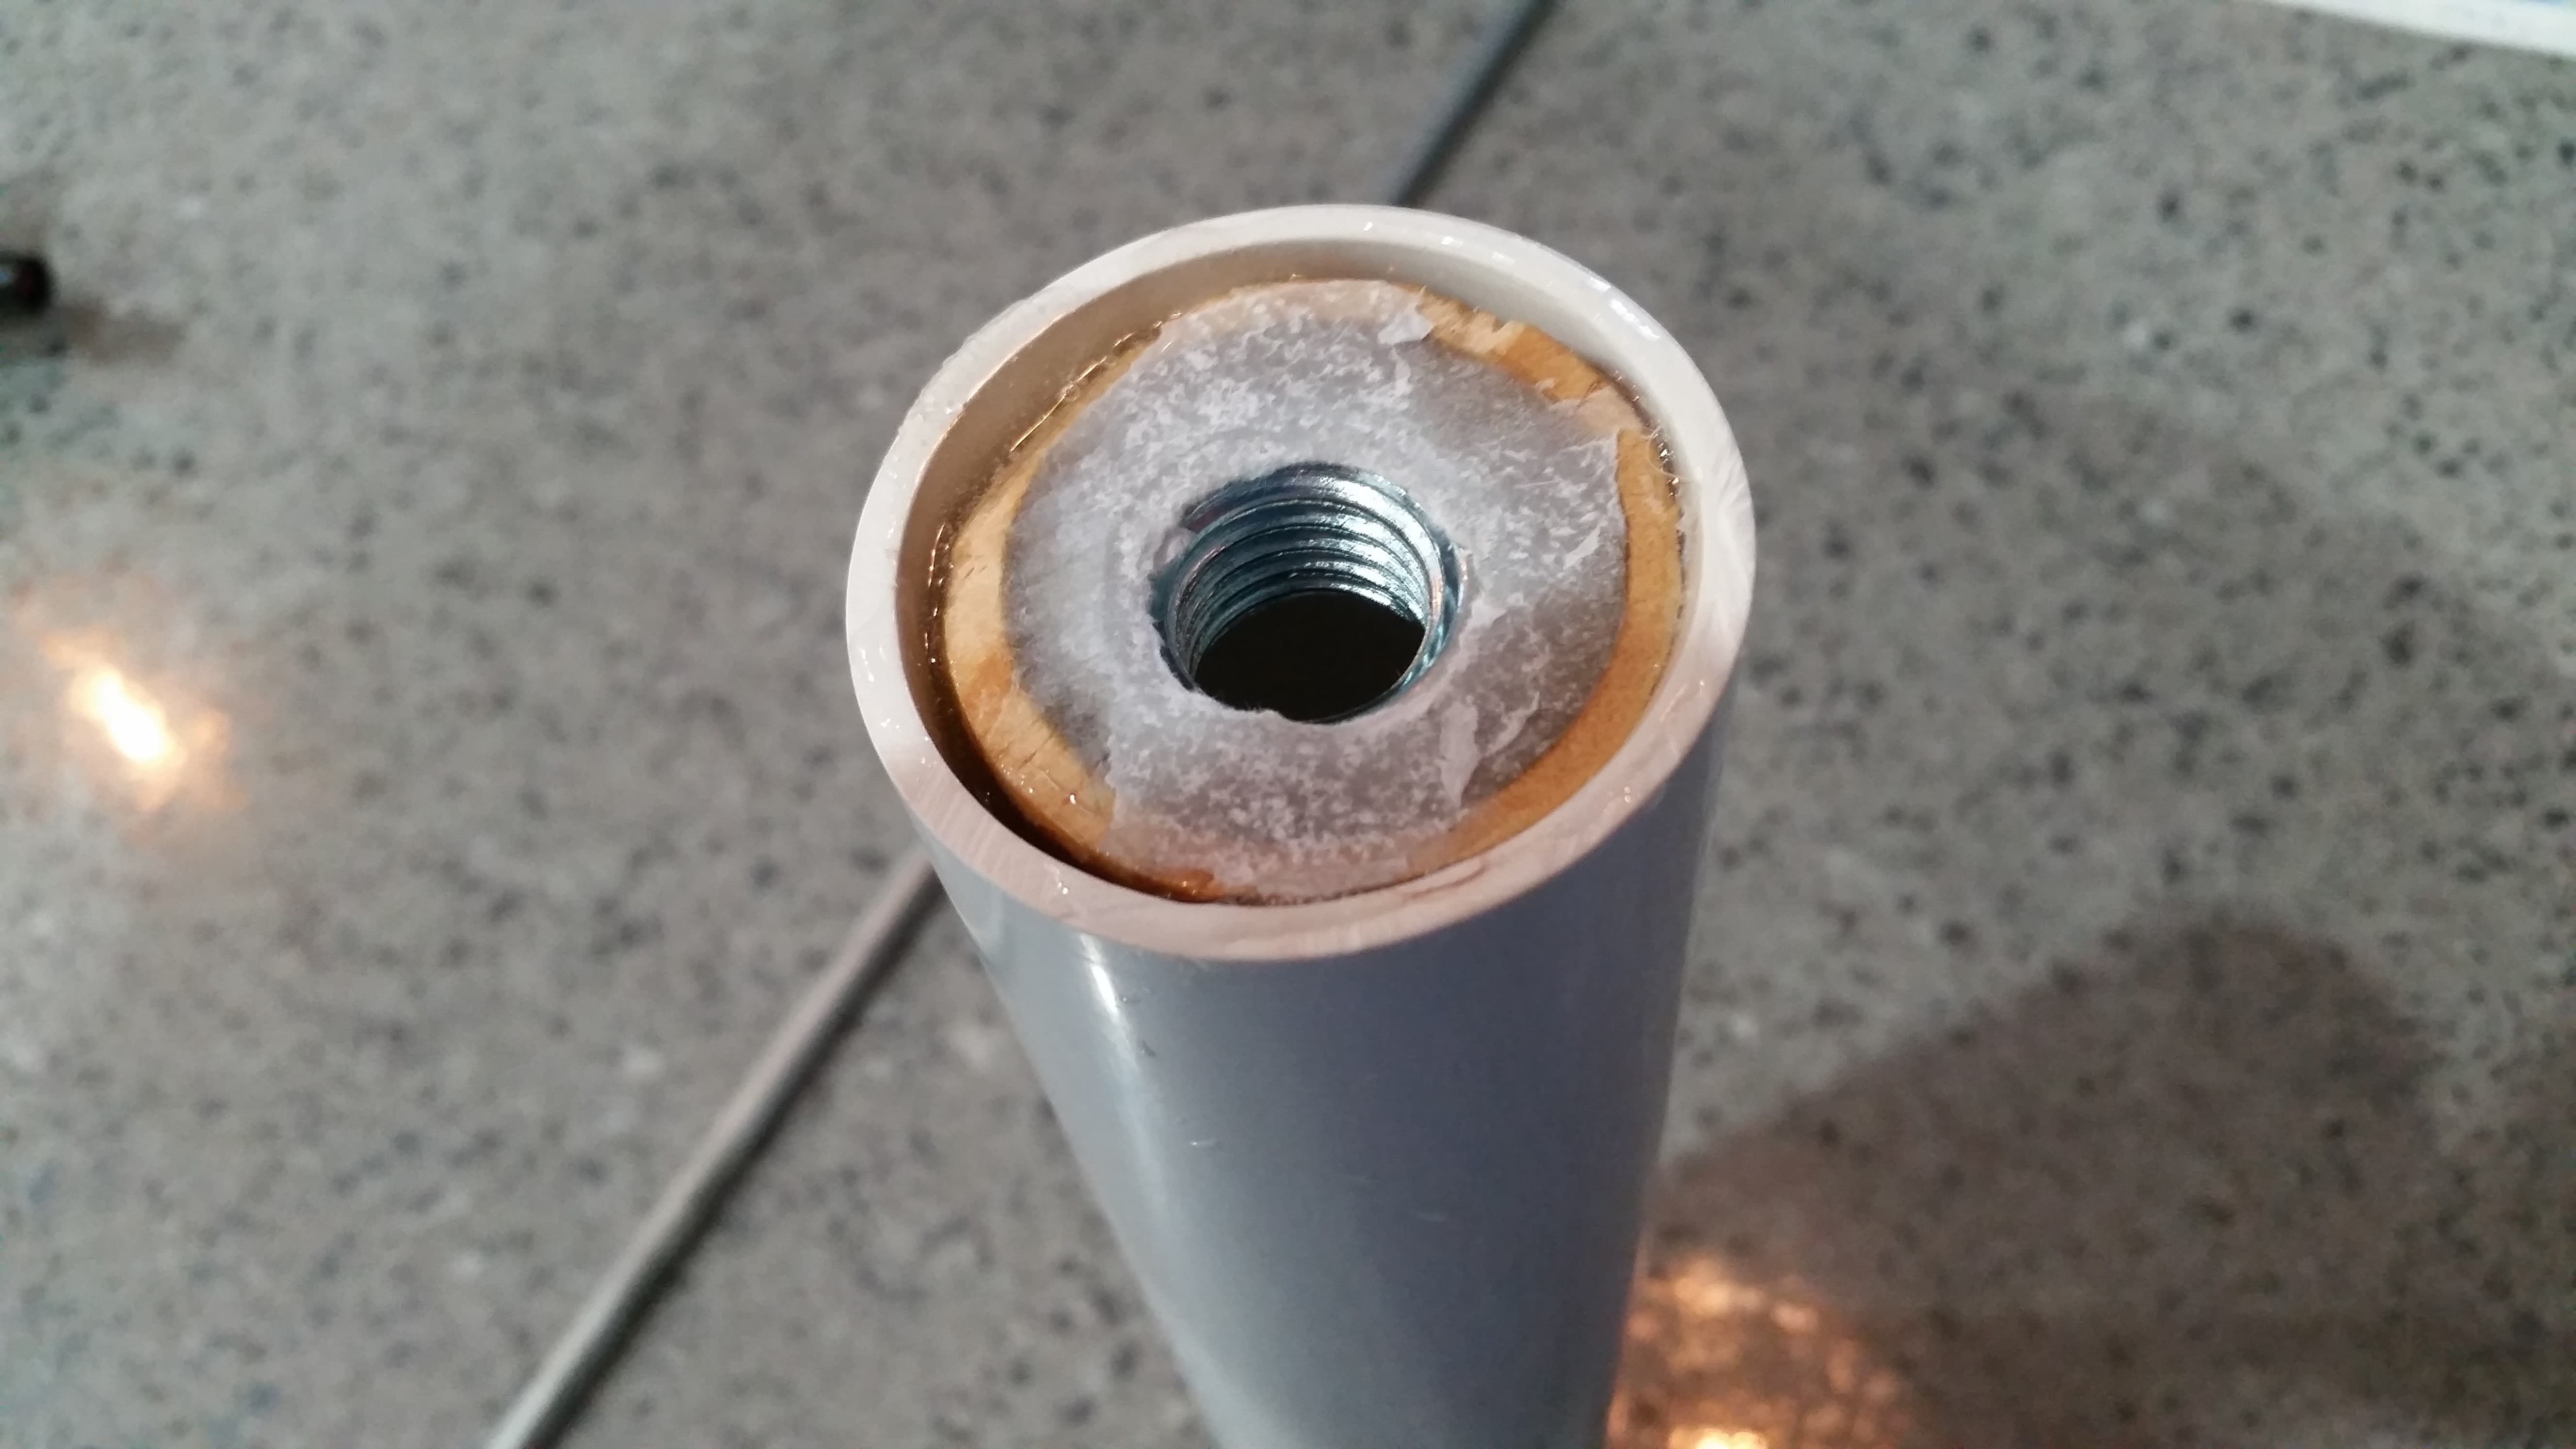
This is the larger plug, with the same size internal hole…sanded out a bit to make it a bit bigger.
I reckon i may go one size up, and just drill a slightly larger internal hole.
Really, fill the bugger up with resin, and maybe a few hand carved slots, to avoid any chance of circular rotation happening later…
And, because im tired and cranky, some "zen peace out " shots, coming back from the pond…


2 Likes
Could also drill the internal hole smaller and then cut six slots a couple of mm deep at each point of the intersections of flats on the nut for a press fit into the wood.
This will stop any rotation, leave you with a thicker wooden wall and the tight press fit will help the glue/resin grip strength ![]()
2 Likes
The issue is, i’m limited, by the size of the “timber hole cut bits”, that i have…
There are only so many sizes, some a bit too big, some too small…
The next smaller size, is way to small, to fit the nut…
Its a wait to dry, and see, approach…
If i go with the larger rear can, I can get a wooden plug , that is almost a perfect fit. ( the front can, is loose fitting though.)
I may be able to drill out a larger size internal hole, which leaves much more space, for a slow, incremental resin build up…
And, incorporate a few notches, to avoid future rotation…
We’ll see…
Half the fun, is the screwing around…
I used 130 kg araldite…lets give it a chance, to set…
And, man, is that a exothermic reaction…!!!
At about 5 mins of mixing the remaining resin, in the mixing pot ( the clear lid) got sooo hot, i thought it would melt through…!!
1 Like
Could do a hole sized hex like the nut. Take some handwork on the wood. I think that’s what the Doctor was saying. Glue that fkr in.
Ok…lets go Nuts…!!
Glue is set. Appears rock solid, so giving me some confidence. I’ll put some bostick glue gun in at the top, to fill the last little bits.
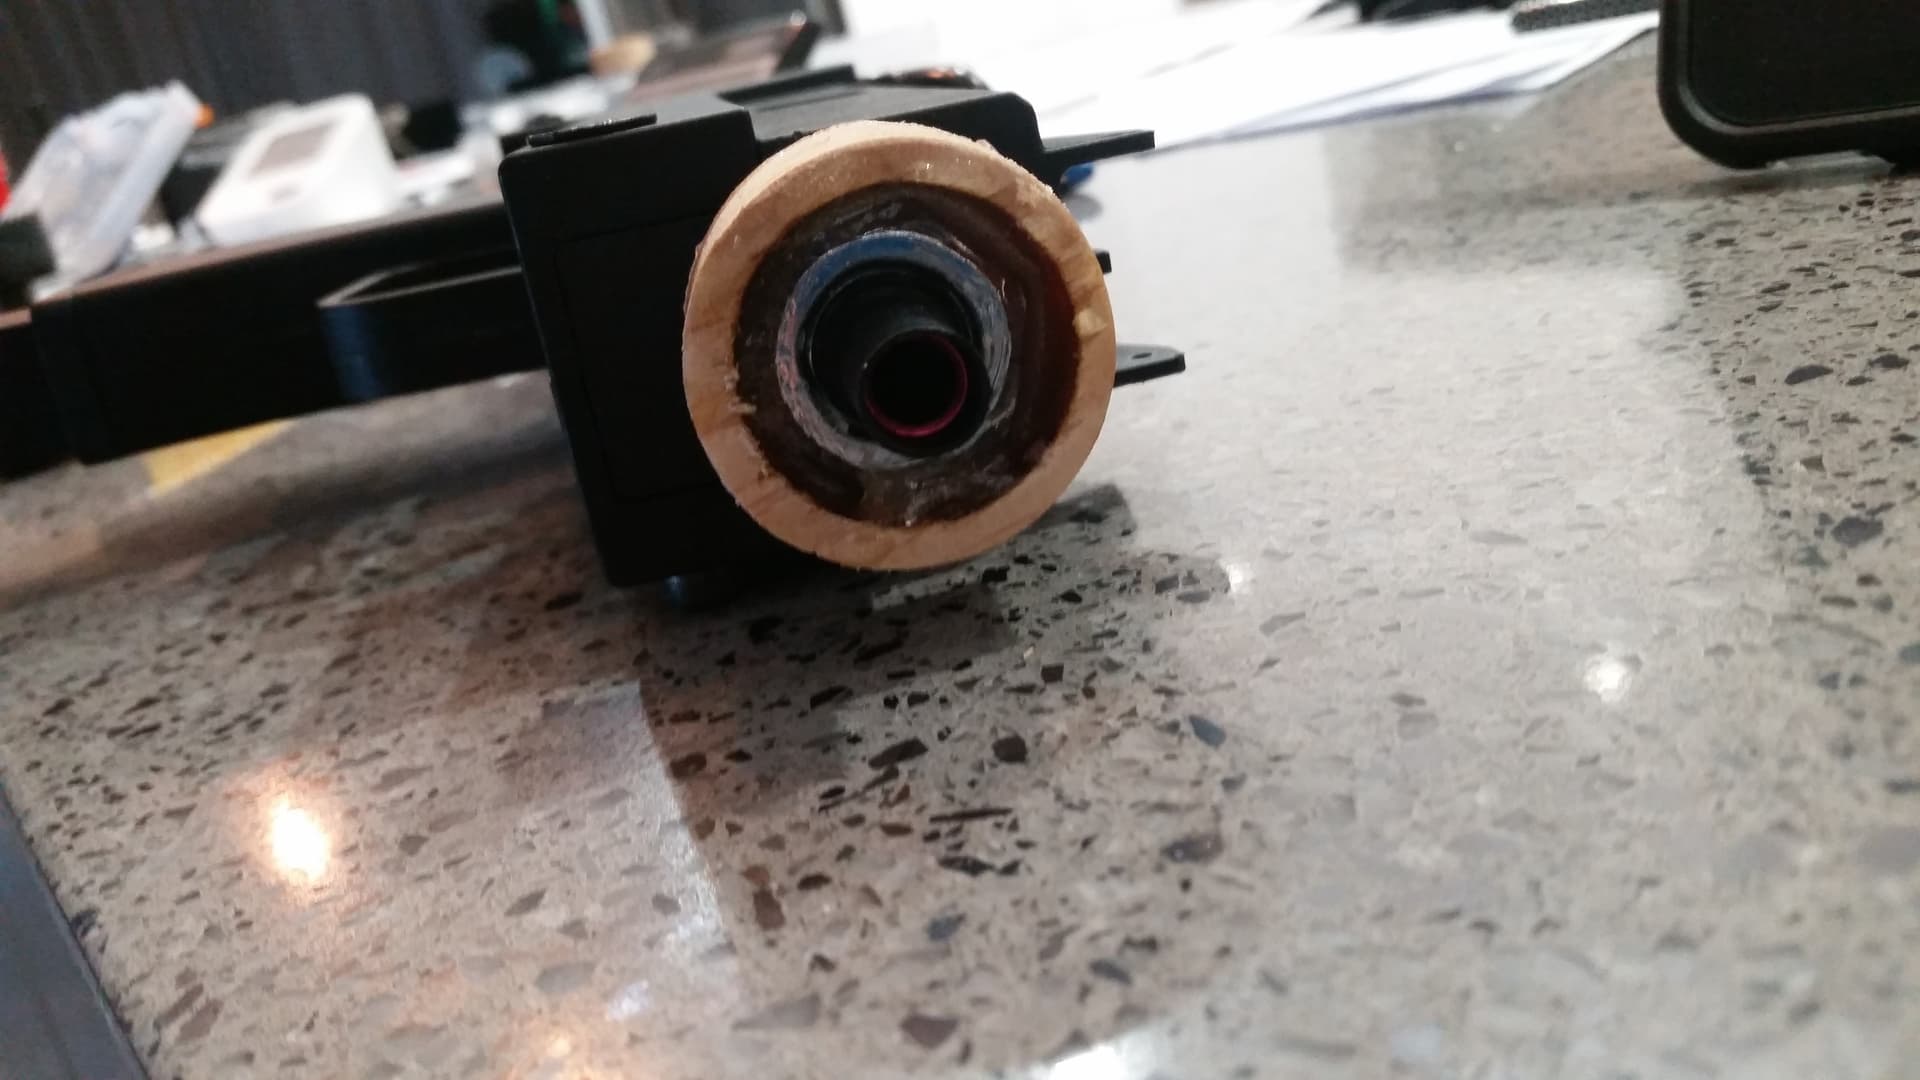
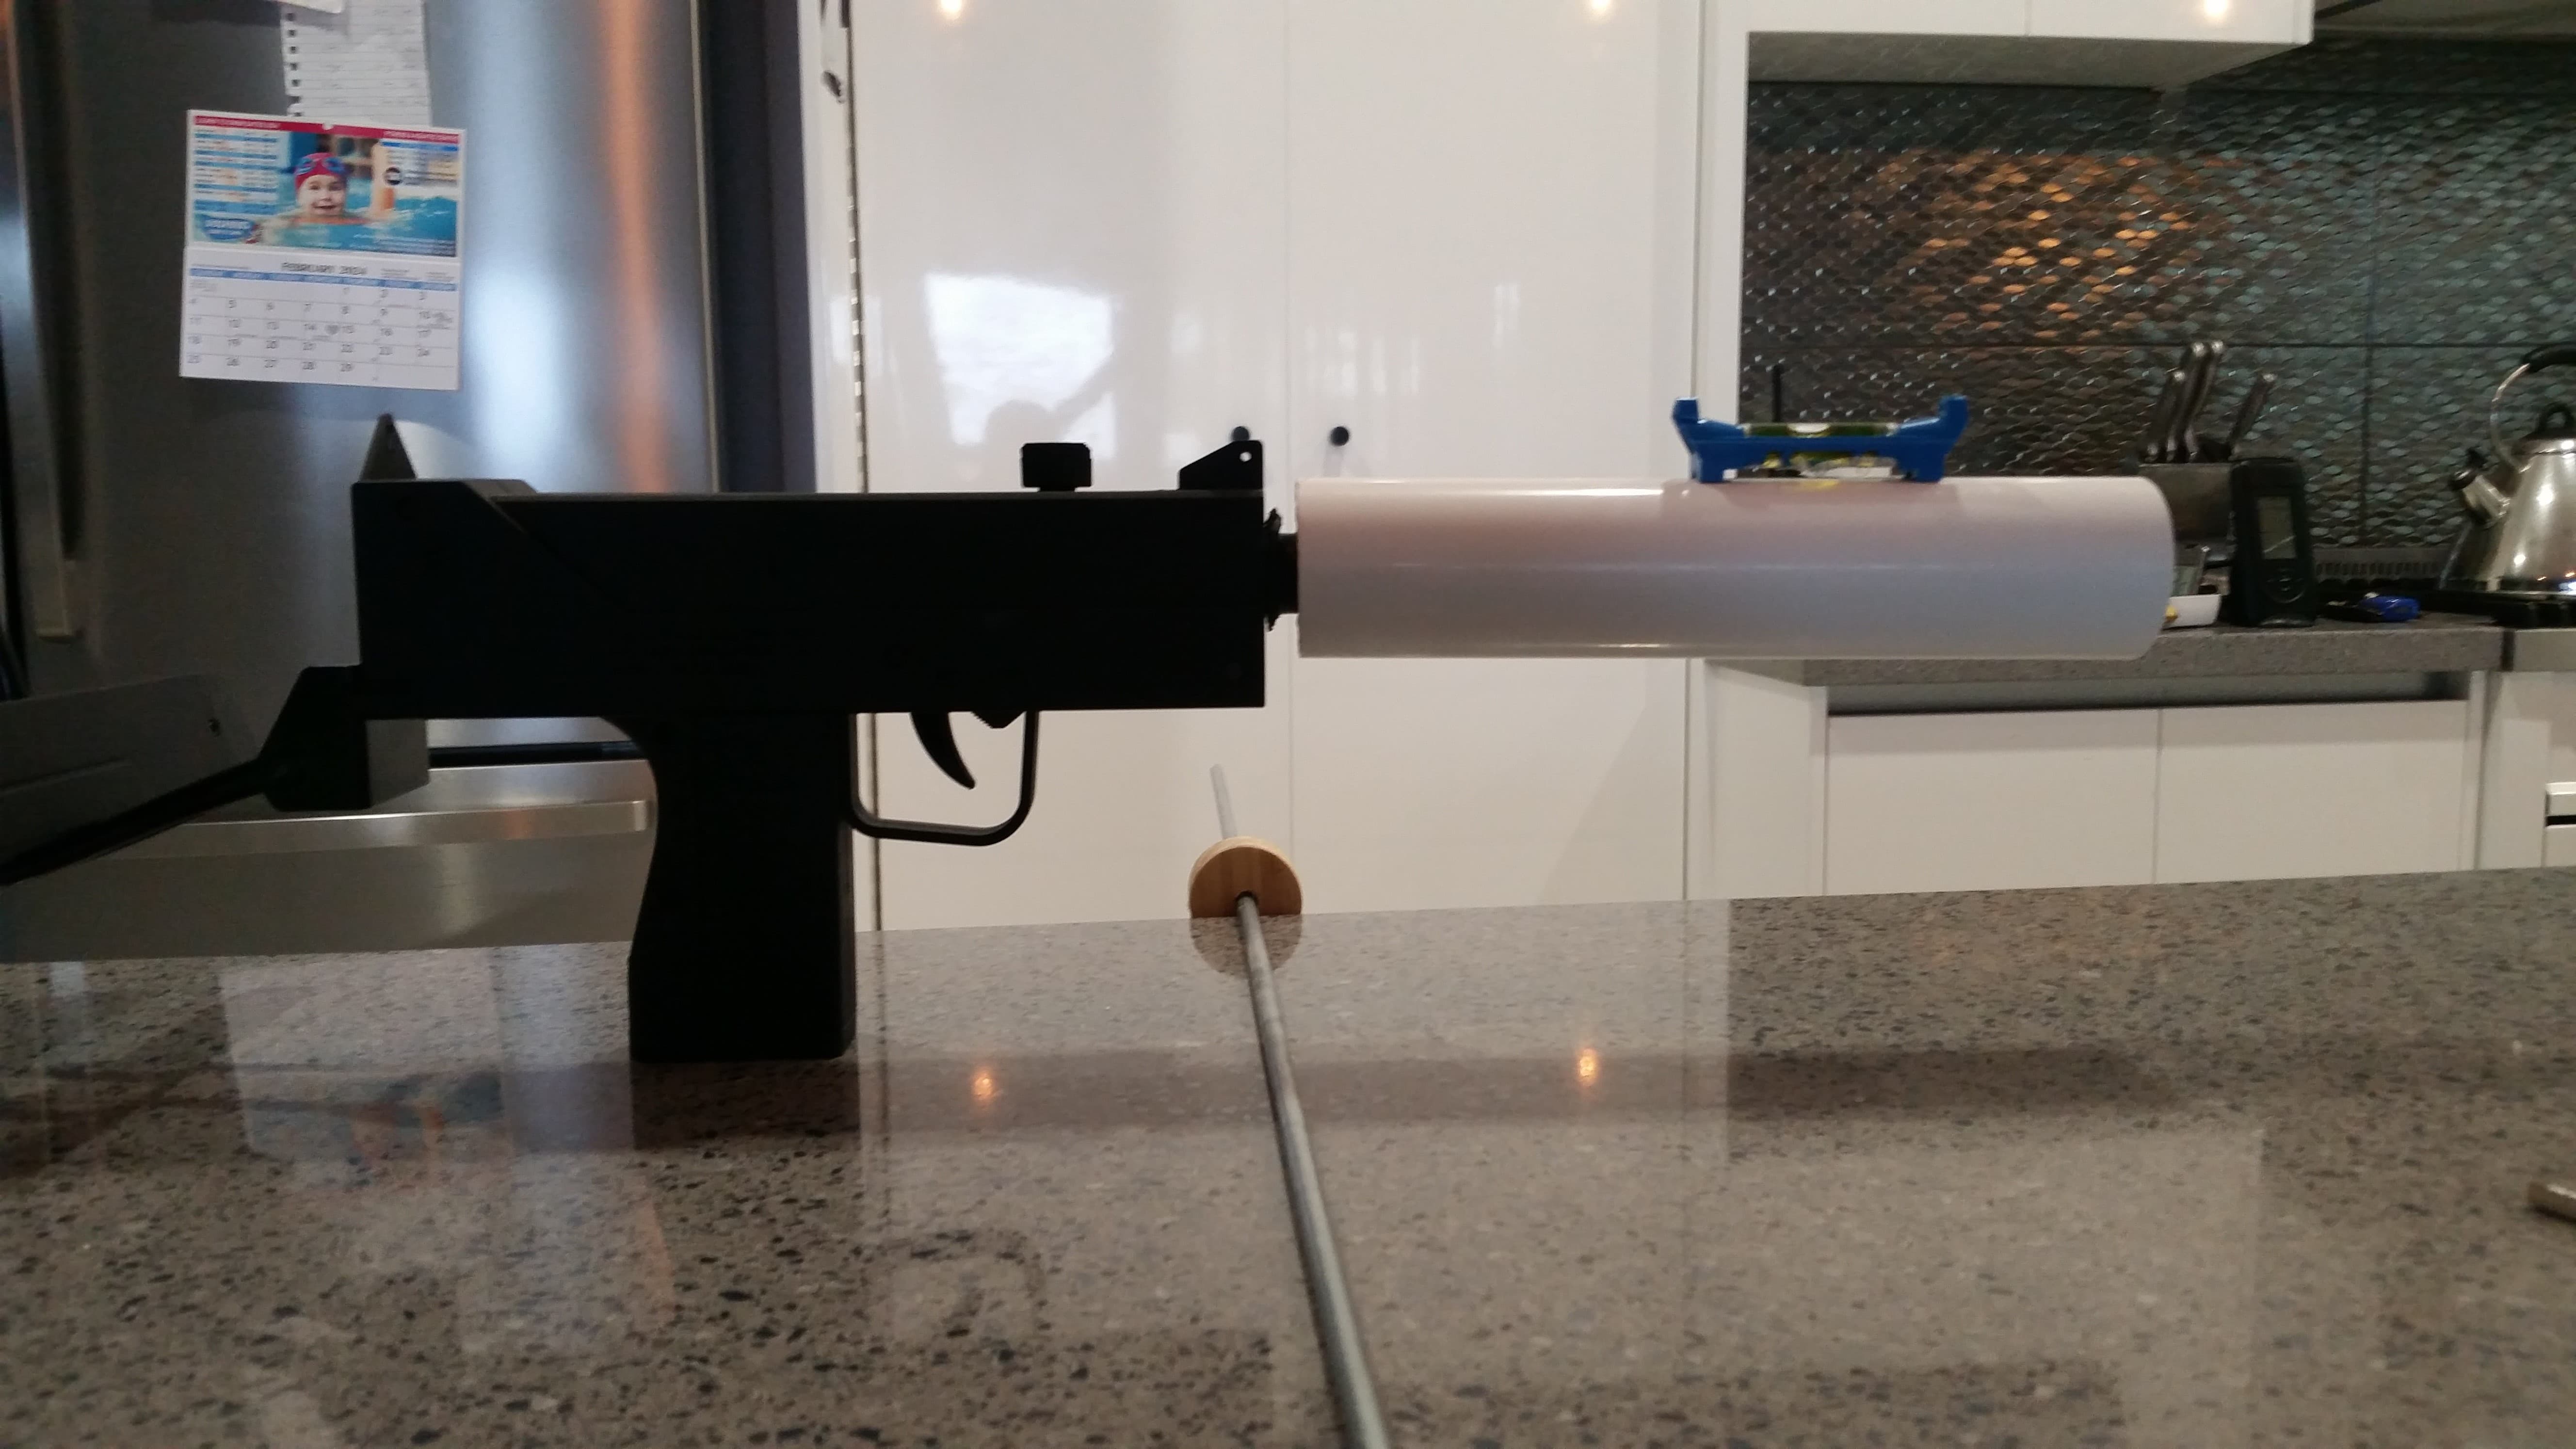
Ok, alignment time…
Lets get serious…!
Some graph paper will help.
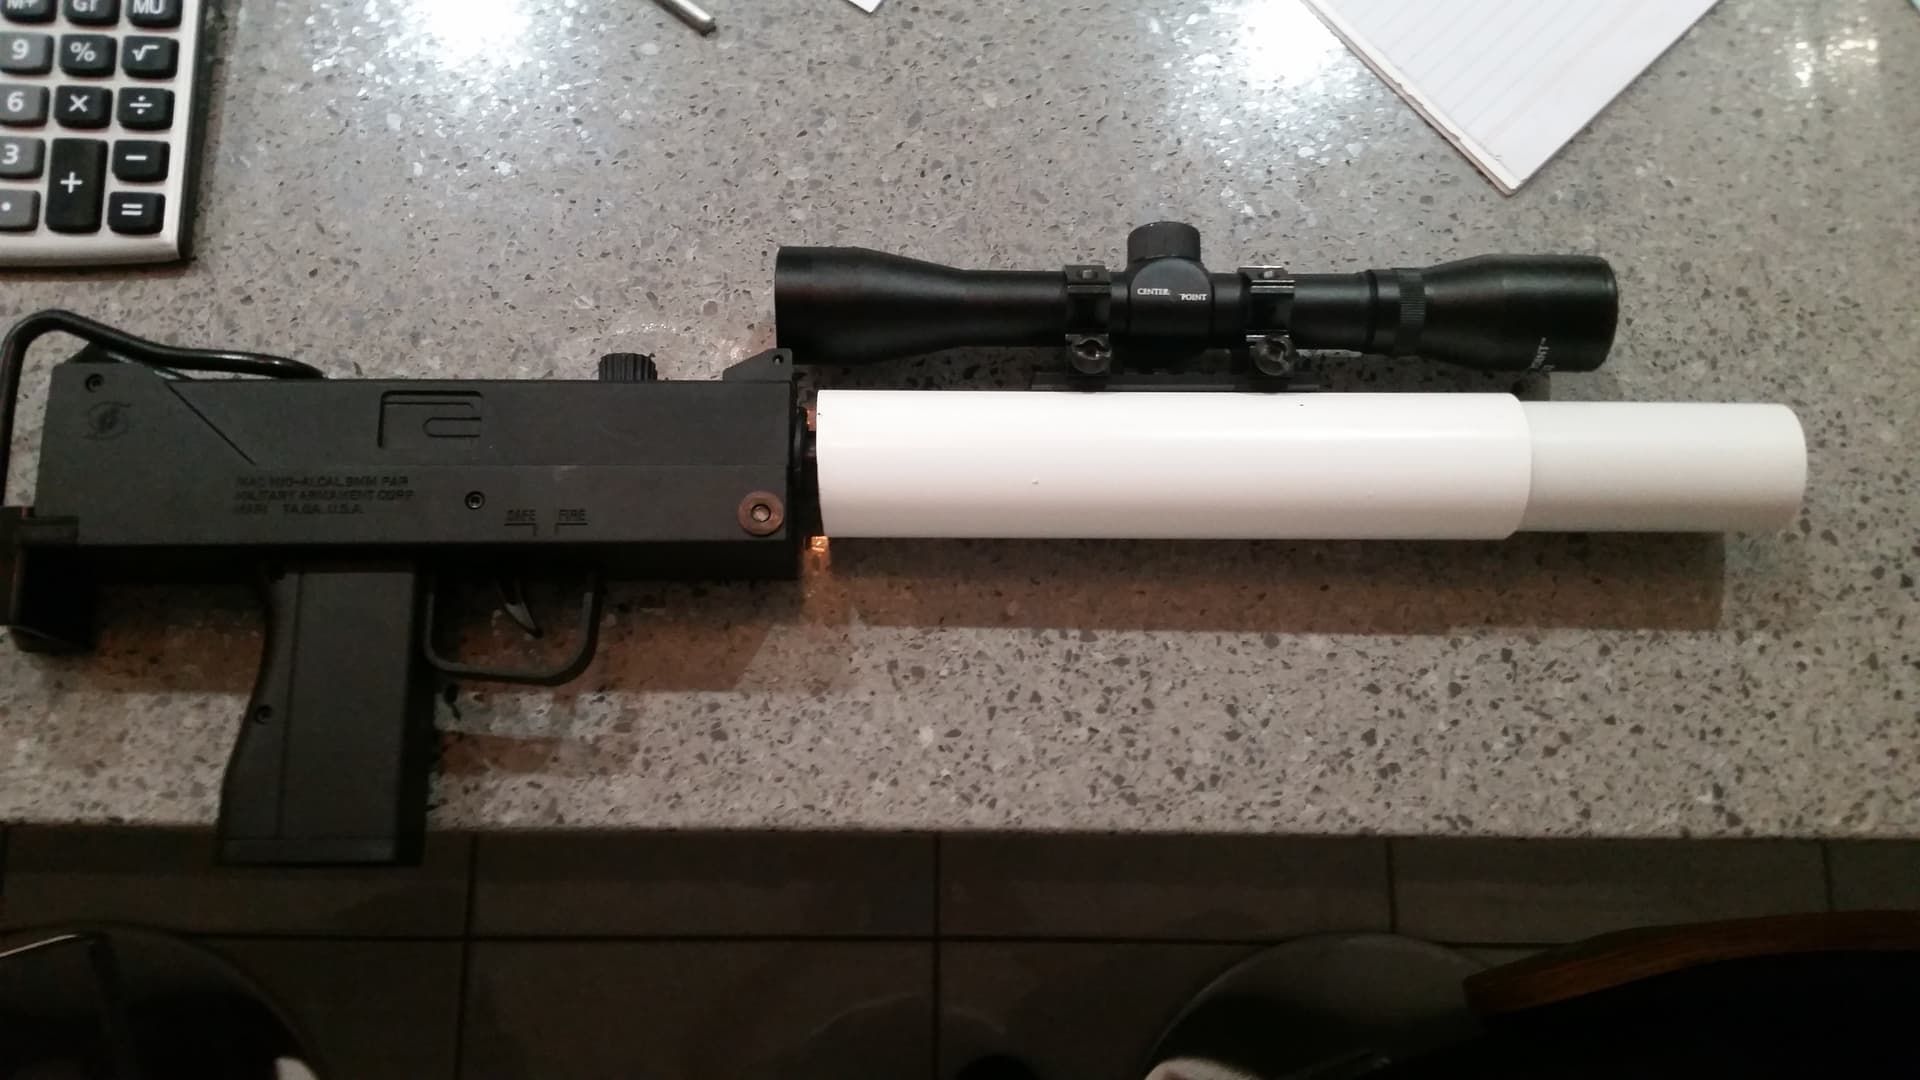
So, there is about 2mm of space, around the rear plug, and the pvc pipe.
Alignment needs to be as good as i can get it, to get gels through.
Long metal rod, inserts deeply into the barrel, and protrudes.
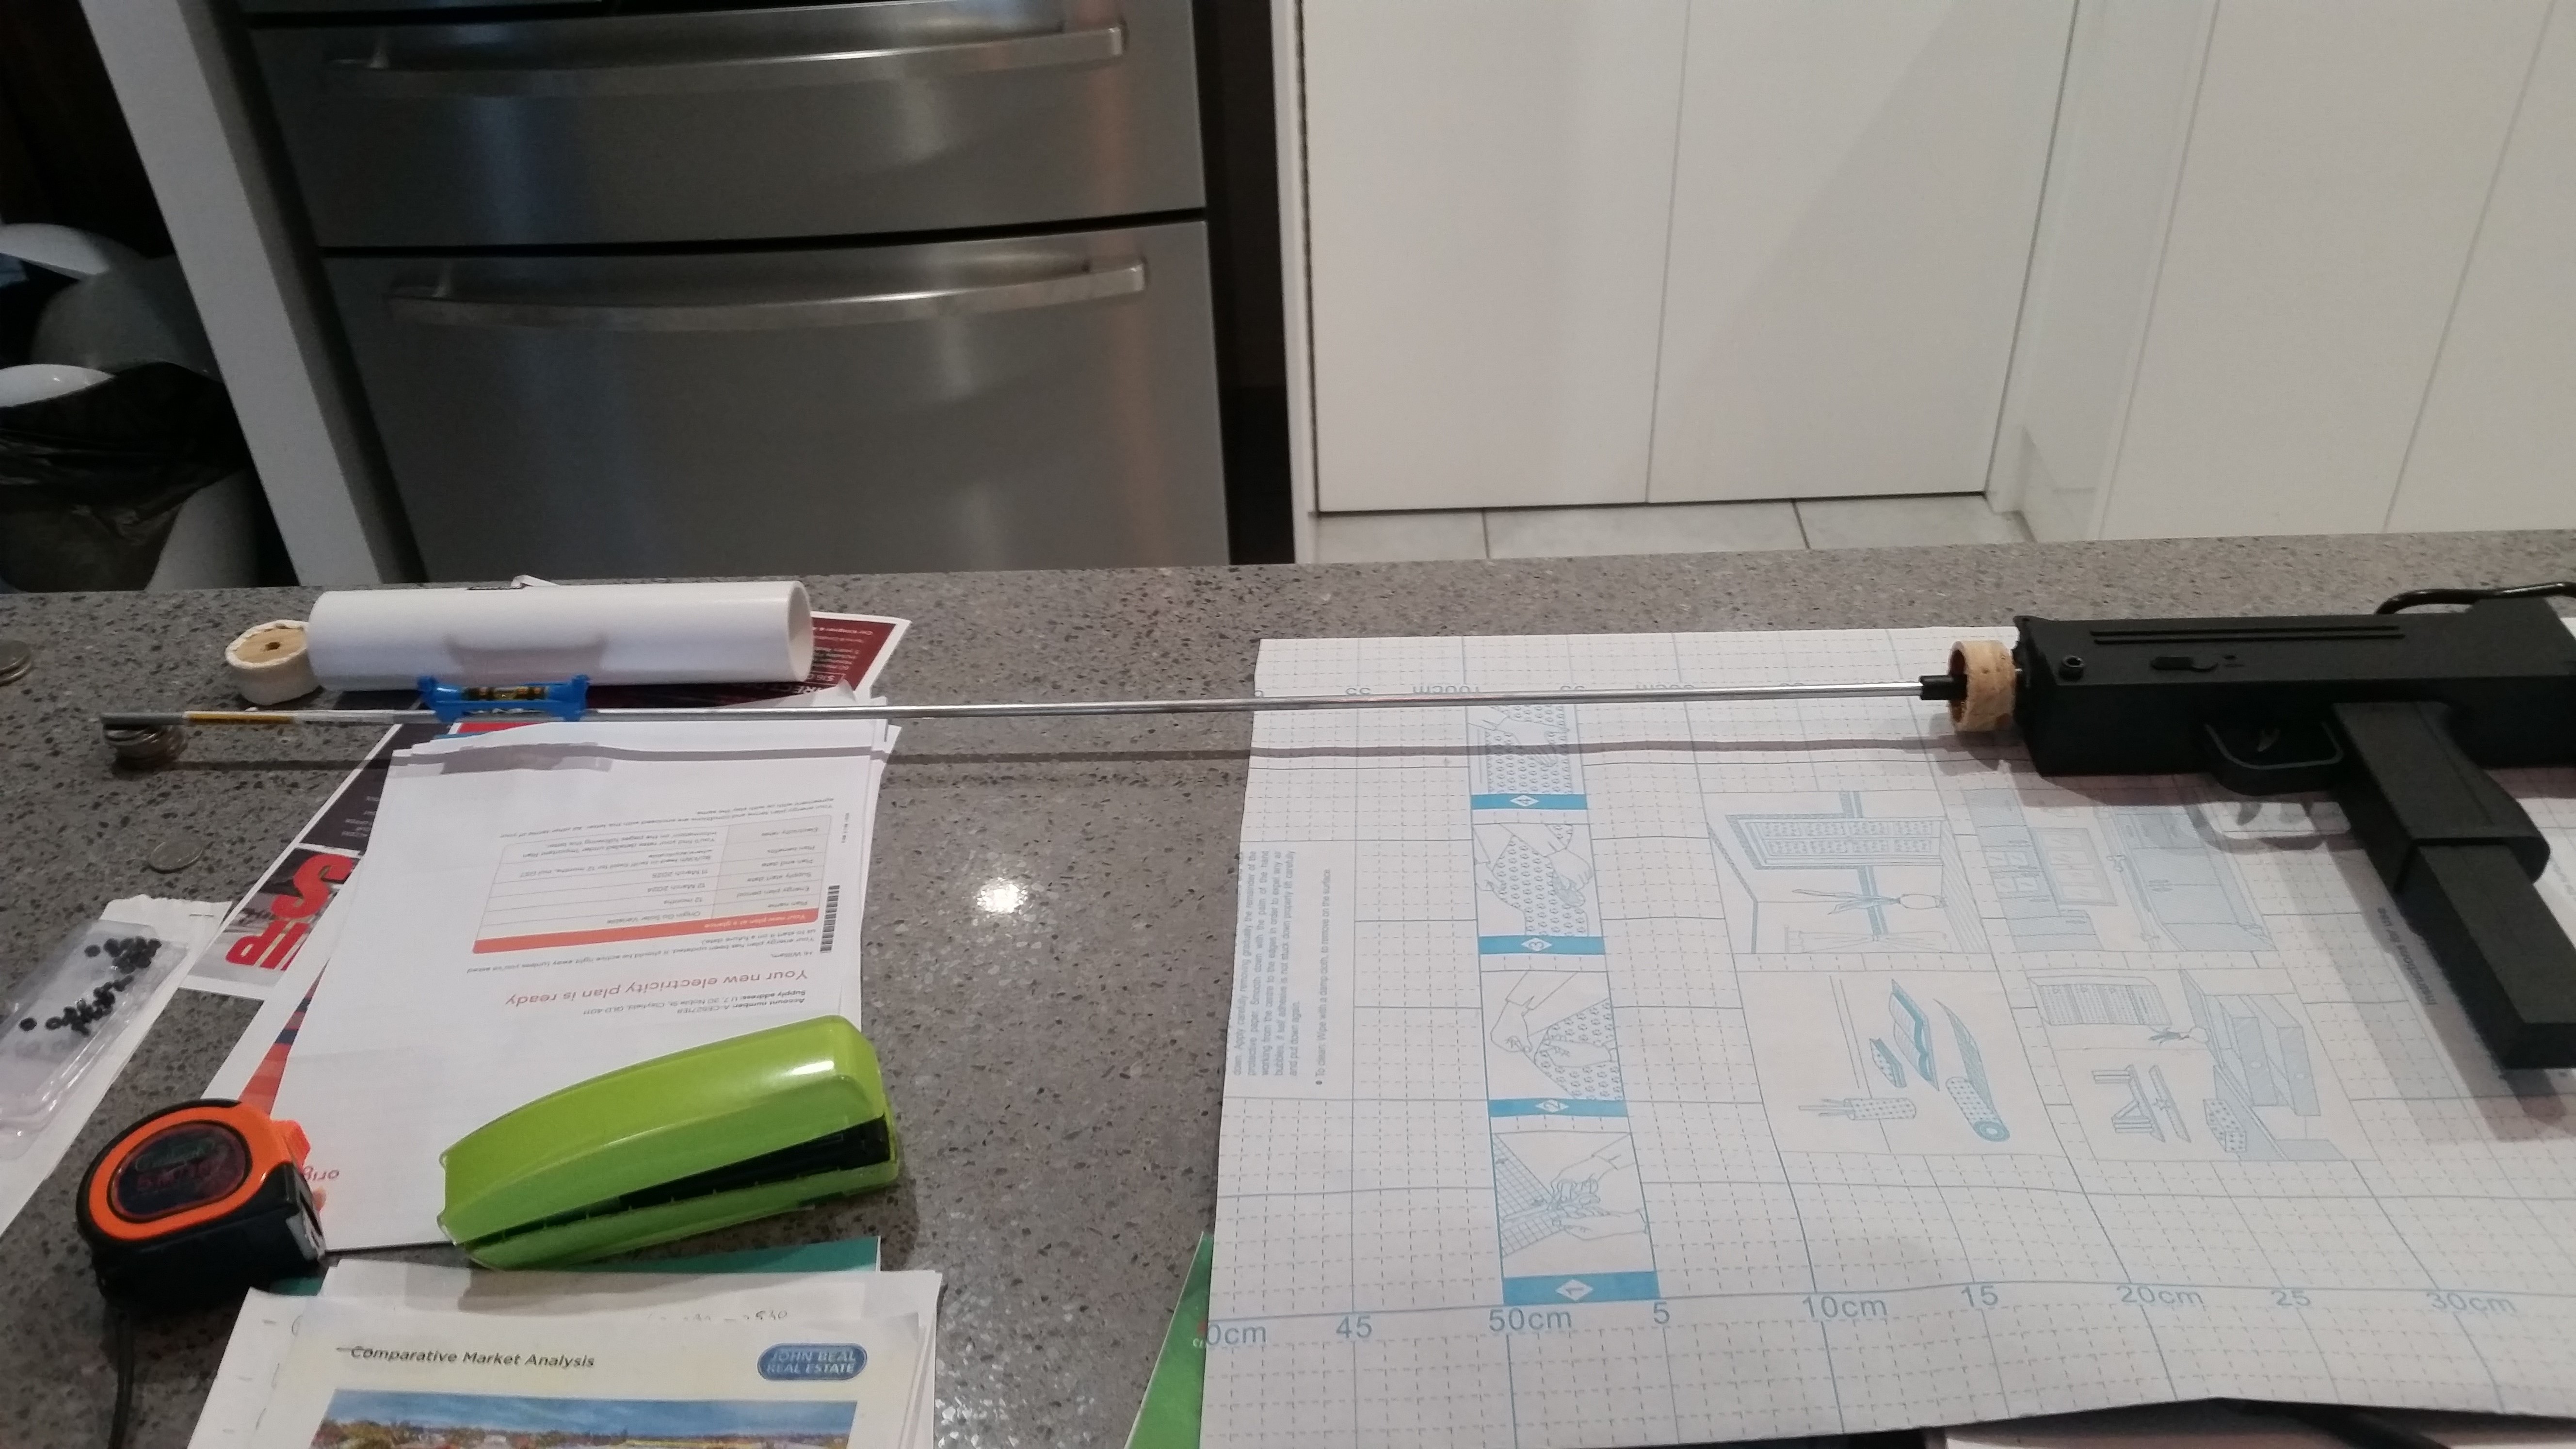
To maintain level over length, ive built up a stack of coins, at the end of the rod, to brace it and have run a spirit level over it…
The bunnings sausage will have to wait another day…
( Who am i kidding…its sunday , its raining, of course im having a sausage…!!)
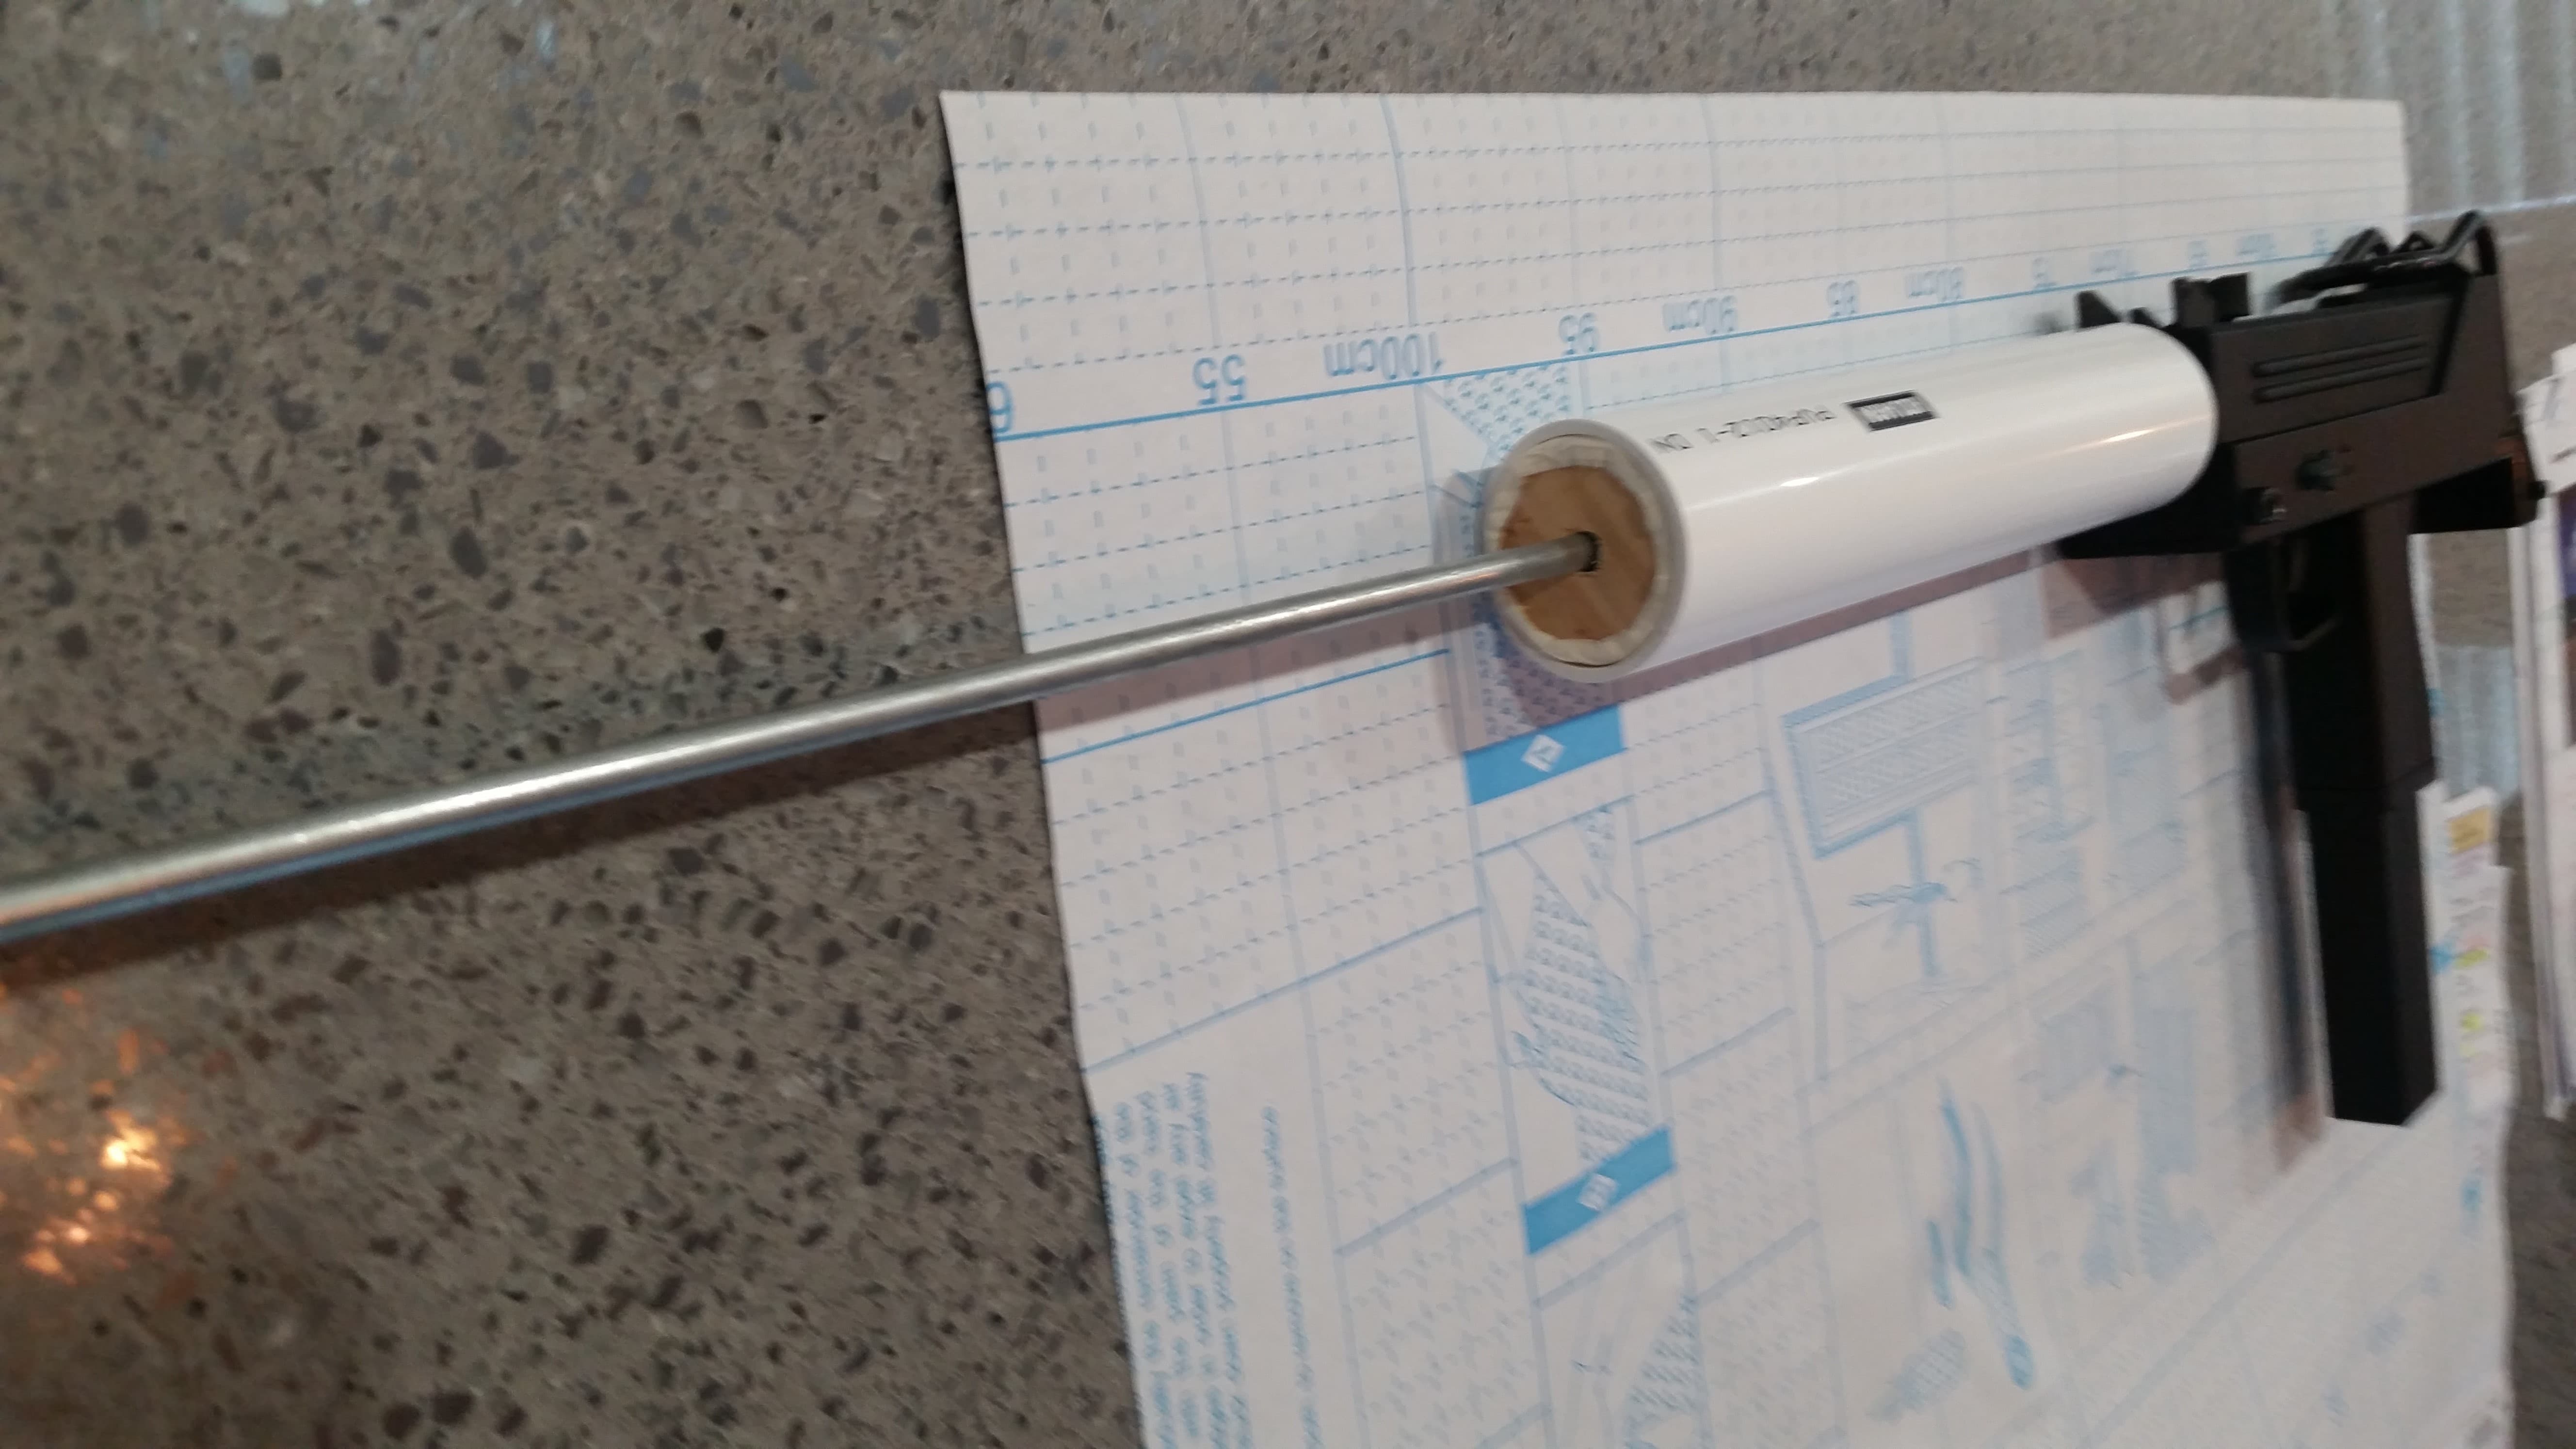
So, ive built up the the front (temporary aligning plug, to hold alignment while resin dries.) so its a tight fit in the pipe.
All of this , is to hold alignment of the pipe, onto the nut while that resin dries.
Then , fitting 2nd pipe is easy, it friction fits, so just make another smaller front alignment plug, for the 2nd smaller can…
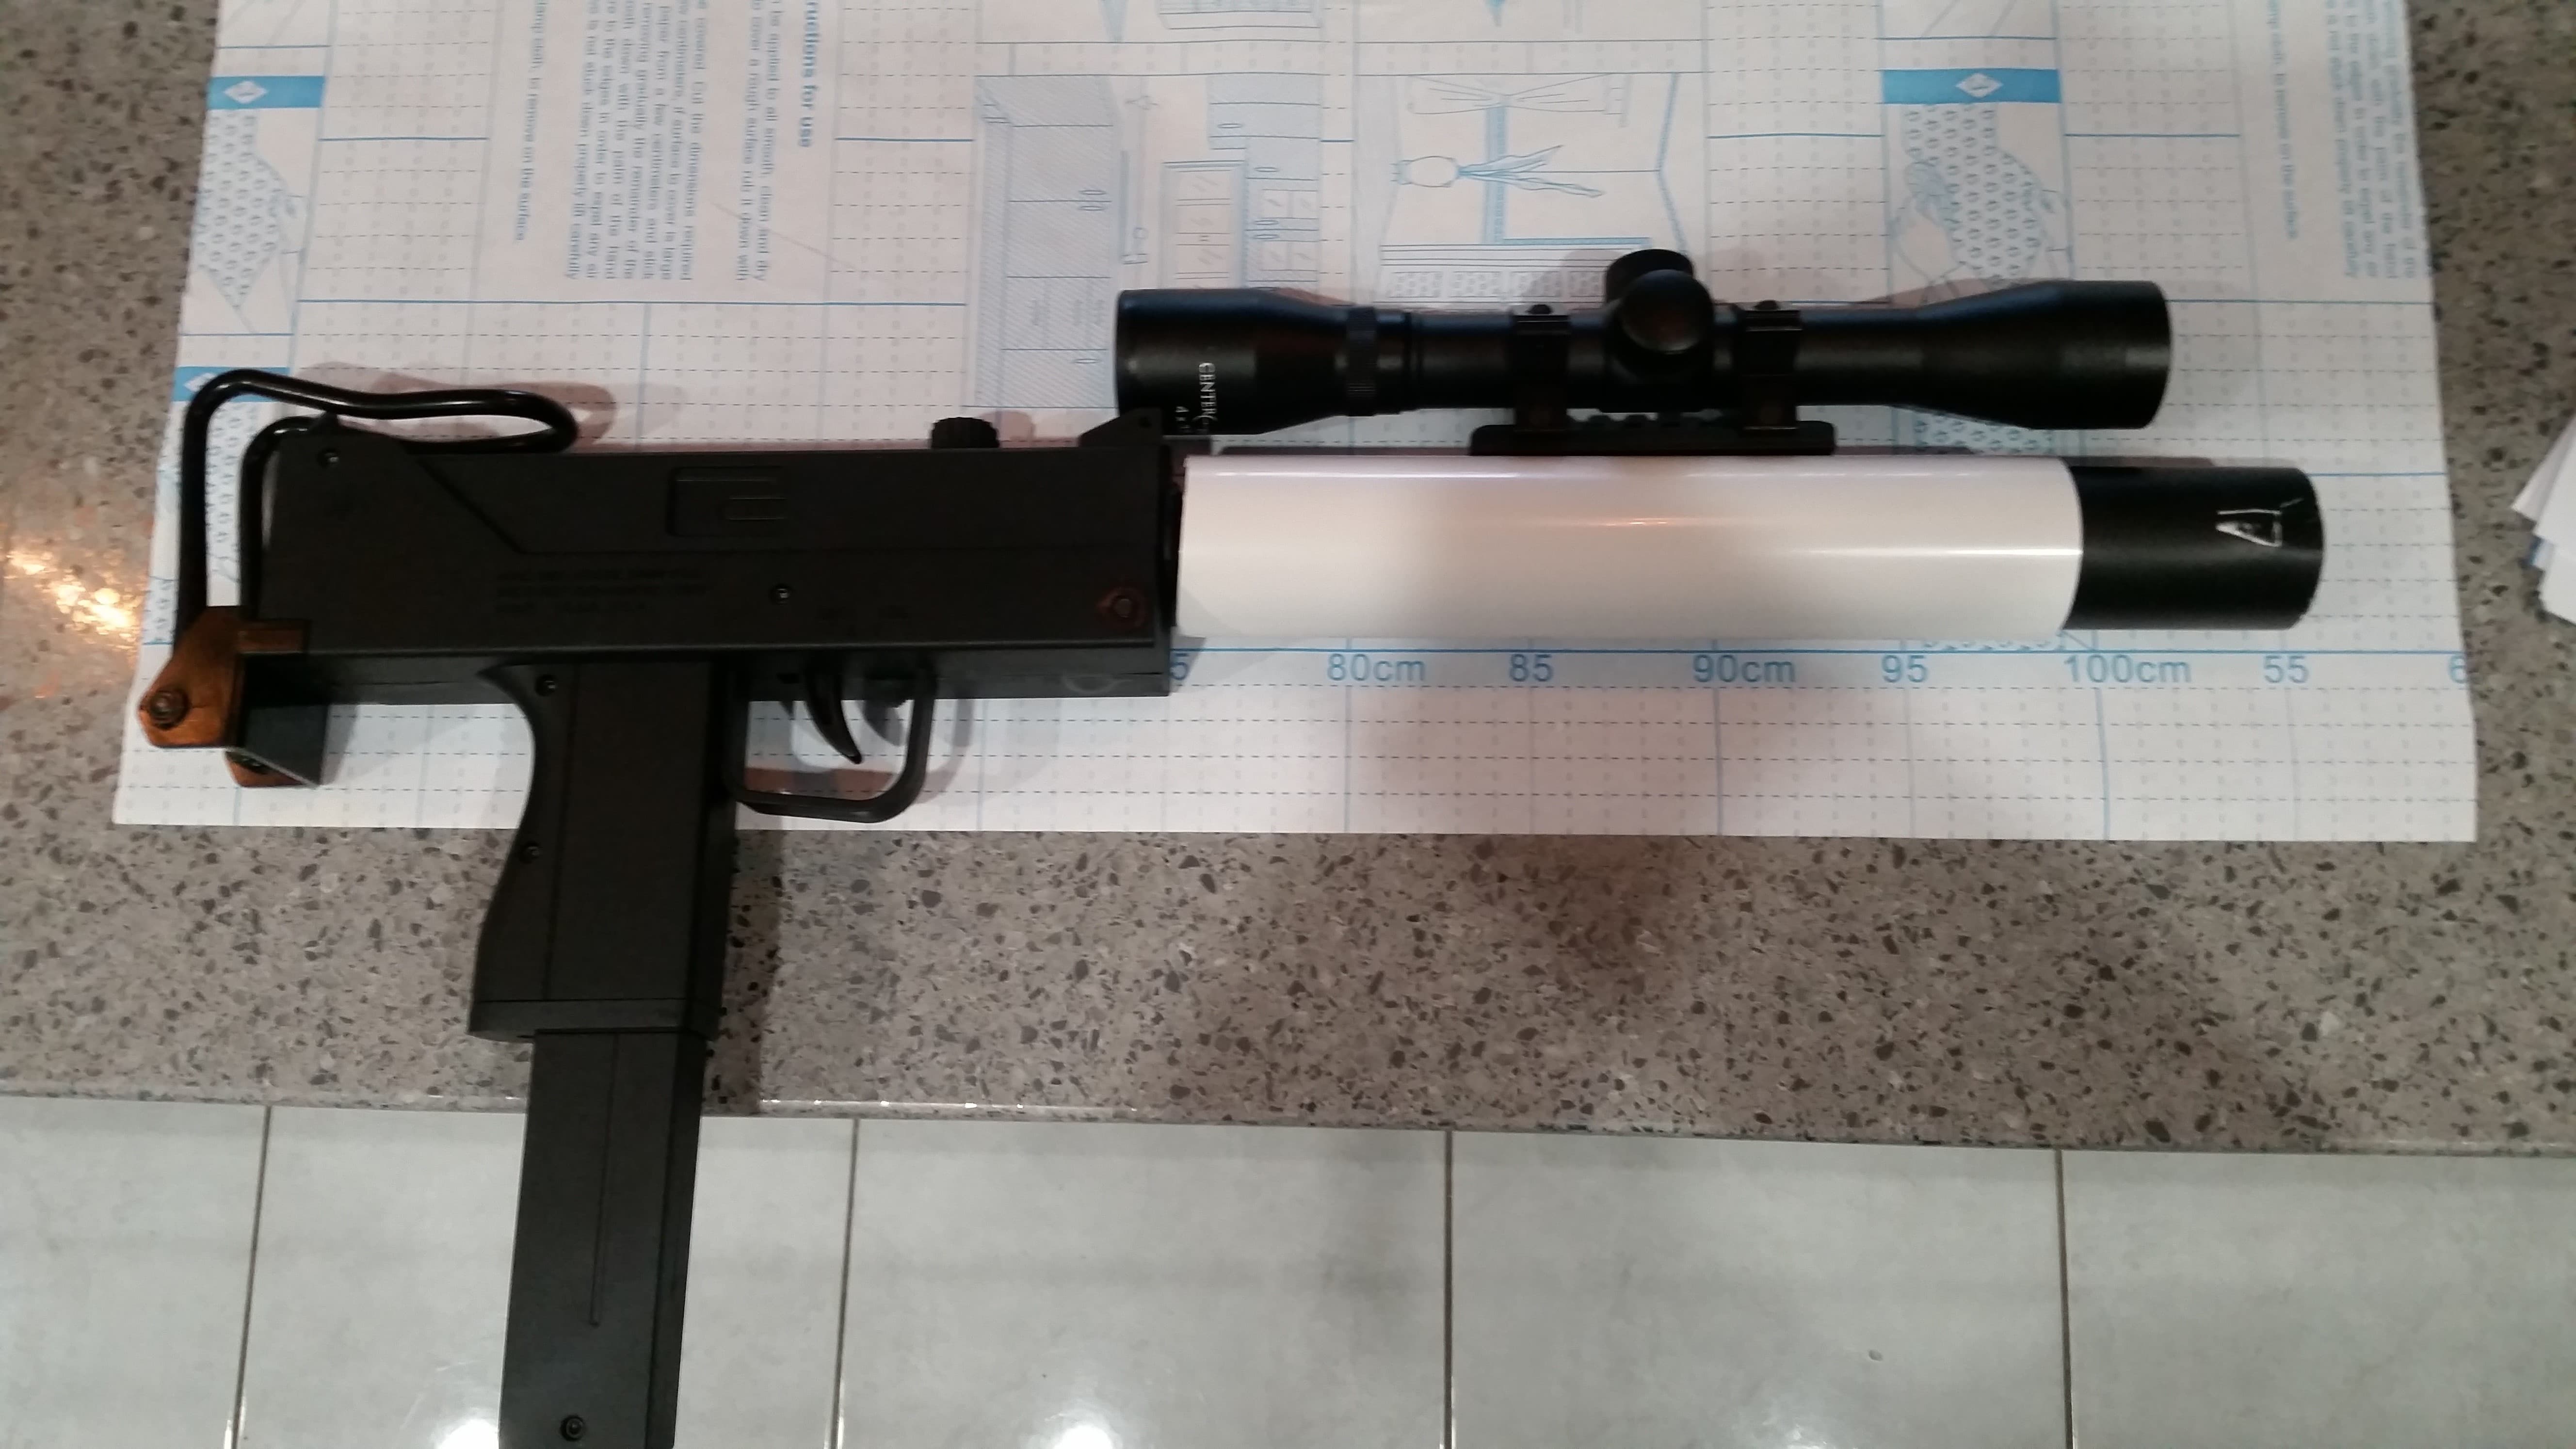
And, add the scope.
I’m working the next few days, so i’ll keep the updates coming, when i’m back…
1 Like
Near araldite disaster…
Messy stuff, got it on both sides, put them together…
All good.
Checked a few mins later, a lot had pooled/ dripped down, and formed a big blob, from under the pvc pipe, onto the paper…
Thankfully it had set enough, i was able to cut it away with a stanley knife.
when it got to a thin layer, it all peeled off, as one…
Very lucky, perfect time in the curing process, the pvc pipe is now spotless…
Never would have got it off, if it had set fully…
Looks like it’s coming together nicely ![]()
Alignment is absolutely essential when it comes to any type of replica, as there’s nothing that the human eye can recognise instantly than a misaligned barrel!
it wont be perfect, but hopefully close enough.
The tell will be, watching it as it screws on / off
pushed the PVC pipe, a little past the plug.
This will leave a little bit of room, to put some more araldite, into the top.
A bit more retention, and fill in/ level the gap.
Thats the theory anyway…bloody sticky, tacky crap…!! ![]()
![]()
1 Like
Ok…
its been several hours, my test resin blob is set very hard, felt brave enough, to gently unscrew and have a look.
So…its off, but by a little.
Should have used, a 2nd alignment plug, at the rear as well.
The front alignment plug did its job, but as the rear was setting, it slightly slumped to one side. A 2nd alignment plug at the rear , say a 1/3 of the way in, would have stopped it.
On the blaster, it is still pretty good…
slight bodily offset, to one side…
Spirit level, is pretty right…
Dammit, why do i have to be OCD obsessive…!?? ![]()
![]()
I’ll see how it ends up , after setting properly, but my conscience is telling me to make another alignment plug, redo the base nut, and start again…
Damn you, OCD…!! ![]()
![]()
![]()
Life IS pain.
The suffering, is optional…!! ![]()
![]()
I’ve already talked myself, into re-doing it.
I’ll use this one, as a trial run.
The front can friction fits, so i’ll cut a front pipe, push it in … then blue tac the scope on.
Lets see, if it can take the weight overnight, and if it all holds up…
two kurt russell blasters, in one shot…!!
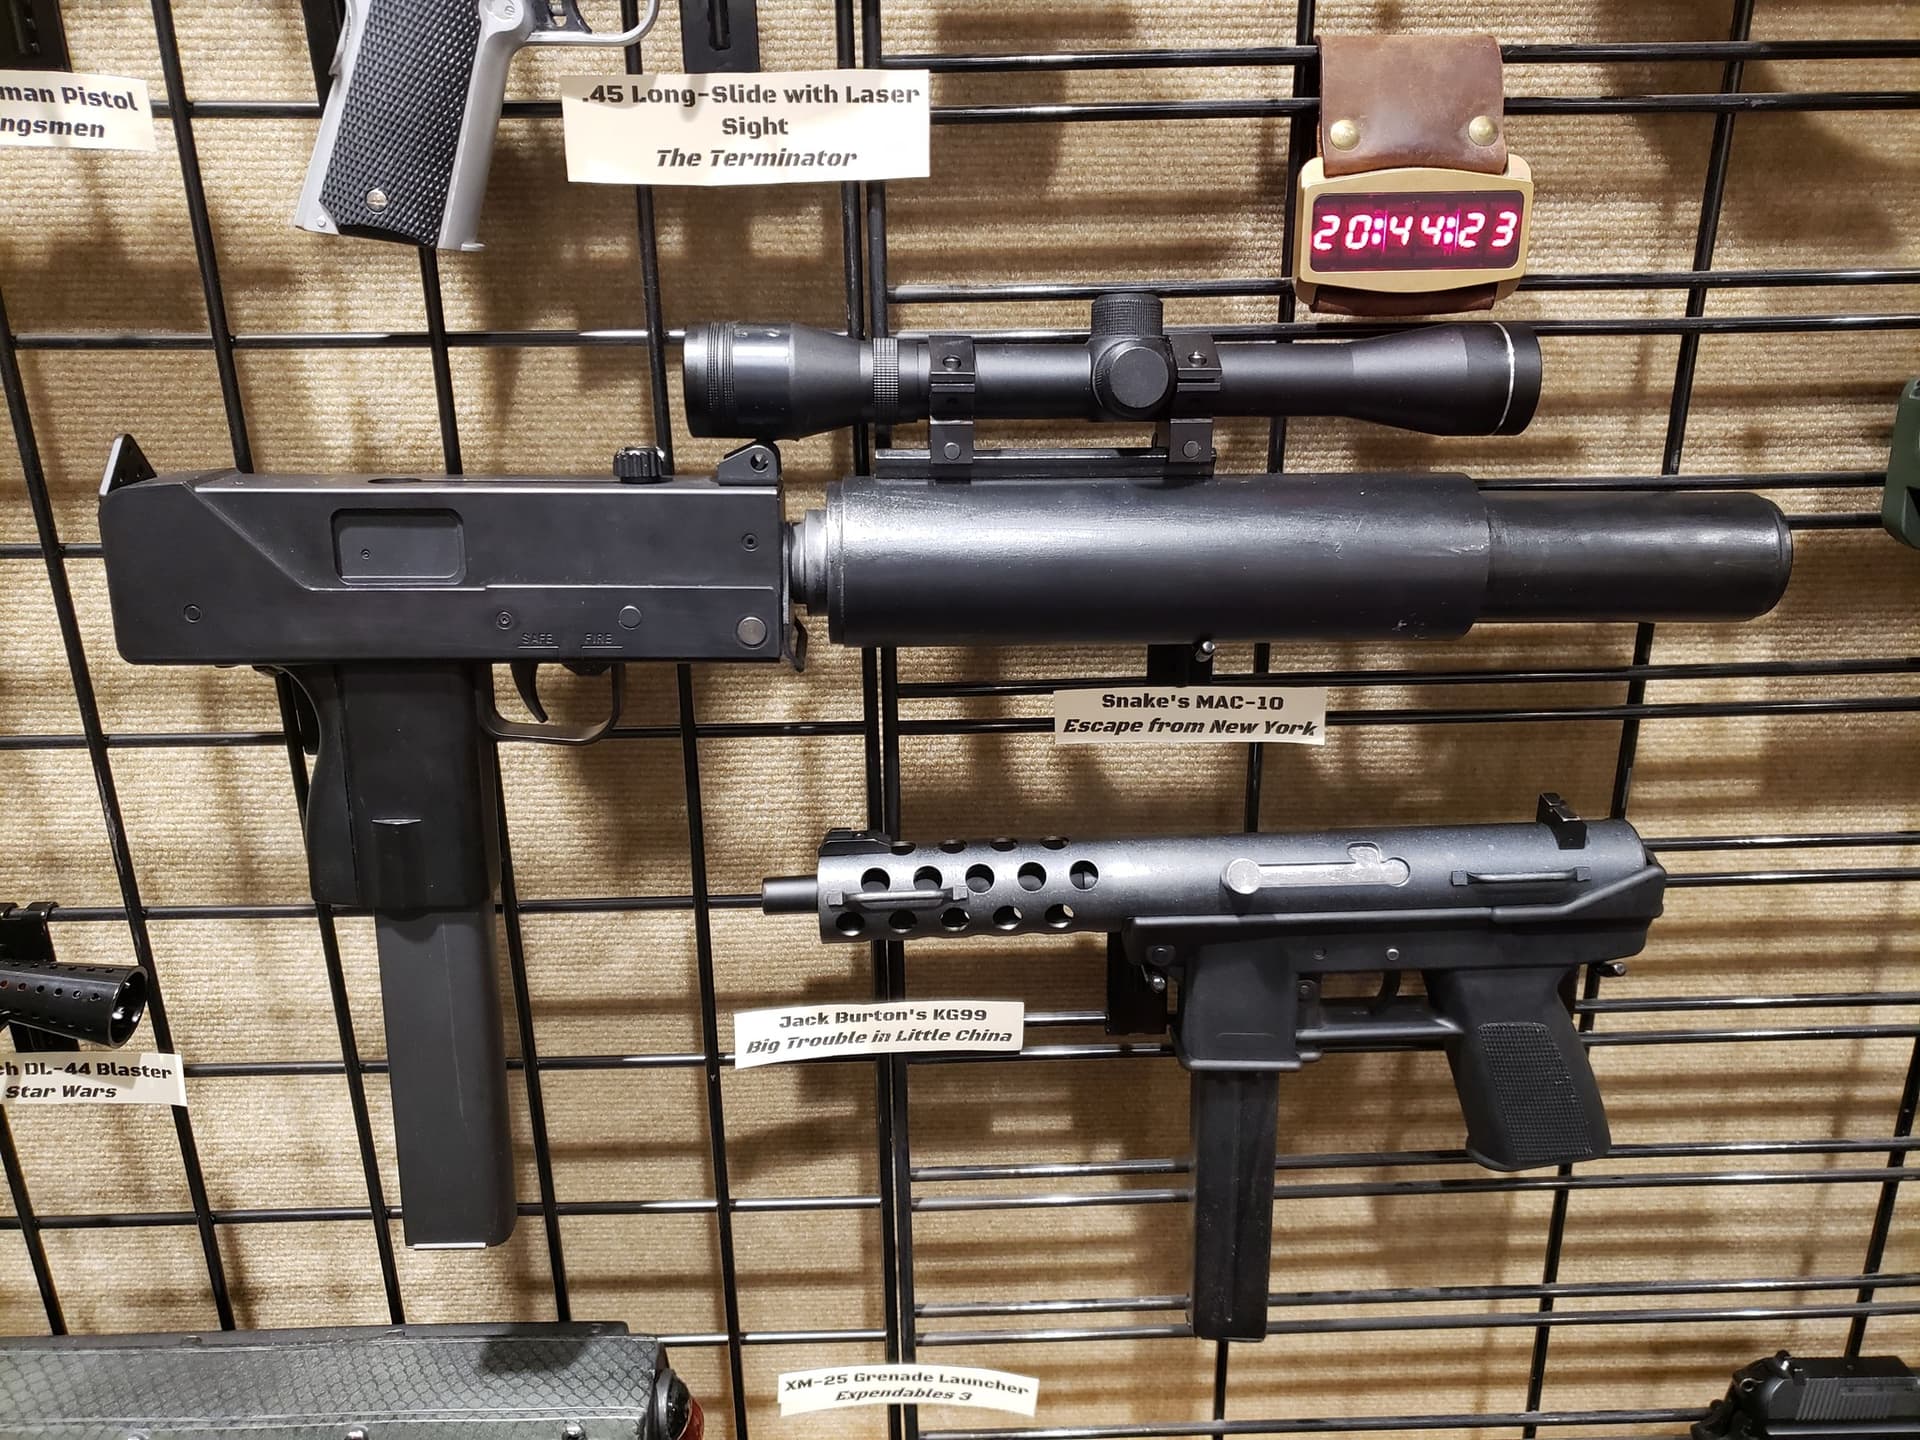
Im tempted to try a Tec-9, for a a/soft import, for my US trip.
I’ll have to see what qld police reckon, about importing shells…
This is AEG, GBB would be harder to modify…
I must admit that the KG-9 is my favourite little awesome looking piece of furniture ![]()
It’s so clean and nasty looking all combined nicely into a pretty tough looking little package ![]()
Doesn’t look over the top, appear like a little toy or have heaps of crap hanging off of it…… it’s simply a menacing looking bit of gear that would have anyone you point it at suddenly giving you their completely undivided attention!
We all are, BME… it’s a curse. ![]()
Finished…!!!
And, by that, i mean time to start again…!!
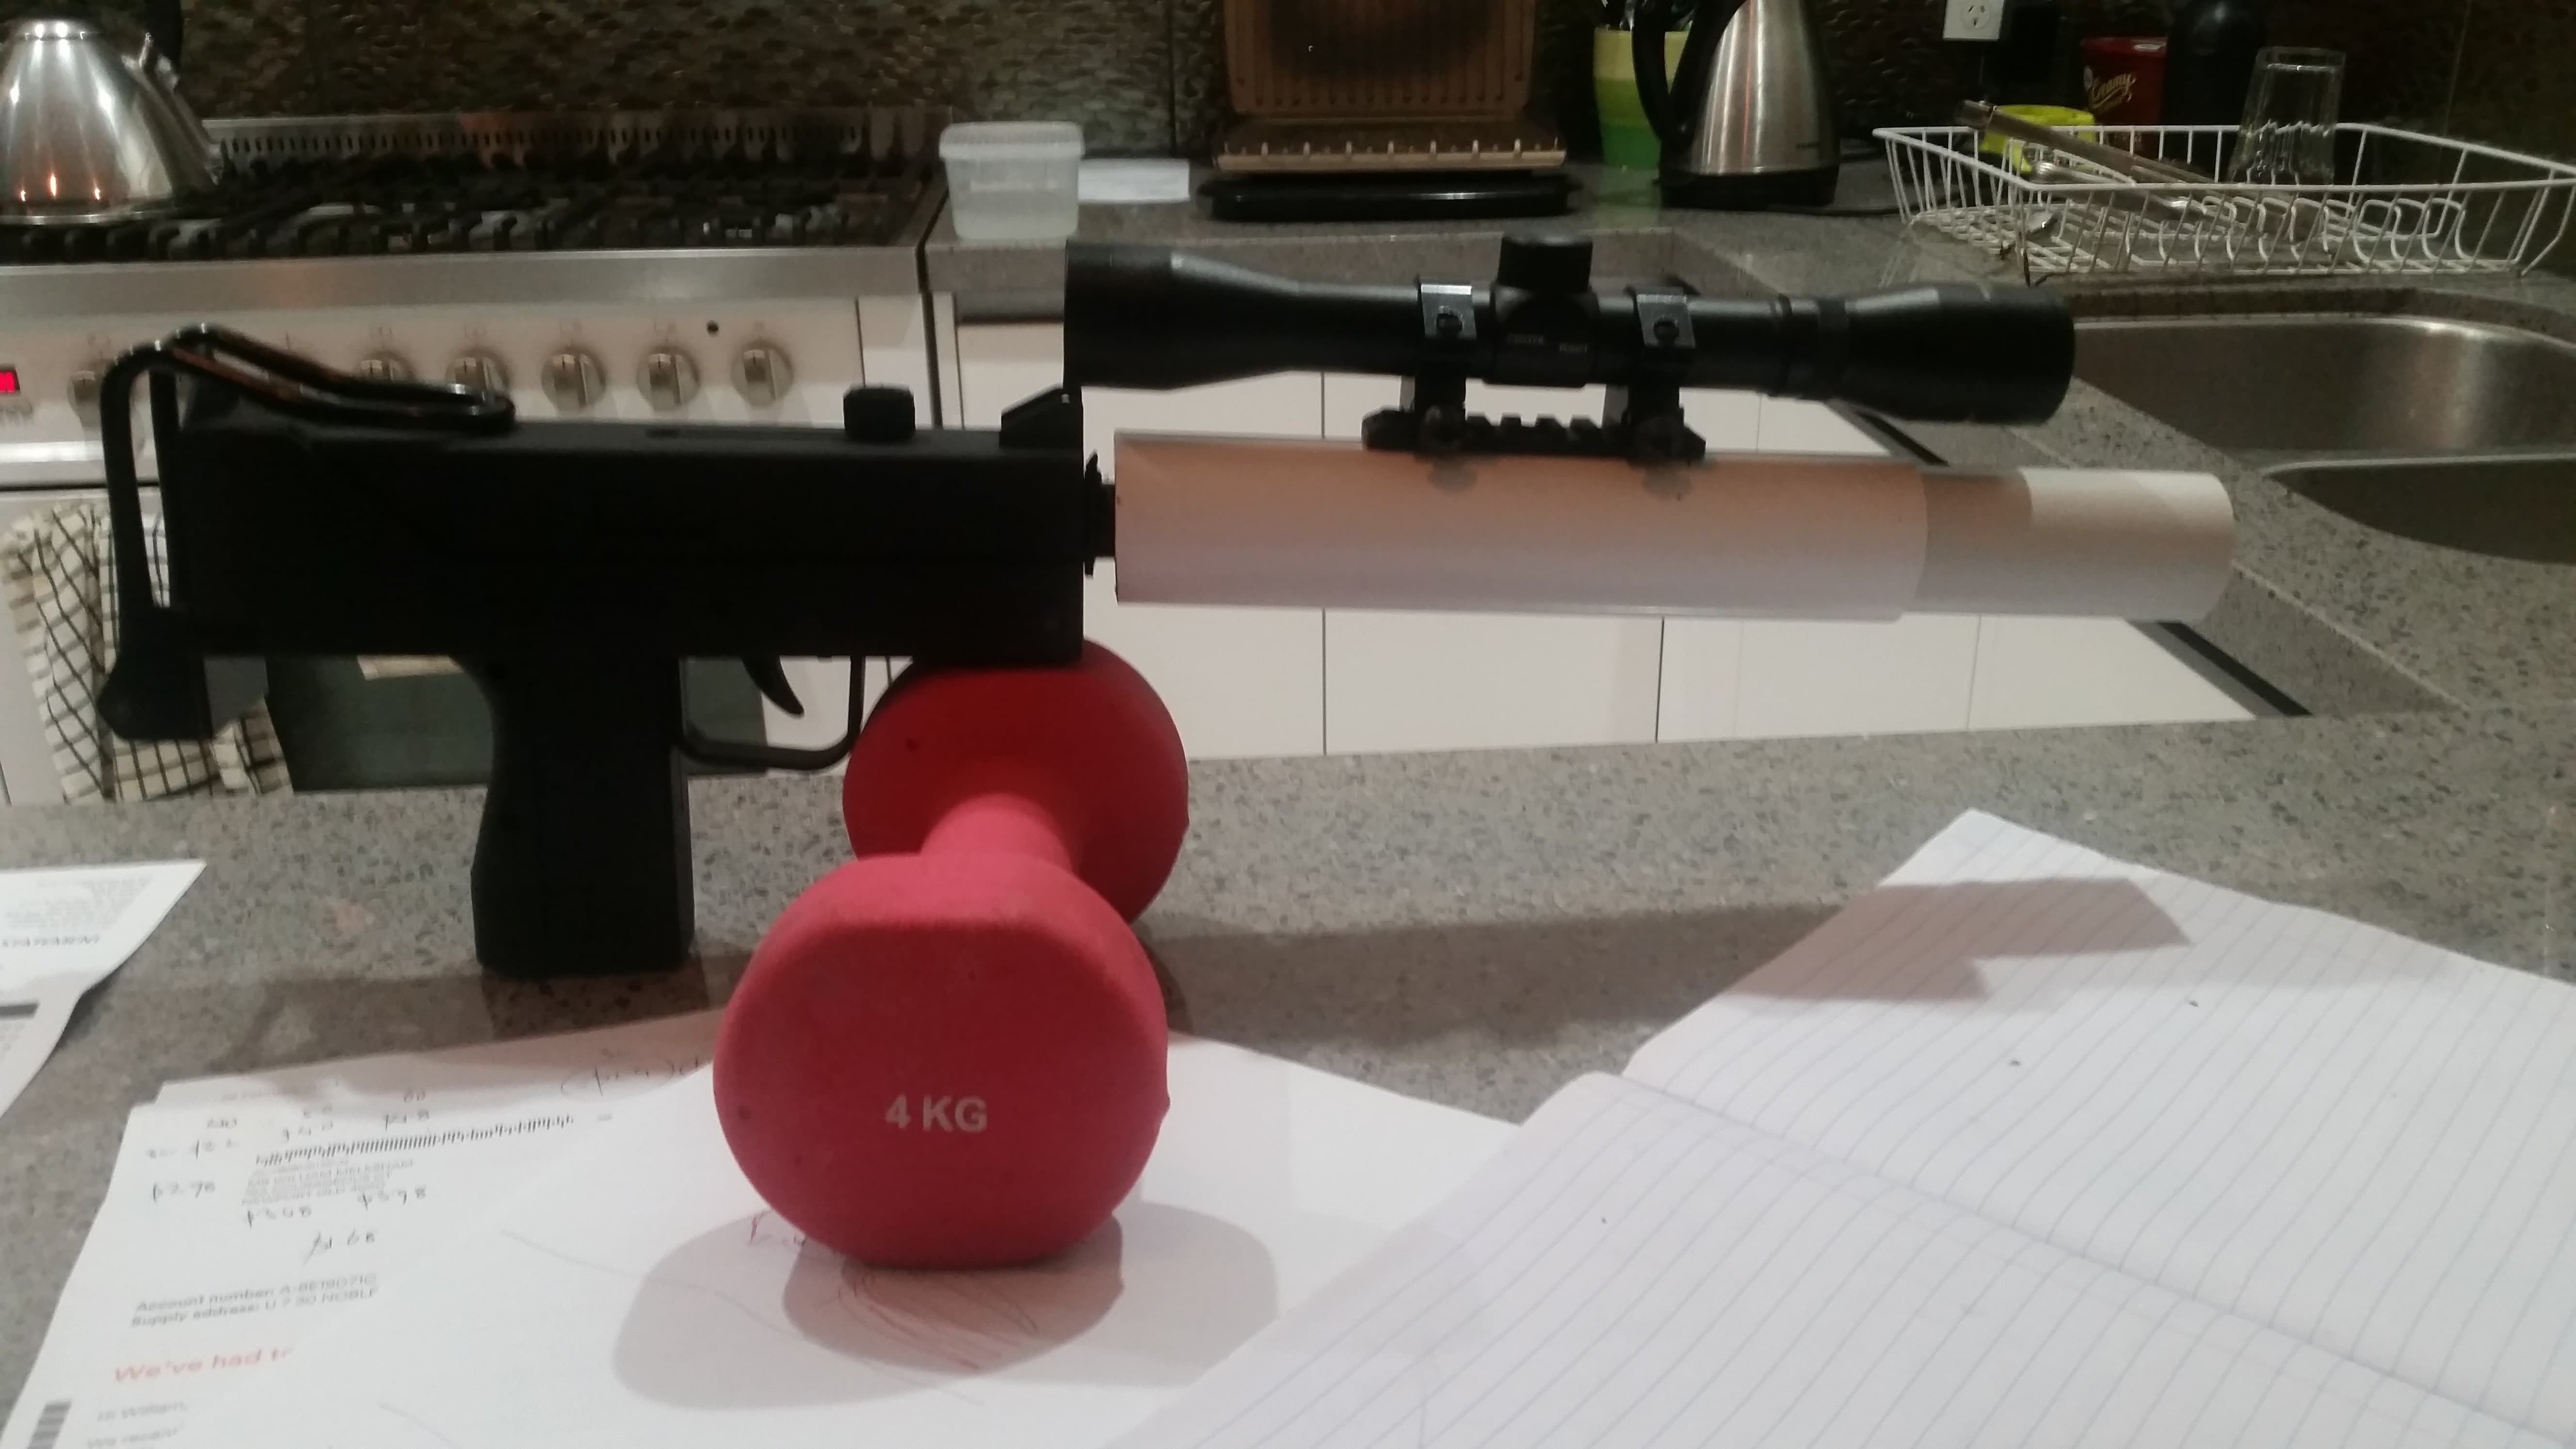
Nuts dried, scope drilled and mounted, front can friction pushed in.
I dont need to leave it overnight to see a few things…
-
there is some droop, with the weight.
This is not unexpected, its not a lot, but noticeable. ( thanks OCD!!)
Fix: when doing the new alignment rings, i will drill the front hole slightly lower, to angle the front up slightly. This will allow for some droop. -
No wild UNSUPPORTED rapid, swinging motions. Holding blaster one hand, suppressor with the other is ok, but no wild single handed, rapid swinging motions. Support the weight.
-
I reckon the resin will hold it. For long term static display, probs best to have a little something to support the can weight…
-
the scope doesn’t touch the front sight.
I wanted it to, to support the weight, but it wont, unless i add material of some sort…
So, time to start again, and get the alignment right.
I’ll shorten the front can, a little bit too.
Drilling the scope holes, slightly offset to the mount holes, allows for sideways screwing in. There is just enough meat for the pvc, for the screws to self tap, and make their own path / create retention.
Its taken a bit of mucking around to get here, time to do it all again…!! ![]()
![]()
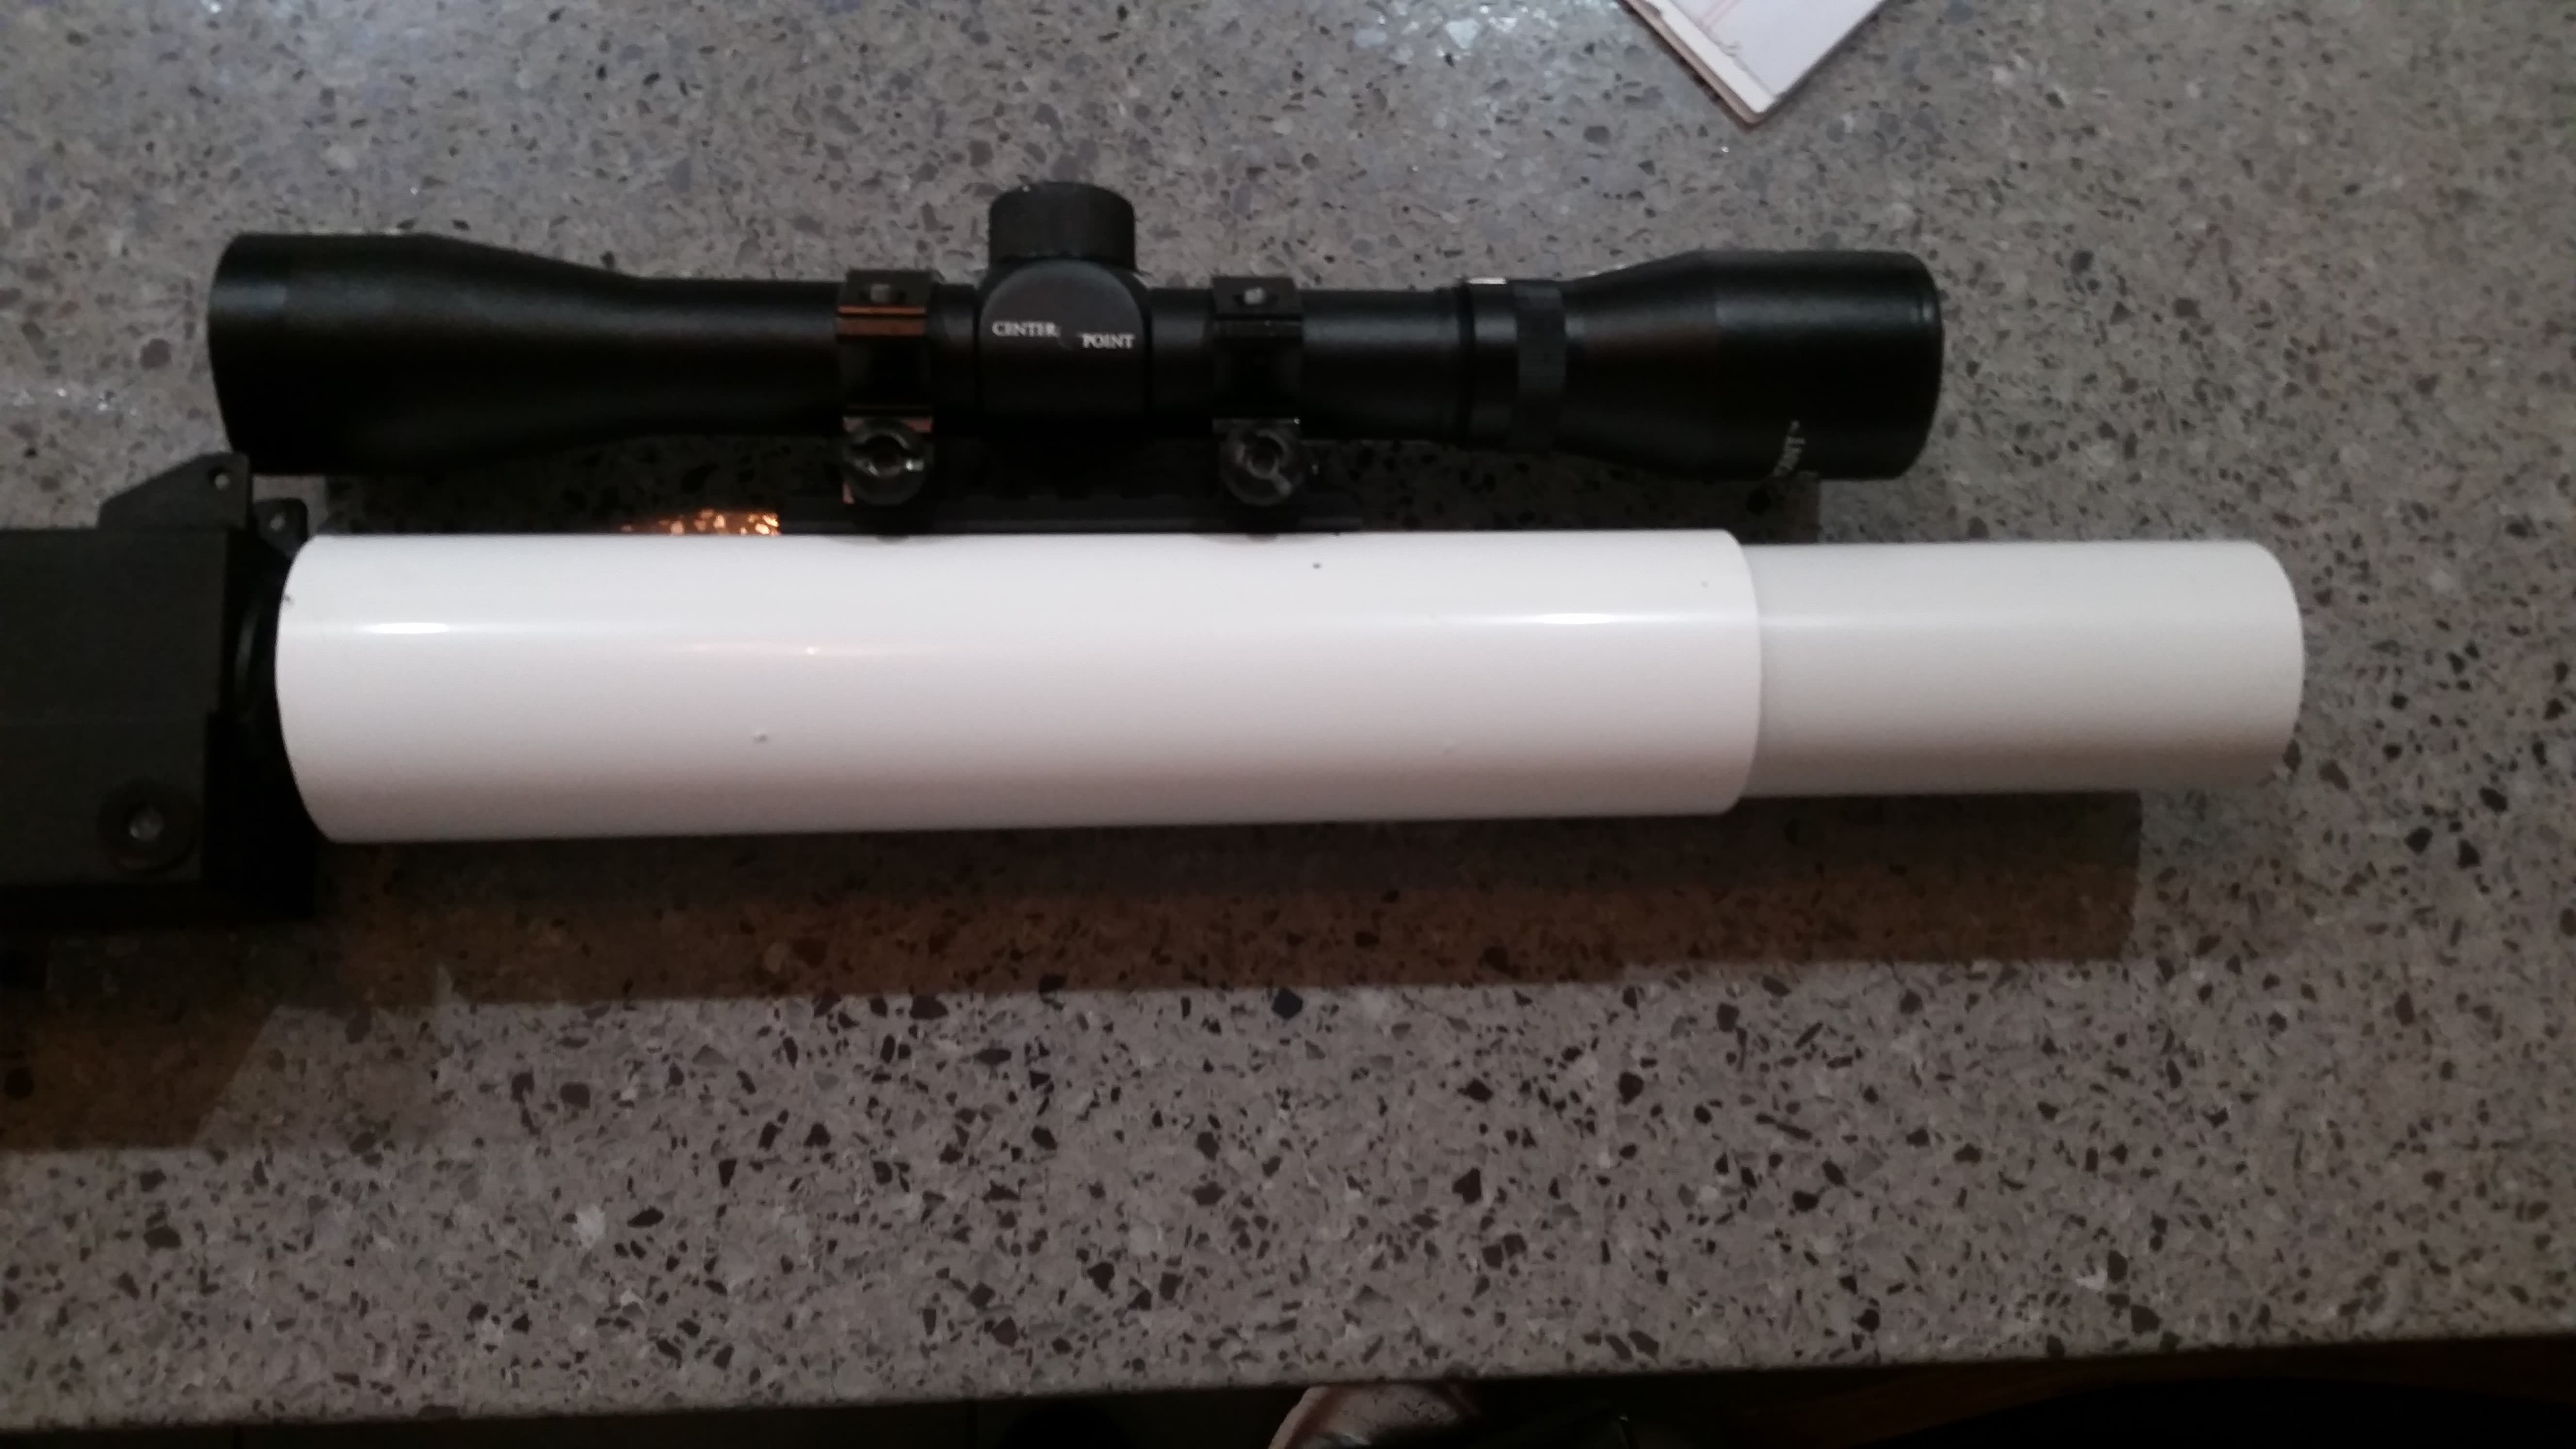
Front can could be a little shorter…
This shot is slightly better.
Down lower, flat shot, better contrast.
And, added some coins, to the top of the weights, to level the blaster properly…
The alignment rod, worked pretty well…
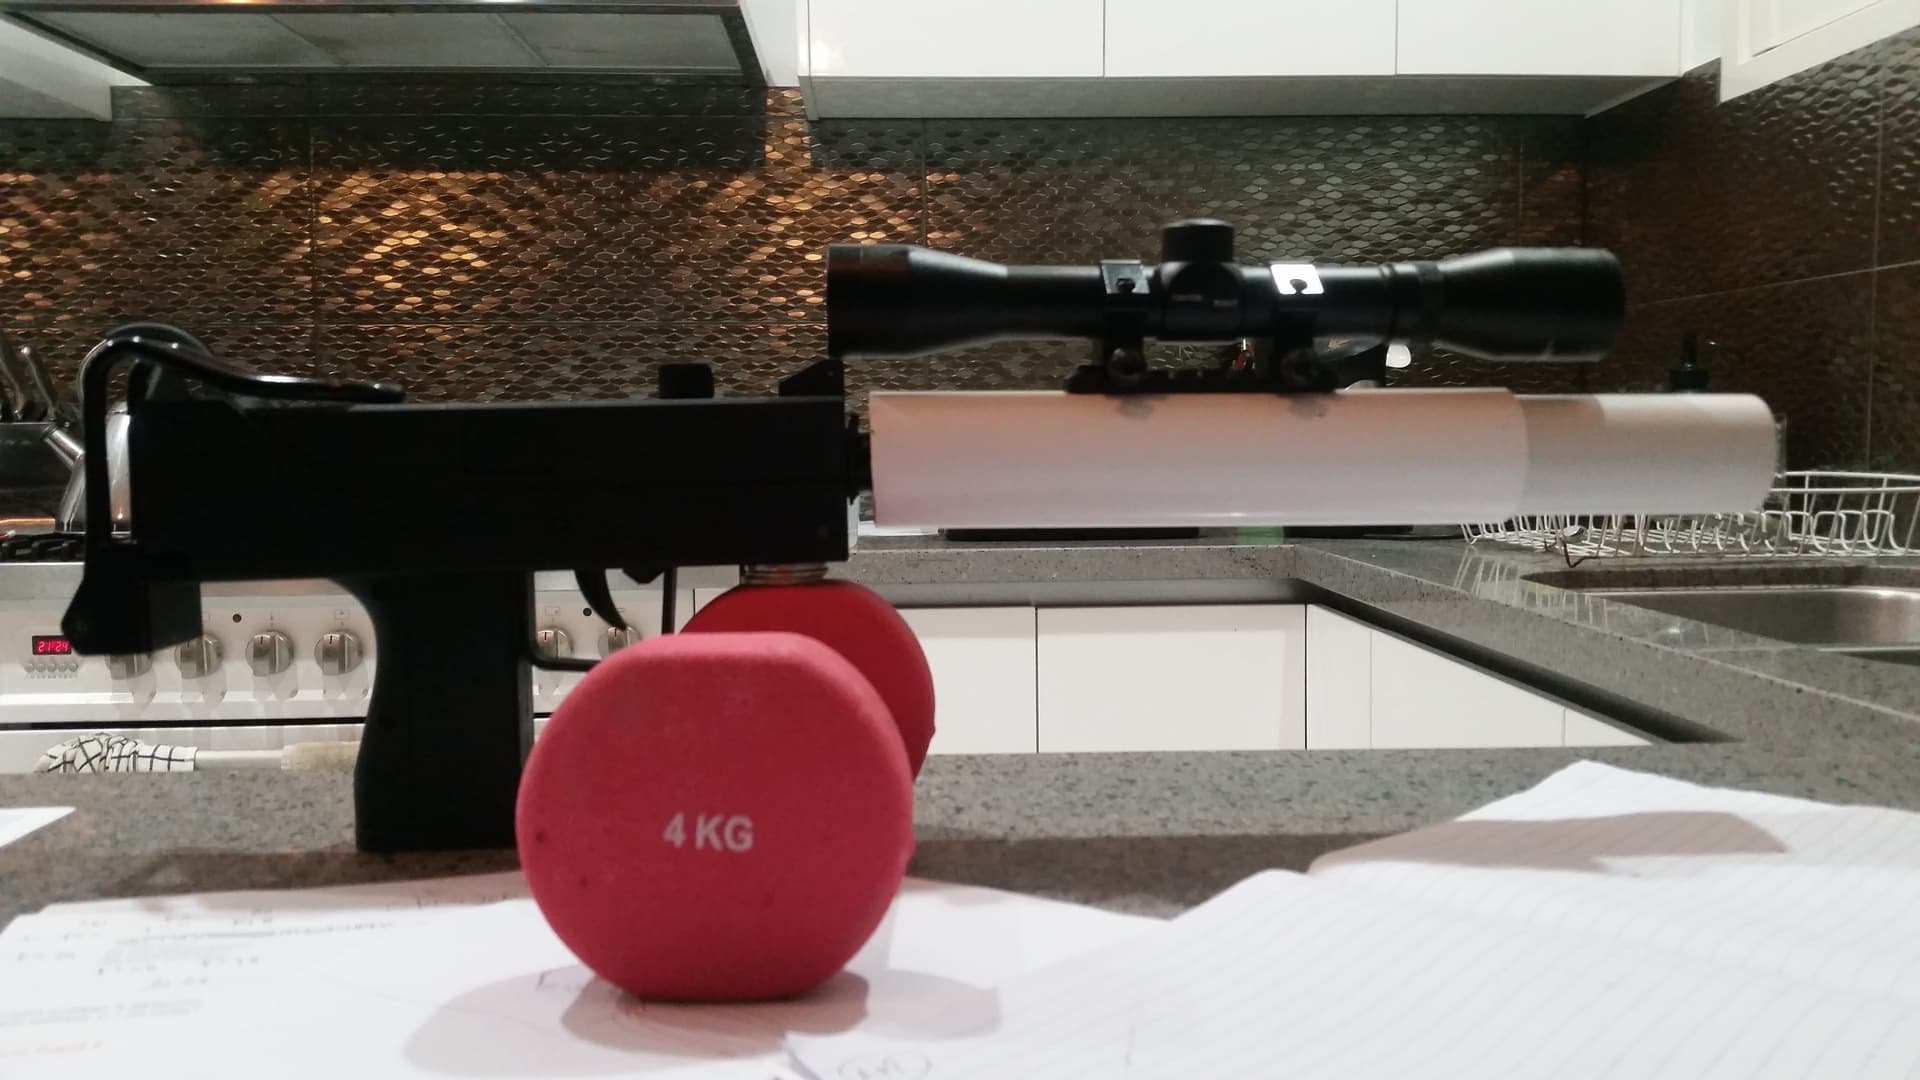
A bit of weight, hanging off from, one resin/wood nut…
Fix: move the scope , a bit more rearward, and shorten the front can a bit…