R.E. Wesker...(Or.. Bad boys,Bad boys.. watcha gonna Glue..?)

Thanks for pointing that out!
She never rocked my boat and honestly haven’t seen any movies that she might have been in… all I get to see is blokes frothing over “her”.

That Adam’s Apple isr pretty hard to ignore though :astonished:, which might be why I never found her attractive?

Drew Barrymore on the other hand :sweat_drops::stuck_out_tongue_winking_eye::crazy_face::gift_heart:

What… have you seen what she looks like today. Older than me to cut it short. ET was it :rofl:

I much prefer something home grown…

2 Likes

Oh yeah…now ya talkin’ :smiling_face_with_three_hearts:
Got such a crush gotta stay away!
Gotta admit that she’s aged much better than Drew… still got it and only getting better :heart_eyes::stuck_out_tongue_winking_eye:

Yeah what I was getting at. some have aged well. But damn some have not.

Now Kylie Minouge, well oh yea she going great from the home and away days haha or whatever crap that was I watched years ago :laughing:

Oh thats right it was Neighbours. Or was it. Still crap :laughing:

It’s only taken forever….

Well, I did drop the upper slide off, early Dec, at the cerakoter…

But, he now says it should be ready by the end of the week!

Gen 1 silver KEle, with cerakoted upper slide, and 3d printed L nozzle and Supp, and torch…

Once it’s all done, I’ll start a new easy to find post, about my RE collection.

Make it easy for newbies to find , and follow the builds…

Fingers crossed, no more surprises…

1 Like

Rome wasn’t built in a day. At least that’s what I tell myself…

Ok…
FINALLY got the cerakoted slide back, from the coater…

He did a great job, even though it took a long time.
Xmas, and all that.

He said he WONT do any more gelblasters, as he only releases high quality work, and the cheap chinese metal took a LOT of work, to get it reasonable for coating.

In the oven 3/4 times, still leeching oils from the metals, it needed to be soaked in a special solution, and then all the dags filed off. He said the cheap metals are crap, and the same on lower quality real steel as well.

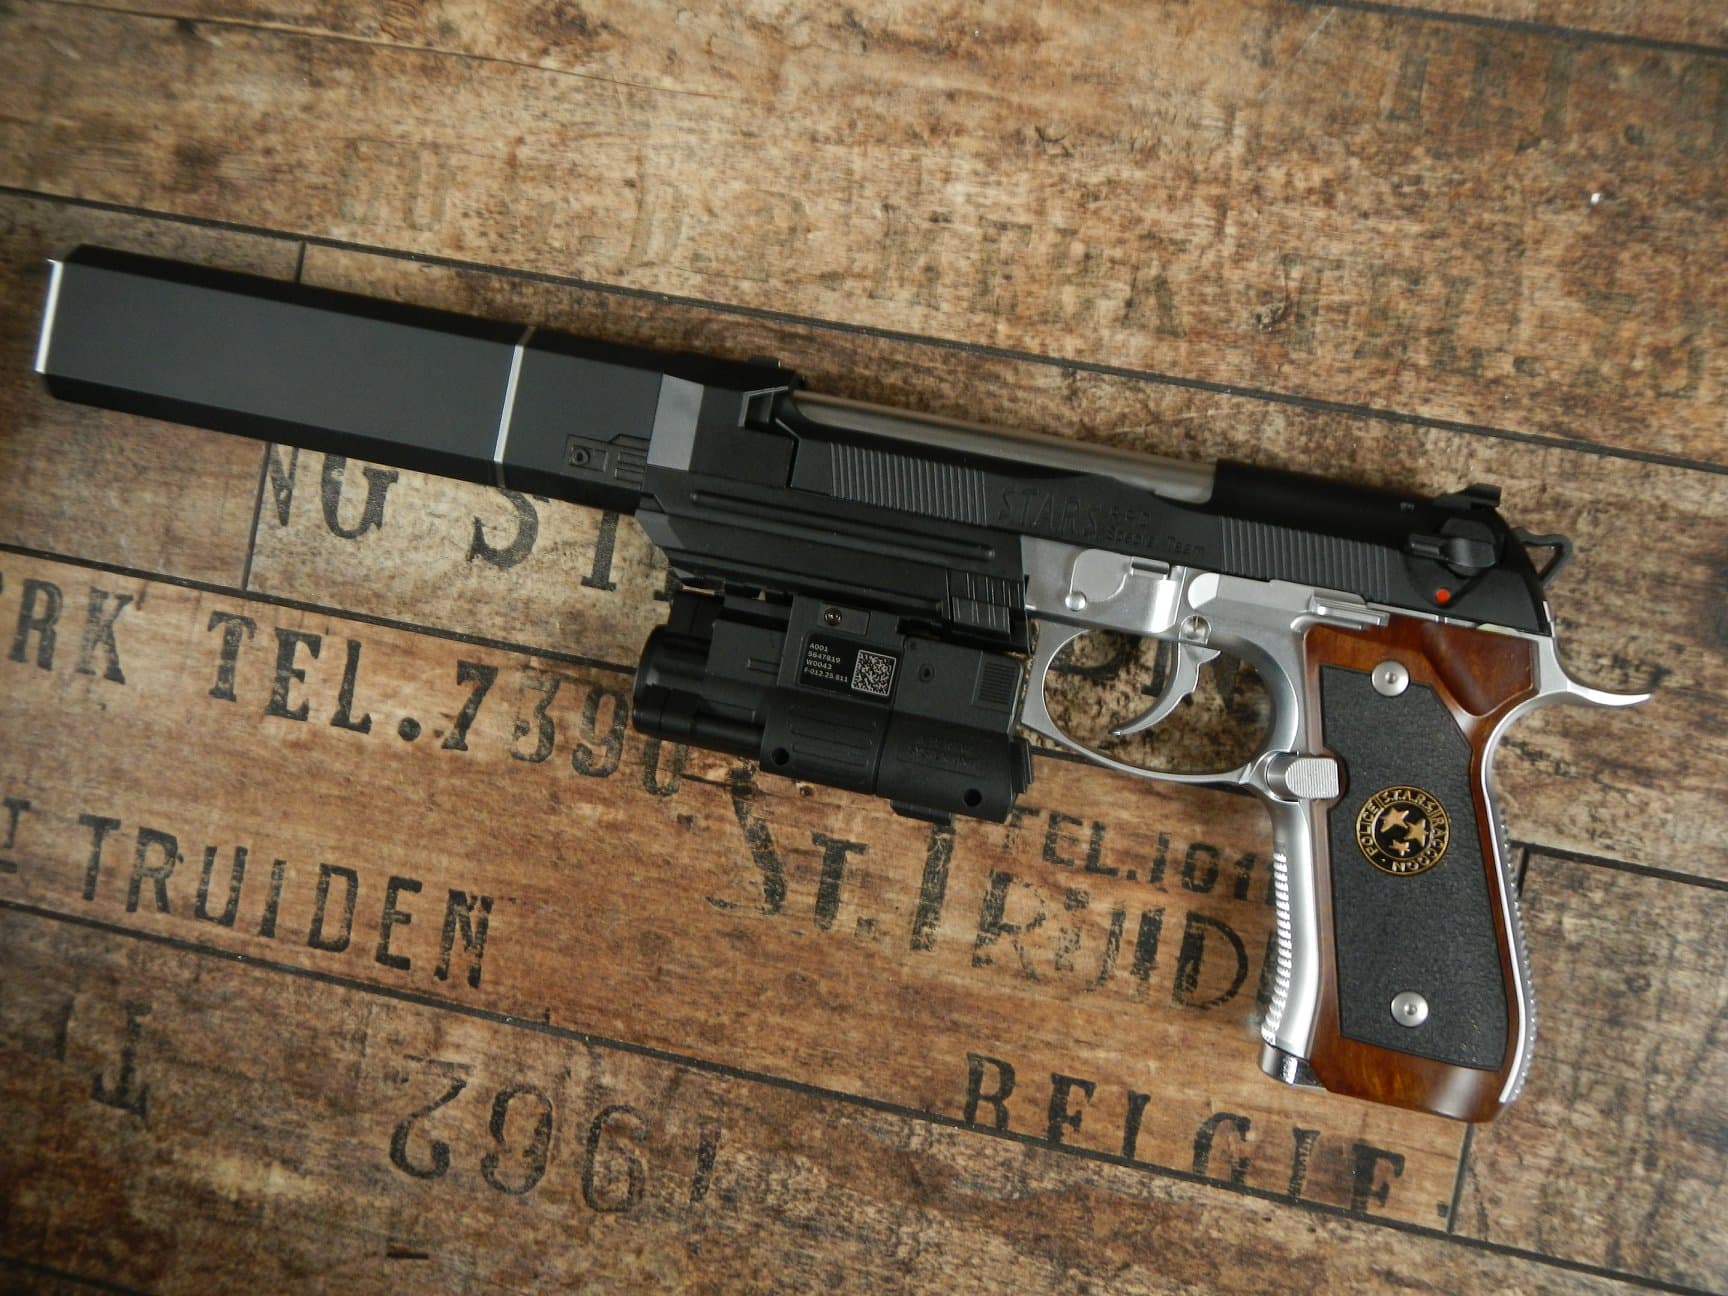
It came out looking good, a very close match to the gen2 kele, and a good match with the flat black rustoleum.

This is a night shot, but you can see the finish / sharpness of stenciling…

Not in focus 100%.

Still work to do, its “quick assembled for show”, not finished glueing yet.

The slide is super stiff ( cerakoted bulked up) and will need some relieving, for better cocking. i’ll have to epoxy the supp, to the L nozzle.

I like the look without the supp as well, i’ll order another wesker kit from the states, to A) have a spare, and B) be able to swap to L nozzle only if desired.

Special thanks, to @Friendly_Fire , for his help with his drill press, to get the bottom hole drilled and tapped, to hold the nozzle in place…

Anyway, pic porn time…

1: fully nekid…

2: Getting a glow on…

3: Is that a supp, or are you just happy to see me.?.?

1 Like

Reminder shot: this the proper a/soft version.

The torch is not the same, but reasonably close.
I’ll have to fit some silver grip screws.
Switches are all silver, gen 2 KEle now is black switches.

All in all, a pretty good knock off, i reckon.

Its not like the zombies get close enough, to pick the differences and complain…
:rofl: :rofl: :rofl:

More updates 2morrow, as work proceeds, and full RE thread, coming soon…

Looks really good. :+1:

I was thinking last night, if you hunt around you may be able to source a longer rail torch that sits a little closer to the trigger guard. :man_shrugging: They’re all a little different, and it’s just a pity the rail doesn’t extend a bit further back.

But I guess that’s just being picky with the details. Either way, it’s a damn good replica of a Wesker as it is. :+1:

I had a Quick Look on aliexpress…

My torch is 8cm long.
There are ones around 10cm long, that is more in keeping with the original.

Fully bulk up the space from the trigger guard, to the front of the nozzle…

Wesker, by a whisker…!!

Quick, the zombies are coming, time to get to it…
Time to use the new shorty shotty…!!

Take that , chunk…!!

But seriously, my “new” wesker supp kit arrived…it landed in brissy, so no problems. Printed out of PTG, for better temp stability…( but horrible finish lines!)

This is my old system…it was PLA, got up to a really good finish.
But, it had no way to attach and retain the supp…glueing it on was going the be the solution, but small binding areas and correct alignment would be a p roblem…

It did get a super smooth finish, you wouldn’t pick it as a 3d print…

1 Like

The new system, has protruding thread on the nozzle, and the supp in threaded to take it.

It also has a locking tab, that slides backwards, to stop rotation and lock it in.
Just like the real one.
Unfortunately, the finish lines are horrible…

That little silver tab is what slides back, and stops rotation.

It took a hell of a lot of sanding, and lines still remain…

@DChapo … i tried using wet and dry 240 / 400 / 600 / 1200

They still persist.
I was using straight back/ forwards motion…is circular better, or does it scuff it.??

Here is the sanded one, compared to the ( as yet) untouched spare…

Is this standard, for PETG, or just a terrible couple of prints.??

This shows how it all goes together…

Anyway, i gave it a trial paint, to see how bad the lines were.

for Paint, (NOTE TO SELF) I used Rustoleum ULTRA MATT BLACK, and a top coat of TS-80. This was used on my original piece.

The Lower Nozzle came up pretty good, its a smaller area with changing angles, so its not so obvious.

There are some tape marks, where i protected the central silver channel etc.

Lines are still visible, so it’ll all get sanded off, and re sanded again.

At least it gives a “half finished” sample look.

Here, the fake ( but correct ) wesker torch is fitted…

No way im going to sand all that, for a fake torch…

The 1300 lumen retina searer, is a much better tool…
And pretty similar size wise…

Proof it all fits and does stand up…!!!

To quote wednesday addams…

" I’ll sand, sand, sand,
with my hands, hands, hands
Till those lines are gone,
Like Jesus said…!!"

image

:rofl: :rofl:

More depends on the printer itself, PETG isn’t great for layer lines but isn’t usually that bad, try hitting it with a filler primer then give it another sand until the plastic had mostly come through.

Direction doesn’t ultimately affect the outcome as you use a higher grit at the end and the final coat of paint should fill any tiny marks too

They definitely need to service and/or recalibrate that printer though, especially if they’re doing it commercially.

I have absolutely ZERO experience with 3D printing, but I do know a thing or two about restoring old vehicle trim parts!

I was going to suggest the same as @DChapo replied, using a spray coat of plastic high build etch primer first to fill the gaps, then only need to lightly sand back to the printed surface appears before giving it a final coat of colour.

Should work perfectly.:ok_hand:

This is the stuff I usually use and I find 240 w/d does the job for what I need.

My full process is

  1. Give it a quick rub with 240 just to see how deep any lines are.
  2. depending on how bad it is and if it’s going to be an issue I might go over the bad spots with 80grit then smooth it out with 120.
  3. Once I’m happy with that I go over it with the filler primer and let dry
  4. Give it a rub with 120 to take it down to mostly plastic then smooth out with 240 w/d.
  5. If it’s still a bit rough (worst case) I pretty much repeat steps 2-4, or if it’s just about there I’ll give it another light coat of primer and another light rub.
  6. After that it’s the usual painting steps, base-rub-2nd coat-rub-clear coat for me.

A little trick too if you find the print has like a fur to it you can give the surface a quick hit with a flame, PLA just a flash but PETG might need a full second. It’s also good if you’re not going to pai t the part but want to smooth it you can sand it then hit it with a flame and it sorta glasses the surface, kinda like how you can hit that black plastic used for bumpers with a blowtorch to get rid of the fading.

Had a crack, with the primer.

I used my Tamiya primer. I tried a bit of a thicker coating, then sanding off.
When sanding , i dry sanded, using 1200 grit and light pressure.
That left sanding scuff marks, on the primer.

I removed all that, and gave it a ‘very light misting’ top coat.
A thin layer, that i didn’t touch, and left it smooth.

Painted, and now letting it dry…

Not a perfect finish, but miles ahead of the horrendous initial presentation.

I’ll let it dry , apply some top coat, then mask / goop up, and do the silver.

The one on the far right is my first one…
It may be the PLA, but i do like the “vertical finish lines”.
Makes it kinda look like metal manufacturing marks…

2 Likes

Definitely looks much better than how you received it

Nice work :+1:t2:

1 Like